If you’re searching for How To Build A Roof Truss For A House, you’re likely planning a new build, garage, shed, or major renovation. Roof trusses are structural components that carry the weight of roofing materials, snow loads, and wind forces—so precision matters.
This guide explains planning, calculations, materials, safety considerations, and step-by-step assembly so you can understand the process clearly and build with confidence.
How To Build A Roof Truss For A House: What Is a Roof Truss?
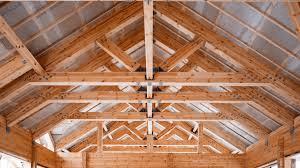
A roof truss is a pre-engineered structural framework made of triangular wood components that distribute weight evenly across load-bearing walls.
Read too: Hail Damage Roof Repair: Essential Guide to Restoring Your Home’s Protection
The triangular shape is not accidental. It is one of the most stable geometric forms in construction. For general structural principles, see the overview of roof framing systems on Wikipedia:
https://en.wikipedia.org/wiki/Roof_truss
Trusses are designed to:
- Support dead loads (roofing materials)
- Handle live loads (snow, maintenance workers)
- Resist wind uplift forces
- Transfer weight safely to exterior walls
Improperly designed trusses can cause sagging, cracking, or structural failure.
Should You Build Your Own Roof Truss?
This is an important question.
In residential construction, most roof trusses are factory-engineered. According to industry data, over 80% of new U.S. homes use pre-manufactured trusses due to precise load calculations and safety compliance.
However, smaller structures such as:
- Sheds
- Garages
- Porches
- Cabins
may allow DIY truss construction if properly calculated.
For full-scale homes, always consult a structural engineer.
What Types of Roof Trusses Are Common?
Choosing the right design depends on span, roof pitch, and load requirements.
Common Residential Truss Types
| Truss Type | Best For | Complexity |
|---|---|---|
| King Post | Small spans (under 16 ft) | Low |
| Queen Post | Medium spans | Moderate |
| Fink Truss | Standard homes | Moderate |
| Scissor Truss | Vaulted ceilings | High |
The Fink truss is the most common for residential homes due to its strength-to-material efficiency ratio.
What Materials Are Required?
Lumber
- 2×4 or 2×6 kiln-dried structural lumber
- Grade #2 or better
Fasteners
- 16d nails
- Structural screws
- Metal truss plates (connector plates)
Tools
- Circular saw
- Framing square
- Chalk line
- Clamps
- Hammer or nail gun
Quality lumber is critical. Warped or wet lumber can compromise structural alignment.
How To Calculate Roof Pitch and Span
Before cutting, determine:
- Span (distance between exterior walls)
- Roof pitch (rise over run)
- Snow load (based on climate zone)
Example Calculation
If your house span is 24 feet and pitch is 6:12:
- Run = 12 feet (half span)
- Rise = 6 inches per 12 inches run
- Total rise = 6 ft
Accurate calculations ensure proper alignment and load distribution.
Step-by-Step: How To Build A Roof Truss For A House
Step 1: Create a Full-Scale Template
Lay plywood on a flat surface.
- Mark span width.
- Mark roof pitch angles using framing square.
- Draw top chord lines.
- Draw bottom chord.
A template ensures consistency when building multiple trusses.
Step 2: Cut the Top Chords
- Use miter cuts for ridge connection.
- Verify angle matches calculated pitch.
- Double-check measurements before cutting.
Precision at this stage prevents structural misalignment.
Step 3: Cut Bottom Chord
- Length equals total span.
- Ensure perfectly straight alignment.
The bottom chord resists outward wall pressure.
Step 4: Install Web Members
Web members form internal triangles.
- Measure and cut precisely.
- Ensure tight joints.
- Maintain symmetry.
Triangular geometry distributes loads evenly across structure.
Step 5: Attach Metal Connector Plates
- Place truss plates over each joint.
- Hammer evenly or use hydraulic press if available.
- Ensure full tooth penetration into lumber.
Connector plates significantly increase joint strength.
Step 6: Verify Squareness
Measure diagonals:
If both diagonal measurements are equal, truss is square.
Adjust before fastening permanently.
How Far Apart Should Roof Trusses Be Spaced?
Standard spacing:
- 24 inches on center (common residential)
- 16 inches on center (higher load areas)
Spacing depends on:
- Snow load
- Roofing material weight
- Local building codes
Load Considerations: Why They Matter
Roof trusses must support:
- Dead load: 10–15 pounds per square foot
- Live load: 20–40 pounds per square foot (higher in snow zones)
Incorrect load assumptions can lead to structural sagging.
Always verify with local building codes.
Estimated Cost to Build Roof Trusses
| Item | Estimated Cost |
|---|---|
| Lumber per truss | $50–$120 |
| Metal plates | $10–$25 |
| Total per truss | $60–$145 |
Factory-built trusses may cost $100–$300 per truss but include engineering certification.
Pros and Cons of DIY Roof Trusses
Advantages
- Cost savings on small projects
- Custom sizing
- Hands-on control
Disadvantages
- Requires precise calculations
- Structural liability risks
- Time-intensive
- May not meet code without engineering approval
Common Mistakes to Avoid
- Using wet or warped lumber
- Incorrect pitch calculation
- Poor connector plate installation
- Uneven spacing
- Ignoring load requirements
Structural components must always meet safety standards.
Is It Better to Buy Pre-Manufactured Trusses?
For full-size homes, yes.
Manufactured trusses:
- Are engineered for load compliance
- Include stamped design approval
- Reduce liability
- Install faster
DIY is more appropriate for sheds or small garages.
FAQ: How To Build A Roof Truss For A House
Q1: Can I legally build my own roof trusses?
In many jurisdictions, residential homes require engineer-approved trusses. Check local building codes.
Q2: What lumber size should I use?
2×4 or 2×6 lumber is typical, depending on span and load requirements.
Q3: How many trusses do I need?
Divide roof length by spacing (16 or 24 inches on center) and add one additional truss.
Example:
40 ft roof ÷ 2 ft spacing = 20 trusses + 1 end truss = 21 total.
Q4: How long does it take to build one truss?
Approximately 1–2 hours per truss for experienced DIY builders.
Q5: What is the strongest roof truss design?
Fink trusses are widely used for strength and efficiency in standard residential construction.
Conclusion
Understanding How To Build A Roof Truss For A House requires careful planning, accurate measurements, and strict adherence to structural principles. While DIY truss building is possible for smaller structures, full residential homes typically require engineered trusses for safety and compliance.
If this guide helped clarify the process, consider sharing it with fellow builders or saving it for your construction planning. Strong foundations and precise framing are the keys to a durable home.


Leave a Reply