How to Install a Metal Roof on a Shed? Metal roofs are a popular choice for sheds because they are durable, low-maintenance, and energy-efficient. They are also relatively easy to install, even for DIYers.
If you are considering installing a metal roof on your shed, there are a few things you should know. First, you will need to choose the right type of metal roofing material. There are many different types of metal roofing materials available, each with its own advantages and disadvantages.
Choosing the Right Metal Roofing Material
The most common types of metal roofing materials for sheds include:
- Galvanized steel: Galvanized steel is the most affordable type of metal roofing material. It is also relatively easy to find and install. However, galvanized steel is not as durable as other types of metal roofing materials.
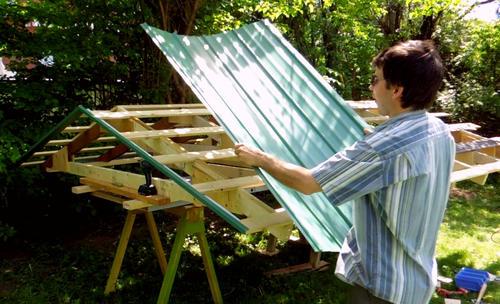
Corrugated metal: Corrugated metal is a type of metal roofing material that is known for its strength and durability. It is also relatively easy to find and install. However, corrugated metal can be more expensive than galvanized steel.
Standing seam metal: Standing seam metal is a type of metal roofing material that is known for its sleek, modern appearance. It is also relatively durable and easy to find. However, standing seam metal can be more expensive than other types of metal roofing materials.
The best type of metal roofing material for your shed will depend on a number of factors, including your budget, the climate in your area, and your personal preferences.
Preparing the Shed
The first step in installing a metal roof on a shed is to prepare the shed for the new material. This involves removing the old roofing material, repairing any damage to the deck, and cleaning the shed.
Removing the Old Roofing Material
If your shed has an existing roofing material, you will need to remove it before installing the new metal roof. You can remove the old roofing material with a hammer, crowbar, and saw. Be careful not to damage the deck when removing the old material.
If the old roofing material is in good condition, you can reuse it. However, if the material is damaged or deteriorated, you will need to dispose of it properly.
Repairing the Deck
Once the old roofing material is removed, you should inspect the deck for any damage. If there is any damage, you will need to repair it before installing the new material.
Common deck repairs include:
- Patching holes or cracks: You can use a variety of materials to patch holes or cracks in a deck, including roofing cement, caulk, or mastic.
- Replacing damaged boards: If a board is damaged beyond repair, you will need to replace it. You can purchase new boards at a home improvement store.
- Applying a layer of sealant: A layer of sealant can help to protect the deck from water damage. You can apply a sealant with a brush or roller.
Cleaning the Shed
Finally, you should clean the shed to remove any debris or dirt. This will help to ensure that the new material adheres properly.
You can clean the shed with a pressure washer or a broom. Be sure to wear safety goggles and gloves when cleaning the shed.
Installing the Metal Roof
Once the shed is prepared, you can begin installing the metal roof. The specific steps involved will vary depending on the type of metal roofing material you are using.
Galvanized Steel and Corrugated Metal Roofing
To install galvanized steel or corrugated metal roofing, you will need to lay the material down on the deck and then fasten it in place with screws or nails.
The screws or nails should be spaced every 12 to 18 inches. Be sure to pre-drill holes for the screws or nails to prevent the metal from splitting.
Standing Seam Metal Roofing
To install standing seam metal roofing, you will need to use a standing seam machine to join the sheets of metal together.
The standing seam machine will create a strong, watertight seam between the sheets of metal.
Flashing All Penetrations
Once the new roofing material is in place, you will need to flash all penetrations, such as vents, pipes, and skylights. Flashing helps to prevent water from leaking around these penetrations.
The type of flashing you need will depend on the type of metal roofing material you are using.
Conclusion: A Professionally Installed Metal Roof for Your Shed
In conclusion, mastering the installation of a metal roof on a shed involves a combination of meticulous planning, precise execution, and ongoing maintenance. This guide equips readers with the knowledge needed to embark on this DIY project with confidence, ensuring a professional result that enhances the durability and aesthetic appeal of their shed.
Remember, whether you’re a seasoned DIY enthusiast or a first-time shed owner, following the steps outlined in this guide will empower you to install a metal roof on your shed like a pro.


Leave a Reply