How To Install A Clay Tile Roof? Installing a clay tile roof can be a rewarding project that adds beauty and durability to your home. This type of roofing is known for its longevity, aesthetic appeal, and ability to withstand harsh weather conditions. In this comprehensive guide, we will walk you through the process of installing a clay tile roof, from preparation to the final inspection.
Why Choose a Clay Tile Roof?
Before diving into the installation process, it’s important to understand why clay tiles are a popular choice:
- Durability: Clay tiles can last for more than 50 years with proper maintenance.
- Aesthetics: Available in various colors and styles, clay tiles add a classic, elegant look to any home.
- Weather Resistance: They can withstand extreme weather conditions, including high winds and heavy rain.
- Energy Efficiency: Clay tiles provide excellent insulation, helping to keep your home cool in the summer and warm in the winter.
Preparation for Installation
Proper preparation is key to a successful installation. Here are the steps to prepare:
1. Gather Materials and Tools
You’ll need the following materials and tools:
- Clay tiles
- Underlayment (e.g., roofing felt or synthetic underlayment)
- Roofing nails or screws
- Roofing cement or adhesive
- Flashing (metal or rubber)
- Roofing hammer or nail gun
- Tape measure
- Chalk line
- Ladder
- Safety gear (gloves, goggles, harness)
2. Inspect the Roof Structure
Ensure the roof structure is strong enough to support the weight of clay tiles, which are heavier than asphalt shingles or metal roofing. Reinforce any weak areas and repair damaged sections.
3. Remove Old Roofing Material
If replacing an existing roof, remove all old roofing materials down to the decking. This provides a clean surface for the new installation.
4. Install Underlayment
Install a high-quality underlayment to protect the roof decking from moisture. Roll out the underlayment horizontally, starting from the bottom edge of the roof and working your way up. Overlap each row by about 2-3 inches and secure it with roofing nails.
Read too: Is It Reasonable to Ask the Seller to Replace the Roof?
How To Install A Clay Tile Roof
Now that the preparation is complete, let’s move on to the installation process.
1. Plan the Layout
Use a tape measure and chalk line to mark horizontal and vertical lines on the underlayment. This will serve as a guide to ensure the tiles are laid out evenly. Plan the layout so that the tiles are centered and symmetrical.
2. Install the Starter Course
Begin with the starter course at the bottom edge of the roof. This row should overhang the edge slightly to allow water to run off properly. Secure each tile with roofing nails or screws, ensuring they are driven through pre-drilled holes to prevent cracking.
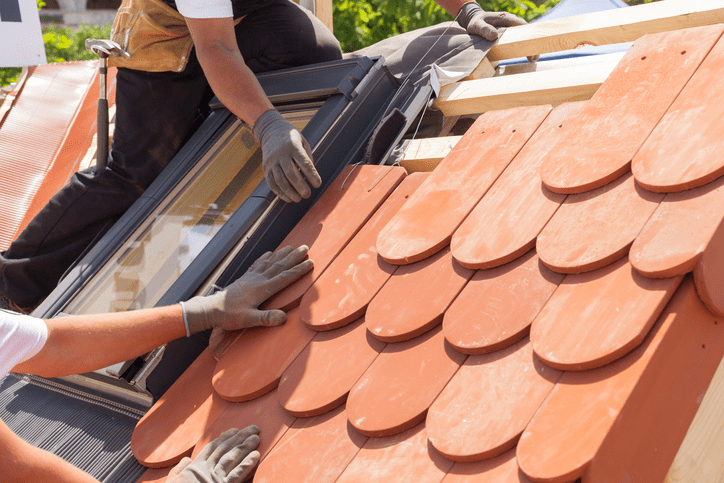
3. Lay the First Row of Tiles
Start laying the first row of tiles above the starter course. Align the tiles with the chalk lines and secure them with nails or screws. Ensure each tile overlaps the one below it to create a watertight seal.
4. Continue Laying Tiles
Continue laying tiles row by row, working your way up the roof. Stagger the tiles in each row to avoid having vertical seams line up, which can lead to leaks. Use the chalk lines as a guide to keep the rows straight.
5. Install Flashing
Install flashing around roof penetrations such as chimneys, vents, and skylights. This prevents water from seeping through these vulnerable areas. Flashing can be made from metal or rubber and should be secured with roofing nails and sealed with roofing cement.
6. Install Ridge Tiles
Once you reach the ridge (the highest point of the roof), install ridge tiles to cover the seam where the two sides of the roof meet. These tiles are usually curved and should be secured with nails and roofing cement.
Tips for Installing Clay Tile Roofs
Here are some additional tips to ensure a successful installation:
- Safety First: Always wear appropriate safety gear and use a harness when working on the roof.
- Proper Ventilation: Ensure the roof has adequate ventilation to prevent heat buildup and moisture accumulation, which can damage the tiles and roof structure.
- Use Quality Materials: Invest in high-quality tiles, underlayment, and flashing to ensure the longevity of your roof.
- Regular Maintenance: Inspect your roof regularly and replace any broken or damaged tiles promptly to prevent leaks.
Common Mistakes to Avoid
Avoid these common mistakes to ensure a smooth installation process:
- Incorrect Fastening: Using the wrong type of nails or not securing tiles properly can lead to loose tiles and leaks.
- Poor Layout Planning: Not planning the layout properly can result in uneven rows and an unattractive finish.
- Skipping Underlayment: Skipping the underlayment can lead to moisture damage and reduce the lifespan of the roof.
- Ignoring Flashing: Failing to install flashing around roof penetrations can result in leaks and water damage.
Benefits of Professional Installation
While installing a clay tile roof can be a DIY project, there are benefits to hiring a professional:
- Expertise: Professionals have the experience and knowledge to ensure the roof is installed correctly and efficiently.
- Warranty: Many professional roofers offer warranties on their work, providing peace of mind.
- Safety: Professionals are trained in safety procedures, reducing the risk of accidents during installation.
Conclusion
Installing a clay tile roof is a great investment in your home’s durability and aesthetic appeal. By following this step-by-step guide, you can achieve a beautiful and long-lasting roof. Remember to take your time, use quality materials, and prioritize safety throughout the installation process.


Leave a Reply