Tile roofs are renowned for their durability, aesthetic appeal, and ability to withstand various weather conditions. Understanding how tile roofs are installed can help homeowners and builders ensure a high-quality, long-lasting roofing system. In this detailed guide, we will explore the entire process of tile roof installation, from preparation to completion.
Introduction to Tile Roofs
Tile roofing has been used for centuries, offering both functional and decorative benefits. Tiles can be made from various materials, including clay, concrete, and slate. Each type has its unique characteristics and installation requirements. Understanding how tile roofs are installed involves knowing the materials, tools, and techniques used to achieve a successful installation.
Types of Tile Roofs
- Clay Tiles: Known for their classic, Mediterranean look, clay tiles are durable and provide excellent insulation. They are typically heavy and require a strong roof structure.
- Concrete Tiles: These tiles offer a similar appearance to clay but are often less expensive. They are available in various styles and colors and provide excellent durability.
- Slate Tiles: Slate tiles are natural stone and offer a high-end look with exceptional longevity. They are very heavy and require a strong roof frame.
Read too: Decoding Timelines: How Long Does It Take To Replace A Roof and What to Expect
Preparation for Tile Roof Installation
1. Assessment and Planning
Before beginning installation, it’s crucial to assess the existing roof structure and plan the project. This includes:
- Inspecting the Roof Deck: Ensure the underlying roof deck is in good condition. Replace any damaged or rotten sections to provide a solid base for the tile.
- Checking Roof Structure: Verify that the roof structure can support the weight of the tiles. Reinforcement may be necessary for heavier tiles.
- Selecting Tiles: Choose the type of tiles based on aesthetic preferences, budget, and climate considerations.
2. Gathering Materials and Tools
To install a tile roof, you will need various materials and tools:
- Tiles: Clay, concrete, or slate tiles as per your choice.
- Underlayment: A layer of waterproof material, typically asphalt-saturated felt or synthetic underlayment.
- Roof Decking: Plywood or oriented strand board (OSB) for the roof deck.
- Flashing: Metal pieces used to direct water away from critical areas.
- Fasteners: Nails or screws suitable for the type of tile and roof deck.
- Tools: Hammer, roofing nailer, tile cutter, and measuring tape.
How Are Tile Roofs Installed?
1. Preparing the Roof Deck
The first step in the installation process is to prepare the roof deck. This involves:
- Cleaning: Remove old roofing materials, debris, and dirt from the roof deck.
- Repairing: Fix any damaged or rotten sections of the roof deck.
- Installing Underlayment: Lay down a waterproof underlayment to protect the roof deck from moisture. Overlap the edges of the underlayment to ensure complete coverage.
2. Installing Roof Flashing
Flashing is essential to prevent water from seeping into vulnerable areas of the roof. Key areas for flashing include:
- Ridge: The peak where two roof slopes meet.
- Valleys: The interior angles formed by intersecting roof slopes.
- Chimneys and Vents: Any protrusions through the roof surface.
Install flashing according to manufacturer instructions and ensure it is properly sealed to prevent leaks.
3. Laying the Tile Underlayment
Tile underlayment is typically made of a durable, water-resistant material designed to support the weight of the tiles. The underlayment is laid over the roof deck and secured with fasteners. It provides an extra layer of protection and helps distribute the weight of the tiles evenly.
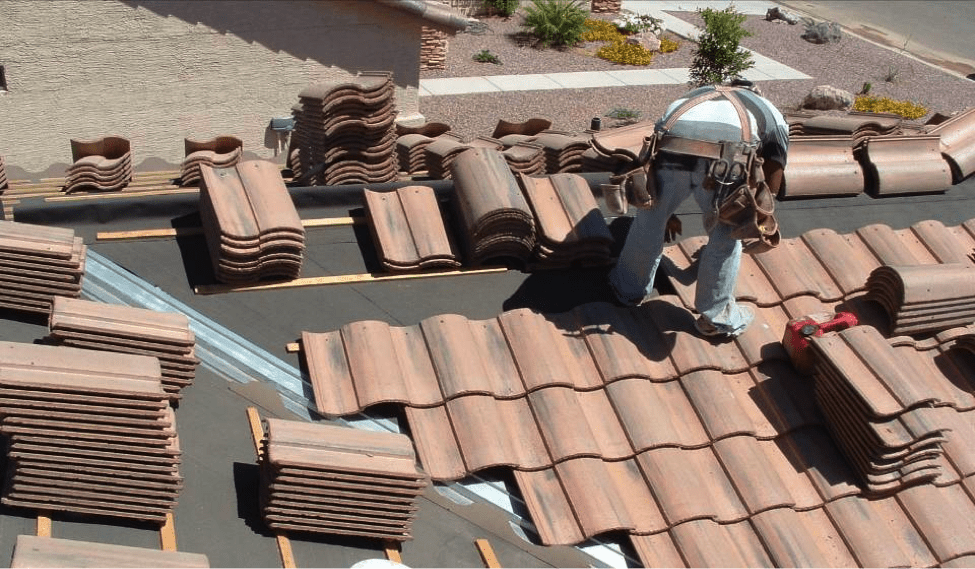
4. Starting Tile Installation
Tile installation begins at the bottom edge of the roof and works upward. Follow these steps:
- Install Starter Course: The first row of tiles, known as the starter course, is installed at the eaves of the roof. This row often consists of cut tiles or specially designed starter tiles.
- Lay Subsequent Courses: Continue laying tiles row by row, overlapping each row as you move up the roof. Ensure that tiles are properly aligned and spaced according to manufacturer recommendations.
- Cutting Tiles: Use a tile cutter to make precise cuts for tiles that need to fit around edges, vents, or other obstacles. Ensure cuts are clean and accurate to maintain a uniform appearance.
5. Securing the Tiles
Tiles are secured to the roof deck using nails, screws, or clips, depending on the tile type and manufacturer recommendations. Ensure each tile is properly fastened to prevent movement or damage.
6. Finishing Touches
Once all tiles are installed, complete the roof by:
- Installing Ridge Tiles: Ridge tiles cover the peak of the roof and are installed last. They help protect the roof from wind and water ingress.
- Sealing and Caulking: Apply sealant or caulk to ensure watertight seals around flashings, vents, and other roof penetrations.
Post-Installation Considerations
1. Inspection and Quality Check
After installation, conduct a thorough inspection to ensure that:
- Tiles are Properly Aligned: Check for uniformity in tile placement and alignment.
- Flashing is Secure: Ensure that all flashing is correctly installed and sealed.
- There are No Leaks: Inspect the roof for any signs of leaks or moisture ingress.
2. Maintenance
Regular maintenance is crucial for prolonging the lifespan of your tile roof. This includes:
- Cleaning: Remove debris and leaves from the roof and gutters to prevent blockages and water damage.
- Inspecting for Damage: Regularly check for cracked or broken tiles and repair them promptly.
- Checking Flashing: Ensure flashing remains secure and free of damage.
Benefits of Tile Roofing
Tile roofs offer several benefits, including:
- Durability: Tile roofs can last 50 years or more with proper maintenance.
- Aesthetic Appeal: Available in various styles and colors, tiles provide a classic and attractive look.
- Energy Efficiency: Tiles provide excellent insulation and can help reduce heating and cooling costs.
- Fire Resistance: Tile roofs are fire-resistant, providing added safety for your home.
Common Issues and Solutions
1. Cracked or Broken Tiles
Cracked or broken tiles can be caused by severe weather or improper installation. Replace damaged tiles promptly to prevent leaks and further damage.
2. Leaking Roof
Leaks can occur if the underlayment or flashing is not installed correctly. Address leaks immediately by inspecting and repairing affected areas.
3. Tile Slippage
Tiles may slip if not properly secured. Ensure all tiles are fastened correctly and address any slippage issues promptly.
Conclusion
Understanding how tile roofs are installed is essential for achieving a successful and durable roofing system. From preparation and planning to installation and maintenance, each step plays a crucial role in ensuring your tile roof performs well and lasts for many years. By following best practices and addressing potential issues proactively, you can enjoy the benefits of a beautiful and functional tile roof for your home.


Leave a Reply