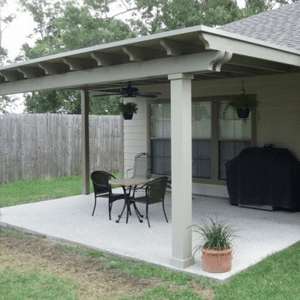
If you’re looking to enhance your outdoor living space, adding a patio roof to an existing house is a fantastic way to create a comfortable area for relaxing, entertaining, or dining. A patio roof provides protection from the sun and rain, ensuring that your outdoor activities are not limited by weather conditions. But how do you attach a patio roof to an existing house? In this guide, we’ll walk you through the process step by step, from preparation to installation, and give you the tips and tricks for a successful project.
Benefits of Adding a Patio Roof to Your Home
Before diving into the “how-to” details, let’s look at the benefits of attaching a patio roof to your existing house.
- Extended Living Space
A patio roof adds functional outdoor space that you can use all year round. Whether it’s sunny or rainy, a covered patio allows you to entertain, relax, or dine outside without worrying about the weather. - Increased Home Value
A well-built patio roof can significantly boost the value of your property. Potential buyers will appreciate the added outdoor living area, making your home more attractive in the real estate market. - Protection from the Elements
A patio roof will shield your outdoor furniture, grills, and other equipment from harsh weather conditions, including sun, rain, and snow, helping to extend their life. - Aesthetic Appeal
When designed properly, a patio roof can enhance the look of your home, blending seamlessly with your existing architecture while adding a touch of elegance.
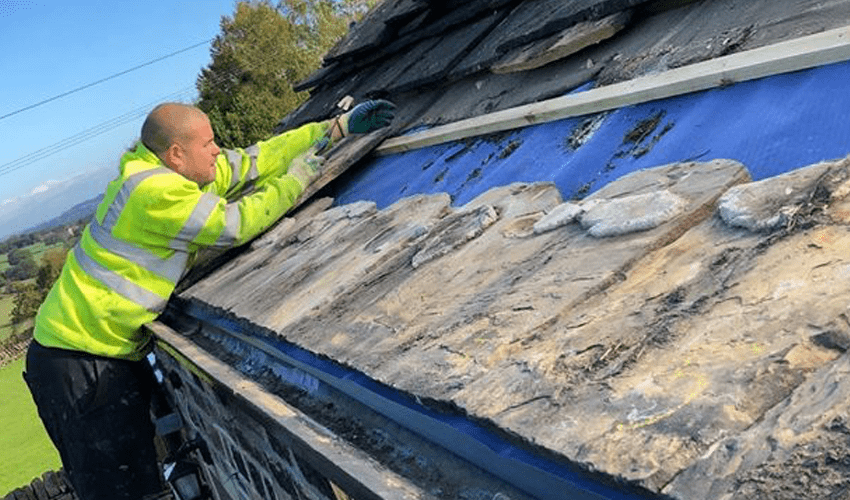
Read too: Hail Damage Roof Repair: Essential Guide to Restoring Your Home’s Protection
Materials Needed for the Job
Before starting the installation process, it’s important to gather the necessary tools and materials. Here’s a list of the essentials:
- Patio roofing materials (such as shingles, metal panels, or polycarbonate sheets)
- Lumber (pressure-treated 2×6 or 2×8)
- Concrete or concrete anchors (for securing the posts)
- Galvanized steel or heavy-duty brackets for attaching the roof to the house
- Roofing nails or screws
- Power drill and screws
- Ladder
- Safety equipment (gloves, goggles, and a helmet)
- Level
- Measuring tape
- Saw (if necessary)
Step-by-Step Guide: How to Attach a Patio Roof to an Existing House
Step 1: Plan and Design Your Patio Roof
Before you begin, it’s crucial to plan the design and dimensions of your patio roof. Consider the following:
- Roof Style: The roof can be attached to the house in several styles: flat, gabled (two sloping sides), or a hip roof (slopes on all four sides).
- Roof Pitch: Ensure that the pitch of the roof allows water to flow off easily. A flat roof is possible but requires careful attention to drainage.
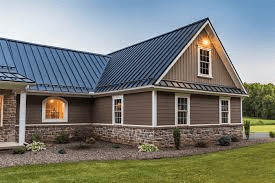
- Materials: Choose materials that complement the existing house. For example, if your home has shingles, you might opt for a matching shingle roof for the patio.
- Permit and Codes: Check with your local building authority for any permits or zoning requirements before proceeding. Building codes may dictate the dimensions and structure of your roof.
Step 2: Mark the Location and Install Posts
Once you have your design finalized, the next step is to mark the location of the patio roof and install the posts. This will provide the necessary support for the roof.
- Mark the Wall and Post Locations
Use a level and measuring tape to mark the position where the roof will attach to the house. Mark the positions for the posts as well. - Install the Support Posts
Use a post hole digger or auger to dig holes for the posts. Typically, patio posts are spaced 8 to 10 feet apart. Set the posts in concrete to ensure they are stable and secure. Use a level to make sure each post is perfectly vertical.
Step 3: Install the Header Board
The header board is a critical component of the structure that will connect the patio roof to your house. This board will bear the weight of the roof and distribute it across the posts.
- Attach the Header to the House
Use galvanized steel brackets or ledger boards to securely attach the header board to the side of your house. Make sure it’s level and aligned with your markings. If attaching directly to brick or concrete, you’ll need to drill into the surface and use concrete anchors or masonry screws. - Measure and Cut the Header Board
Measure the length of the header board to ensure it extends across the entire width of the patio. Cut the board to fit if necessary. Use treated lumber for this part, as it needs to withstand the outdoor elements.
Step 4: Add Rafters and Supports
The rafters are what will hold the roof covering, so they need to be installed securely to ensure the roof’s stability.
- Install the Rafters
Position the rafters so that they’re spaced evenly across the header board, usually about 16 to 24 inches apart. Secure the rafters with metal brackets, screws, or nails. Ensure that the rafters extend to the posts, and use additional brackets for extra support. - Ensure the Correct Pitch
The rafters should be installed at the correct angle to create a slight slope for proper water drainage. This is particularly important if you are installing a roof that needs to shed rain.
Step 5: Install the Roof Covering
With the rafters in place, it’s time to install the roof covering. The type of material you choose will depend on your aesthetic preferences, the climate, and your budget.
- Install Roofing Panels
If you’re using metal or polycarbonate roofing panels, begin at the edge and work your way across the roof, overlapping the panels as you go. Secure them to the rafters with screws or nails, ensuring they are spaced appropriately. - Install Shingles (if applicable)
If you’re using shingles, start from the bottom of the roof and work your way up. Be sure to overlap each row of shingles to avoid leaks. Roofing nails are essential for securing shingles, so ensure that they are properly spaced and driven in straight.
Step 6: Finish the Roof Edges
To complete your patio roof, you’ll need to finish the edges and ensure proper sealing to prevent water leakage.
- Install Gutter System (Optional)
Consider installing gutters along the edge of your roof to direct rainwater away from the patio and house. Gutter systems help protect the foundation and landscape from water damage. - Add Fascia and Soffit
The fascia and soffit provide a clean finish to the roof and can help conceal the underside of the rafters. Attach the fascia board to the edges of the roof, and add soffit material if desired for additional ventilation.
Final Tips for Attaching a Patio Roof to an Existing House
- Weatherproofing: Ensure all seams and gaps are properly sealed with weather-resistant caulking or flashing to prevent leaks.
- Check for Level and Square: Throughout the process, constantly check for level and square to ensure that the roof is even and well-supported.
- Professional Help: If you’re unsure about any part of the process, or if your house’s existing structure is complex, consider consulting a professional contractor to ensure the job is done correctly.
Conclusion
Attaching a patio roof to an existing house is a rewarding DIY project that can improve your home’s curb appeal and provide valuable outdoor space. With careful planning and execution, you can create a beautiful, functional patio that will serve your family for years to come. By following the steps outlined in this guide, you’ll be able to build a sturdy, attractive patio roof that enhances your outdoor living experience.
Leave a Reply