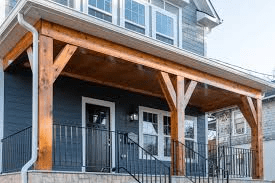
Adding a porch roof can transform your home’s comfort and curb appeal, but many homeowners worry about leaks, structural damage, or code violations. If you’re searching for How To Attach A Porch Roof To The House, you’re likely looking for a solution that is safe, durable, and weatherproof. This guide walks you through the process step by step—clearly and confidently—even if you’re new to DIY construction.
How To Attach A Porch Roof To The House: What You Must Know First
Before picking up any tools, it’s critical to understand that attaching a porch roof directly affects your home’s structural integrity.
Read too: How Long Do Standing Seam Metal Roofs Last? A Comprehensive Guide to Durability and Longevity
Key Considerations Before You Start
- Local building codes and permits
- Load-bearing wall location
- Roof pitch and drainage direction
- Existing siding and wall materials
According to U.S. housing data, over 35% of exterior renovation issues come from improper load transfer, not poor materials. Planning correctly prevents costly repairs later.
Do You Need a Permit to Attach a Porch Roof?
One of the most common homeowner questions is:
“Do I need a permit to attach a porch roof to my house?”
The Short Answer: Usually, Yes
Most US municipalities require a permit because:
- The roof adds structural load
- It alters the exterior envelope
- It impacts water runoff and drainage
Failing to obtain a permit may result in:
- Fines
- Forced removal
- Insurance claim denial
Always check with your local building department before starting.
What Is the Best Way to Attach a Porch Roof to a House?
The most reliable and widely accepted method is using a ledger board.
What Is a Ledger Board?
A ledger board is a horizontal beam securely fastened to the house’s framing. It transfers the porch roof load into the home’s structure.
According to structural engineers, ledger boards should always be fastened to wall studs or rim joists—never just siding or sheathing.
For background on how roofs distribute loads, see:
👉 https://en.wikipedia.org/wiki/Roof
Tools and Materials You’ll Need
Before starting, gather all materials to ensure smooth workflow.
Essential Materials
- Pressure-treated ledger board (2×8 or 2×10)
- Galvanized lag bolts (½ inch diameter)
- Metal flashing (aluminum or galvanized steel)
- Rafters (2×6 or 2×8 depending on span)
- Joist hangers
- Roofing underlayment and shingles
Tools Required
- Drill with masonry and wood bits
- Circular saw
- Level
- Tape measure
- Ladder
- Safety goggles and gloves
Step-by-Step Guide: How To Attach A Porch Roof To The House
Step 1: Locate the Load-Bearing Wall
Use a stud finder to locate wall studs or rim joists.
Never attach a porch roof to brick veneer or siding alone.
Mark stud locations clearly.
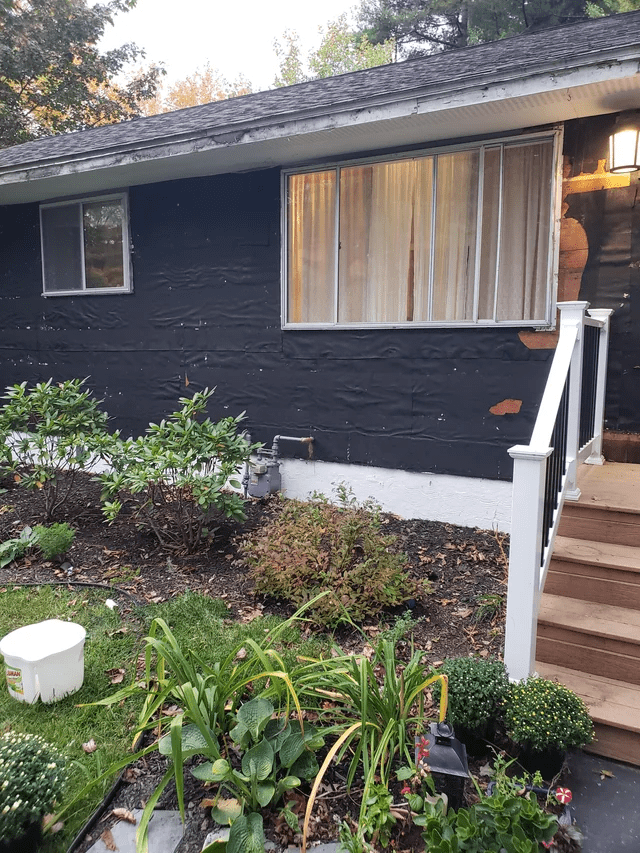
Step 2: Remove Siding Where the Ledger Will Go
Carefully cut and remove siding to expose the wall sheathing.
Tip: Remove only what’s necessary to minimize patching later.
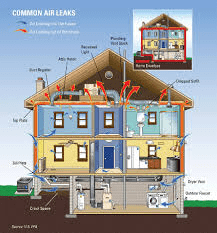
Step 3: Install Waterproof Flashing
Proper flashing prevents water intrusion—a leading cause of porch failure.
- Install metal flashing behind siding
- Extend flashing at least 6 inches above the ledger location
- Ensure downward slope for water runoff
Step 4: Attach the Ledger Board
Position the ledger board level against the wall.
- Use ½-inch lag bolts
- Space bolts every 16 inches
- Tighten into wall studs or rim joist
📏 Example:
For an 8-foot ledger board, you’ll typically use 6–7 lag bolts.
Step 5: Install Rafters
Attach rafters to the ledger board using metal joist hangers.
- Standard spacing: 16 inches on center
- Ensure consistent pitch (minimum 3:12 slope recommended)
A proper slope prevents standing water and ice buildup.
Step 6: Secure the Outer Support
The outer edge of the porch roof must be supported by:
- Posts
- A beam
- Or a load-bearing wall
Posts should rest on concrete footings at least 12 inches deep, depending on frost line.
Step 7: Add Roofing and Final Flashing
Finish by installing:
- Roof sheathing
- Underlayment
- Shingles or metal roofing
Seal all flashing joints with exterior-grade sealant.
Common Mistakes When Attaching a Porch Roof
❌ Attaching to siding instead of framing
❌ Skipping flashing
❌ Incorrect roof pitch
❌ Using non-galvanized fasteners
These mistakes often lead to leaks, rot, and structural movement within 2–3 years.
Pros and Cons of Attaching a Porch Roof to the House
✅ Advantages
- Strong structural support
- Seamless appearance
- Better weather protection
- Higher home value
❌ Disadvantages
- Requires precise flashing
- Permit complexity
- Potential water intrusion if done incorrectly
How Much Does It Cost to Attach a Porch Roof to a House?
Average US cost ranges between $2,000–$6,000, depending on:
- Roof size
- Materials
- Labor rates
- Permit fees
DIY installation can save 30–40%, but only if done correctly.
Is It Better to Attach or Build a Freestanding Porch Roof?
| Feature | Attached Roof | Freestanding Roof |
|---|---|---|
| Structural Strength | High | Moderate |
| Leak Risk | Medium | Low |
| Cost | Lower | Higher |
| Visual Integration | Seamless | Separate |
Attached roofs look better but require more precision.
FAQ: How To Attach A Porch Roof To The House
Q1: Can I attach a porch roof without removing siding?
No. Siding must be removed to securely fasten the ledger board and install flashing.
Q2: What size ledger board should I use?
Most porches use 2×8 or 2×10 pressure-treated lumber, depending on span.
Q3: How do I prevent leaks where the porch roof meets the house?
Proper step flashing, counter flashing, and sealant are essential.
Q4: Can I attach a porch roof to brick?
Only if you anchor into the structural framing behind the brick, never the veneer alone.
Q5: How long does installation take?
DIY projects typically take 2–4 days, depending on experience and weather.
Conclusion
Learning How To Attach A Porch Roof To The House correctly can save thousands of dollars while adding comfort and value to your home. The key is proper planning, secure ledger attachment, and waterproof flashing.
If you found this guide helpful, share it on social media to help other homeowners build smarter, safer porches 🏠🔨

Leave a Reply