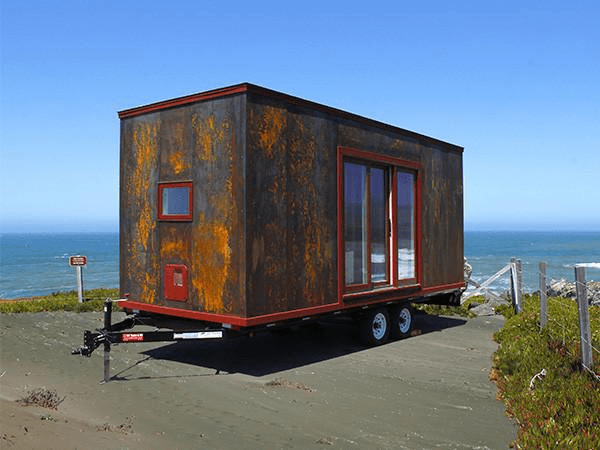
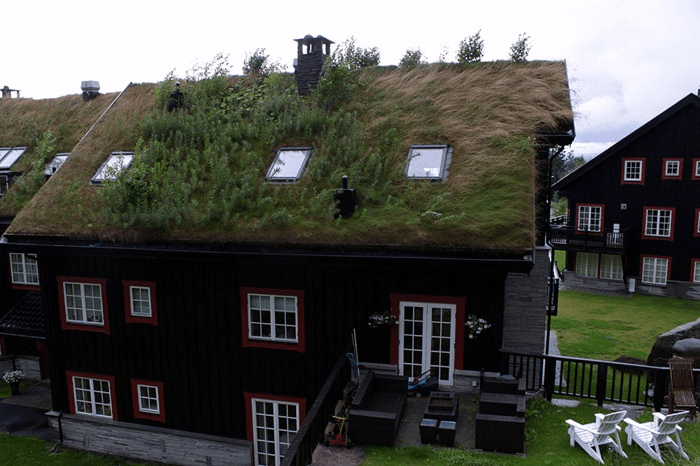
Building a tiny house has become a popular choice for many seeking affordable, minimalist, and efficient living. One of the key design elements that affect both the aesthetics and functionality of a tiny house is the roof style. A flat roof offers a modern, sleek look and can maximize usable space, but it also requires careful planning and construction to ensure durability and weather resistance.
In this comprehensive article, we will walk you through how to build a flat roof on a tiny house with practical tips, materials, and step-by-step instructions. Whether you’re a DIY enthusiast or planning to hire professionals, this guide will help you understand the essentials of flat roof construction tailored for tiny homes.
Read too: Hail Damage Roof Repair: Essential Guide to Restoring Your Home’s Protection
Why Choose a Flat Roof for Your Tiny House?
Flat roofs are often chosen for tiny houses for several reasons:
- Modern aesthetic: Flat roofs provide a clean, contemporary look that complements minimalist designs.
- Additional usable space: You can use the roof as a deck, garden, or solar panel platform.
- Simplicity: Flat roofs are generally easier and quicker to build compared to complex pitched roofs.
- Cost efficiency: Requires less material than steeply pitched roofs, reducing overall expenses.
- Ease of maintenance: Flat roofs offer easier access for repairs and inspections.
However, building a flat roof requires careful attention to waterproofing and drainage to avoid water pooling and leaks.
How To Build A Flat Roof On A Tiny House: Essential Considerations
Planning Your Flat Roof Design
Before starting construction, consider these factors:
- Roof slope: Although called “flat,” your roof should have a slight slope (typically 1/4 inch per foot) to allow water drainage.
- Materials: Choose roofing materials that are durable and waterproof, such as EPDM rubber, TPO, PVC roofing membranes, or built-up roofing.
- Insulation: Proper insulation is essential to regulate indoor temperatures and prevent condensation.
- Weight: Your tiny house frame must be able to support the weight of roofing materials and any additional load (e.g., rooftop deck, snow).
- Local building codes: Check requirements for roofing systems, waterproofing, and fire resistance in your area.
How To Build A Flat Roof On A Tiny House: Step-by-Step Construction Guide
Step 1: Frame the Roof Structure
Start by framing the roof using strong, lightweight lumber such as 2×6 or 2×8 rafters or trusses. The frame must:
- Support the roofing materials and withstand weather conditions.
- Be built with a slight pitch to ensure water runoff.
- Extend slightly beyond the house walls to create an overhang for additional protection.
Step 2: Install Roof Sheathing
Once the frame is complete, cover it with roof sheathing boards, usually plywood or oriented strand board (OSB).
- Attach the sheathing securely to the rafters with nails or screws.
- Make sure the surface is smooth and flush to support roofing materials properly.
Step 3: Apply a Waterproof Underlayment
A waterproof membrane or roofing felt is critical to prevent leaks.
- Lay the underlayment over the roof sheathing.
- Overlap edges according to manufacturer instructions to create a continuous water barrier.
- Secure the underlayment with roofing nails or staples.
Step 4: Install the Roofing Membrane
Choose a roofing membrane suited for flat roofs, such as EPDM rubber or TPO:
- Roll out the membrane and cut to fit the roof surface.
- Use adhesives, mechanical fasteners, or heat welding to secure it in place.
- Seal all seams and edges carefully to prevent water infiltration.
Step 5: Add Insulation and Ventilation
Good insulation keeps the tiny house comfortable year-round:
- Install rigid foam insulation panels beneath the roof membrane or between rafters.
- Include ventilation to prevent moisture buildup and extend roof lifespan.
- Use vents or ridge vents if applicable.
Step 6: Finish with Trim and Gutters
To protect edges and improve aesthetics:
- Install metal or wooden trim around the roof perimeter.
- Add gutters and downspouts to channel rainwater away from the foundation.
Maintaining Your Flat Roof on a Tiny House
Flat roofs require regular maintenance to ensure longevity:
- Inspect for ponding water or debris and clear them promptly.
- Check for punctures, cracks, or loose seams in the roofing membrane.
- Clean gutters seasonally to prevent overflow and damage.
- Schedule professional inspections every few years.
Frequently Asked Questions About How To Build A Flat Roof On A Tiny House
Is a flat roof suitable for all climates?
Flat roofs work well in moderate climates. In heavy snow or rainfall areas, proper drainage and waterproofing are essential to avoid damage.
How long does a flat roof last on a tiny house?
With proper materials and maintenance, a flat roof can last 20-30 years or more.
Can I build a flat roof on a tiny house myself?
If you have carpentry skills and follow safety protocols, building a flat roof yourself is possible. Otherwise, hiring experienced professionals is advisable.
Final Thoughts: Building a Functional and Attractive Flat Roof on Your Tiny House
Understanding how to build a flat roof on a tiny house enables you to add both style and function to your compact living space. With thoughtful design, quality materials, and regular upkeep, your flat roof will serve you well for years to come—providing shelter, aesthetic appeal, and even additional usable outdoor space.
Whether you’re constructing your tiny house from scratch or remodeling, this roofing style offers a versatile solution that blends simplicity and modern design.
Leave a Reply