How to Build a Gable Porch Roof? A gable porch roof can significantly enhance the aesthetic appeal and functionality of your home. It provides shelter from the elements, adds value to your property, and offers a charming, classic look. This comprehensive guide will walk you through the process of building a gable porch roof, ensuring you have all the information you need to tackle this project confidently.
Introduction to Gable Porch Roofs
What is a Gable Porch Roof?
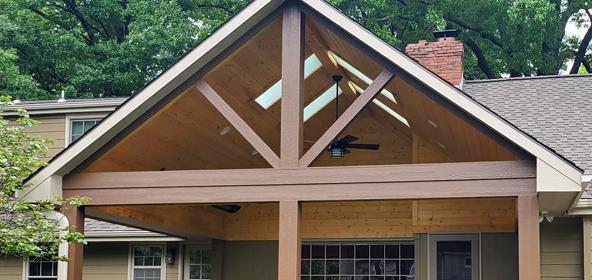
A gable porch roof is characterized by its triangular shape, created by two sloping sides that meet at a ridge. This type of roof is popular for its simple yet elegant design, providing excellent drainage and a robust structure.
Benefits of a Gable Porch Roof
- Aesthetic Appeal: Enhances the look of your home with its classic, symmetrical design.
- Functional: Offers protection from rain, snow, and sun, making your porch more usable year-round.
- Value Addition: Increases the overall value of your property by improving curb appeal and functionality.
How To Build A Gable Porch Roof: A Step-by-Step Guide
Tools and Materials Needed
Before you start, gather the necessary tools and materials:
- Measuring tape
- Carpenter’s pencil
- Level
- Circular saw
- Hammer
- Nails and screws
- Drill
- Ladder
- Safety gear (gloves, goggles, helmet)
- Lumber (2x4s, 4×4 posts, rafters)
- Plywood or OSB sheets
- Roofing material (shingles, metal sheets, etc.)
- Ridge board
- Roofing felt or underlayment
- Metal flashing
- Caulk and sealant
Planning and Design
Measure and Design
- Measure Your Porch: Accurately measure the dimensions of your porch to determine the size of the gable roof.
- Create a Design Plan: Sketch the design of your gable roof, including the pitch (angle) of the roof. A common pitch for gable roofs is 4:12, meaning for every 12 inches horizontally, the roof rises 4 inches.
Step 1: Install the Support Posts
- Mark the Positions: Mark the locations for the support posts at the front corners of your porch.
- Dig Post Holes: Dig holes for the support posts, typically 2-3 feet deep depending on your local building codes.
- Set the Posts: Place the 4×4 posts into the holes and fill with concrete, ensuring they are plumb (vertically straight). Allow the concrete to cure as per the manufacturer’s instructions.
Step 2: Build the Header and Ledger Board
- Install the Ledger Board: Attach a ledger board to the house wall where the roof will attach. Ensure it is level and securely fastened to the wall studs.
- Install the Header: Attach the header board to the tops of the support posts, ensuring it is level and securely fastened.
Step 3: Frame the Roof
- Cut the Rafters: Measure and cut the rafters according to your roof design. The rafters should extend from the header board to the ridge board.
- Install the Ridge Board: Secure the ridge board at the top, spanning between the points where the roof will meet the house and the front edge of the porch.
- Attach the Rafters: Install the rafters, attaching one end to the header board and the other end to the ridge board. Ensure they are evenly spaced and securely fastened.
Step 4: Sheath the Roof
- Install the Plywood Sheets: Cover the rafters with plywood or OSB sheets to create the roof deck. Secure the sheets with nails or screws, ensuring they are flush with each other.
- Install the Underlayment: Roll out the roofing felt or underlayment over the plywood deck, securing it with nails or staples.
Step 5: Add the Roofing Material
- Install the Roofing Material: Depending on your choice (shingles, metal sheets, etc.), install the roofing material starting from the bottom edge and working your way up. Overlap each row to ensure proper water drainage.
- Install the Ridge Cap: Place the ridge cap over the peak of the roof, securing it with nails or screws.
Step 6: Finish with Flashing and Sealant
- Install Flashing: Apply metal flashing at the joints where the roof meets the house to prevent water infiltration.
- Seal Joints and Edges: Use caulk and sealant to seal any gaps or joints to ensure the roof is watertight.
Additional Considerations
Ventilation
Proper ventilation is crucial to prevent moisture buildup and extend the life of your roof. Consider installing soffit vents or ridge vents to promote airflow.
Insulation
Insulating the roof can improve energy efficiency and comfort. Install insulation between the rafters before adding the roof sheathing.
Tips for Success
- Safety First: Always wear safety gear and take precautions when working at heights.
- Check Local Codes: Ensure your construction plans comply with local building codes and regulations.
- Get Help: Building a gable porch roof is a significant project. Consider enlisting the help of friends or hiring a professional if needed.
Common Mistakes to Avoid
- Incorrect Measurements: Double-check all measurements to ensure the roof fits correctly and is structurally sound.
- Ignoring Building Codes: Failure to comply with local building codes can result in fines and the need to redo work.
- Poor Ventilation: Inadequate ventilation can lead to moisture problems and reduce the lifespan of your roof.
Read too: Decoding Timelines: How Long Does It Take To Replace A Roof and What to Expect
Conclusion
Building a gable porch roof can be a rewarding project that enhances your home’s appearance and functionality. By following this detailed guide on how to build a gable porch roof, you can achieve professional results. Remember to plan carefully, use quality materials, and prioritize safety throughout the process.


Leave a Reply