If you’re researching How To Build A Shed Roof Attached To House, you’re likely looking to add covered outdoor space without building a full addition. A shed-style roof (also called a lean-to roof) is one of the simplest and most cost-effective ways to expand usable space while protecting your patio, deck, or side yard from rain and sun.
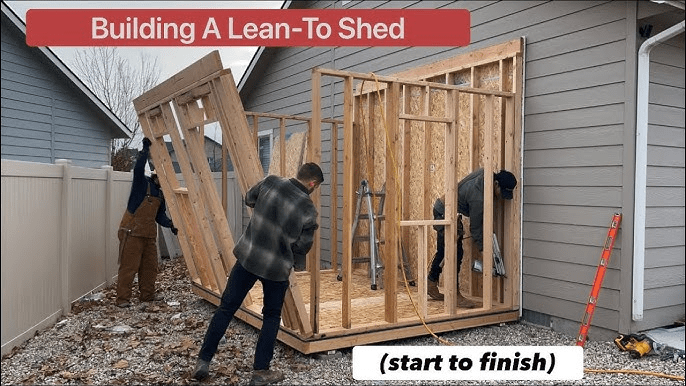
This guide walks you through planning, permits, structural framing, materials, load considerations, and installation steps—so you can build safely, correctly, and in compliance with U.S. building standards.
How To Build A Shed Roof Attached To House: Where Should You Start?
Before cutting lumber, planning is essential. A shed roof attached to your house becomes part of your home’s structural system. That means proper attachment, flashing, drainage slope, and load-bearing support are critical.
Read too: Hail Damage Roof Repair: Essential Guide to Restoring Your Home’s Protection
According to construction industry data, improper ledger board attachment is one of the most common causes of failure in attached outdoor structures. Structural integrity must always be your top priority.
Do You Need a Permit to Build a Shed Roof?
In most U.S. municipalities, yes.
Typical Requirements:
- Building permit
- Structural review
- Footing inspection
- Final inspection
Permit costs generally range from $150 to $800, depending on size and region.
Skipping permits can lead to fines, forced removal, or complications during resale.
What Is a Shed Roof (Lean-To Roof)?
A shed roof is a single-sloped roof surface that attaches to an existing wall and slopes downward away from the house.
Unlike gable roofs (two slopes), a shed roof has:
- One plane
- Simpler framing
- Easier drainage
- Lower material cost
For general roofing structure terminology, see:
https://en.wikipedia.org/wiki/Roof
What Materials Do You Need?
Structural Lumber
- Pressure-treated 6×6 posts
- 2×8 or 2×10 ledger board
- 2×6 or 2×8 rafters
- Double 2×10 beam (header)
- ½-inch exterior plywood sheathing
Hardware
- ½-inch lag bolts or structural screws
- Joist hangers
- Hurricane ties
- Flashing
- Roofing underlayment
- Roofing material (metal panels or shingles)
Tools
- Circular saw
- Drill/impact driver
- Framing square
- 4-foot level
- Tape measure
- Post hole digger
Quality materials ensure durability and long-term safety.
How Deep Should Footings Be?
Footings must extend below the frost line to prevent movement.
General Guidelines:
- Warm climates: 12–18 inches
- Cold climates: 36–48 inches
Always confirm local building codes.
Step-by-Step Footing Installation
- Dig holes at least 12 inches in diameter.
- Depth: Minimum 36 inches (verify local frost line).
- Add 3 inches of gravel.
- Install metal post anchors.
- Pour approximately 2 cubic feet of concrete per hole.
- Allow 24–48 hours curing time.
Strong footings prevent sagging and structural shifting.
How To Attach a Shed Roof to the House Properly
This is the most critical step in How To Build A Shed Roof Attached To House.
Installing the Ledger Board
- Remove siding where ledger will mount.
- Install flashing behind the ledger to prevent water intrusion.
- Position ledger based on roof pitch calculation.
- Secure with ½-inch lag bolts spaced every 16 inches.
- Attach directly into wall studs or rim joist—not sheathing.
Improper flashing can cause rot and mold inside wall cavities.
How To Calculate Shed Roof Pitch
Proper slope ensures water drains away from your home.
Minimum Recommended Pitch:
¼ inch drop per foot of run
Example:
If roof extends 12 feet:
12 × 0.25 inches = 3 inches minimum drop
In snowy climates, a 3:12 pitch (3 inches rise per 12 inches run) is safer.
Step-by-Step: Framing the Shed Roof
Step 1: Install Support Posts
- Attach 6×6 posts to cured footings.
- Brace temporarily to maintain vertical alignment.
- Maintain minimum 7–8 feet clearance.
Step 2: Install Header Beam
- Use doubled 2×10 lumber.
- Secure to posts using carriage bolts.
- Confirm beam is level.
Step 3: Install Rafters
- Space rafters 16 inches on center.
- Attach to ledger with joist hangers.
- Secure to beam with hurricane ties.
Wind uplift protection is especially important in storm-prone regions.
Step 4: Install Roof Sheathing
- Use ½-inch exterior-grade plywood.
- Leave 1/8-inch expansion gap between panels.
- Nail every 6 inches along edges.
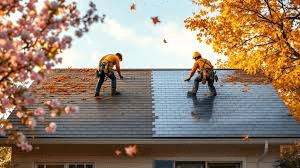
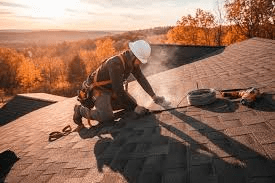
Step 5: Install Roofing Material
Options include:
- Asphalt shingles
- Corrugated metal panels
- Polycarbonate panels
Metal roofing is lightweight and easier for DIY projects.
Estimated Cost Breakdown
| Item | Estimated Cost |
|---|---|
| Lumber | $800–$1,800 |
| Roofing materials | $500–$1,500 |
| Hardware | $200–$400 |
| Permit | $150–$800 |
| Total DIY | $1,650–$4,500 |
Hiring a contractor may cost $5,000–$12,000, depending on complexity.
Pros and Cons of a Shed Roof Attached to House
Advantages
- Affordable construction
- Simple design
- Excellent drainage
- Adds usable outdoor space
- Improves property value
Disadvantages
- Requires permits
- Structural complexity
- Risk of improper flashing
- Not ideal for very large spans
Common Mistakes to Avoid
- Skipping flashing installation
- Using undersized beams
- Ignoring snow load requirements
- Incorrect rafter spacing
- Not checking local codes
Structural safety should always come before appearance.
Is DIY Realistic for Beginners?
DIY is possible if you:
- Have framing experience
- Understand load-bearing principles
- Can safely work at height
If unsure, consult a structural professional for ledger attachment and load calculations.
FAQ: How To Build A Shed Roof Attached To House
Q1: Can I attach the shed roof without removing siding?
No. The ledger must connect directly to framing members, and flashing must be installed behind siding.
Q2: What is the best roofing material for a shed roof?
Metal panels are lightweight and durable. Shingles provide visual consistency with your existing roof.
Q3: How long does it take to build?
DIY projects typically take 3–7 days depending on size and weather conditions.
Q4: Do I need structural screws?
Yes. Use ½-inch lag bolts or structural screws rated for load-bearing use.
Q5: Will this increase home value?
Outdoor structural improvements typically return 60–75% ROI depending on local market conditions.
Conclusion
Learning How To Build A Shed Roof Attached To House allows you to expand your living space, protect your patio, and increase property value. With proper planning, accurate measurements, and secure structural attachment, this project can provide long-term durability and comfort.
If this guide helped you, consider sharing it on social media or saving it for your construction planning. Smart preparation today leads to stronger, safer construction tomorrow.
Leave a Reply