Proper ventilation is essential for any home, and metal houses are no exception. Installing a roof vent helps regulate temperature, reduce moisture, and prevent damage caused by condensation. Knowing how to install a roof vent in a metal house ensures a safe, durable, and efficient solution for your roofing system.
Metal roofing requires special attention due to its unique properties, such as expansion, contraction, and potential water leakage points. This guide will provide a comprehensive step-by-step approach to installing a roof vent in a metal house, along with tips, tools, and safety considerations.
Understanding Roof Vents and Their Importance
Roof vents are designed to allow hot air and moisture to escape from the attic or upper areas of your home. Key benefits include:
- Temperature Regulation: Reduces heat buildup in summer, lowering cooling costs.
- Moisture Control: Prevents condensation that can lead to mold, mildew, or rust in a metal house.
- Prolongs Roof Life: Minimizes warping, corrosion, or deterioration of metal panels.
- Energy Efficiency: Supports proper airflow, reducing strain on HVAC systems.
Knowing these benefits helps homeowners appreciate the importance of learning how to install a roof vent in a metal house correctly.
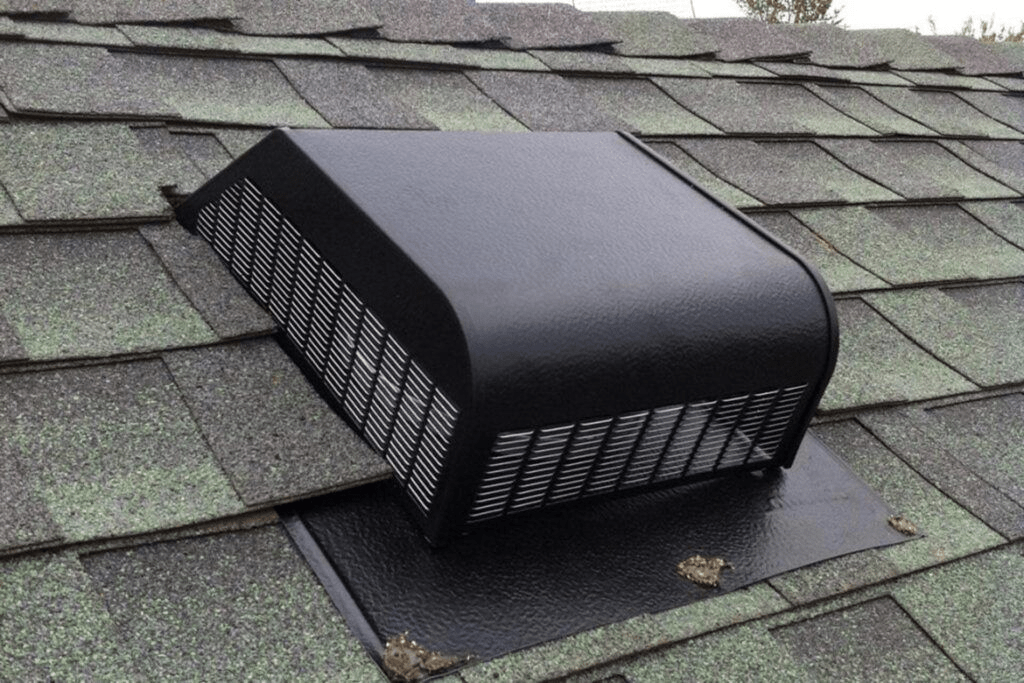
Types of Roof Vents for Metal Houses
Metal roofs require specific types of vents compatible with their structure. Common options include:
- Ridge Vents: Installed along the peak of the roof, ideal for continuous airflow.
- Box Vents: Mounted near the roof’s ridge, easy to install individually.
- Turbine Vents: Rotating vents powered by wind for passive ventilation.
- Powered Vents: Electrically operated for homes requiring active ventilation.
Selecting the right type depends on your roof design, climate, and ventilation needs.
Read too: Hail Damage Roof Repair: Essential Guide to Restoring Your Home’s Protection
Tools and Materials Needed
Before starting the installation, gather the following:
- Metal-compatible roof vent
- Screws or bolts with rubber washers
- Drill with metal bits
- Caulk or roofing sealant
- Measuring tape
- Ladder and safety harness
- Gloves and safety goggles
- Metal snips (if cutting panels)
Having the right tools ensures a smooth and safe how to install a roof vent in a metal house process.
Step-by-Step Guide: How To Install A Roof Vent In A Metal House
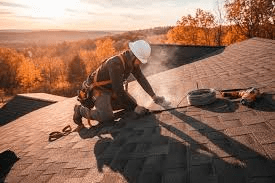
1. Safety Precautions
Working on a metal roof requires caution:
- Use a safety harness and secure ladder.
- Wear non-slip shoes to avoid sliding.
- Check weather conditions—avoid installation during rain or strong winds.
2. Choose the Location
Select the vent location based on airflow requirements:
- Ridge vents should follow the peak of the roof.
- Box vents are placed near the highest point of the roof but spaced evenly.
- Ensure the location avoids structural supports or obstacles beneath the roof.
Proper placement is critical for effective ventilation and longevity of your metal roof.
3. Mark and Prepare the Area
- Use a marker to outline the vent’s footprint on the metal roof.
- Double-check measurements to ensure the vent aligns with roof panels.
- Remove any debris or rust to create a clean installation surface.
4. Cut the Opening
- Use metal snips or a jigsaw with a metal blade to cut the vent opening.
- Ensure edges are smooth to prevent injury or damage to the vent.
- For ridge vents, cut a narrow slit along the ridge’s length, leaving room for installation.
5. Apply Roofing Sealant
- Apply a generous layer of roofing sealant around the cut edges.
- Sealant prevents water leaks and provides additional adhesion for the vent.
6. Install the Roof Vent
- Position the vent over the opening.
- Secure using screws or bolts with rubber washers to prevent leaks.
- Ensure the vent sits flush with the roof and follows panel contours.
7. Seal All Seams
- Apply additional caulk or sealant around vent edges and screw heads.
- Check for any gaps that could allow water infiltration.
8. Inspect and Test
- Inspect the installation for secure placement and proper alignment.
- Test for airflow to ensure the vent functions as intended.
- Check after the first rainfall for leaks and reseal if necessary.
Tips for Long-Term Maintenance
Proper maintenance keeps your vent and metal roof in top condition:
- Inspect Vents Regularly: Check screws, seals, and vent alignment twice a year.
- Clean Debris: Remove leaves or dirt that could block airflow.
- Check for Corrosion: Treat rust spots promptly to prevent damage.
- Reapply Sealant: Maintain a watertight seal around screws and seams.
Routine maintenance ensures your roof vent continues functioning efficiently, maximizing energy savings and protecting your metal house.
Common Mistakes to Avoid
- Incorrect Placement: Avoid installing vents in low points where water collects.
- Insufficient Sealing: Always seal screws and edges to prevent leaks.
- Ignoring Panel Expansion: Metal roofs expand and contract; allow room for movement.
- Using Wrong Fasteners: Use screws with rubber washers to maintain a watertight seal.
Avoiding these mistakes ensures a safe, effective, and long-lasting installation.
Benefits of Proper Roof Vent Installation
Installing a roof vent correctly provides:
- Enhanced Comfort: Reduced heat and humidity inside the home.
- Energy Efficiency: Lowers energy bills by reducing HVAC load.
- Roof Longevity: Prevents premature metal panel deterioration.
- Structural Integrity: Minimizes damage caused by moisture and condensation.
These benefits highlight why it is critical to understand how to install a roof vent in a metal house properly.
Conclusion
Learning how to install a roof vent in a metal house is essential for homeowners seeking to improve ventilation, protect their roofing investment, and maintain a comfortable living environment. With the right tools, careful planning, and attention to detail, you can install a vent that enhances airflow, prevents leaks, and prolongs the life of your metal roof.
From selecting the proper vent type to cutting, sealing, and maintaining the installation, following these steps ensures a professional and durable outcome. Proper ventilation is not just a matter of comfort—it is a critical component of a safe and energy-efficient home.
Leave a Reply