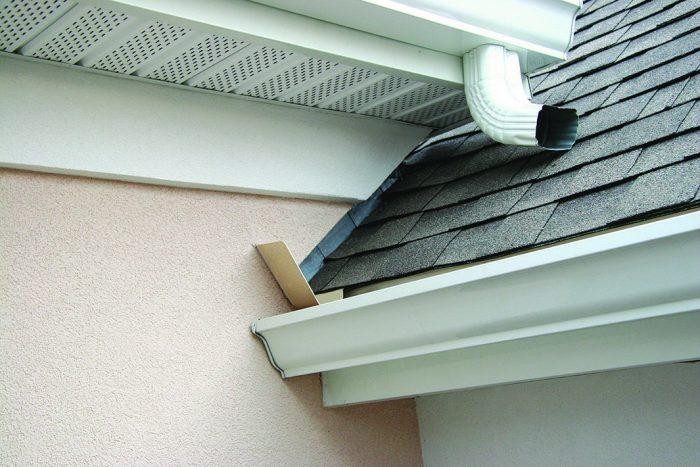
Kick out flashing is a type of flashing that is used to divert water away from the foundation of a building. It is typically used at the bottom of roof overhangs, where water can run down the roof and pool against the foundation. Kick out flashing can help to prevent water damage to the foundation, including rot, mold, and structural damage.
In this article, we will discuss how to install kick out flashing on an existing roof. We will provide step-by-step instructions and tips to help you do the job correctly.
Materials
The following materials are required to install kick out flashing:
- Kick out flashing
- Metal roofing nails or screws
- Caulk or sealant
- Safety gear, including gloves, safety glasses, and a hard hat
Tools
The following tools are required to install kick out flashing:
- Ladder
- Tape measure
- Saw
- Hammer or drill
- Caulk gun
Instructions
1. Inspect the roof
Before you begin installation, inspect the roof to make sure that it is in good condition. Look for any damage to the shingles, flashing, or foundation. If there is any damage, it should be repaired before you install the kick out flashing.
Here are some things to look for when inspecting your roof:
- Missing or damaged shingles
- Loose or damaged flashing
- Cracks or holes in the foundation
If you find any damage, you will need to repair it before you install the kick out flashing.
2. Measure the roof
Measure the width of the roof overhang to determine the length of the kick out flashing. The kick out flashing should extend at least 6 inches beyond the edge of the roof.
Here are some tips for measuring the roof overhang:
- Use a tape measure to measure the distance from the edge of the roof to the foundation.
- Add 6 inches to the measurement to determine the length of the kick out flashing.
3. Cut the kick out flashing
Cut the kick out flashing to the desired length. The kick out flashing should be slightly wider than the roof overhang.
Here are some tips for cutting the kick out flashing:
- Use a saw that is appropriate for the type of kick out flashing you are using.
- Make sure that the cut is straight and even.
4. Install the kick out flashing
Attach the kick out flashing to the roof using metal roofing nails or screws. The nails or screws should be driven through the flashing and into the roof decking.
Here are some tips for installing the kick out flashing:
- Use a level to make sure that the kick out flashing is installed level.
- Drive the nails or screws at least 1 inch into the roof decking.
5. Seal the joints
Apply caulk or sealant around the joints between the kick out flashing and the roof. This will help to prevent water from leaking into the roof.
Here are some tips for sealing the joints:
- Use a caulk or sealant that is designed for use with roofing materials.
- Apply the caulk or sealant in a thin, even layer.
6. Clean up
Clean up any debris from the work area.
Tips
- Use a level to make sure that the kick out flashing is installed level. Ensure proper diversion of water away from the foundation by actively directing it away.
- If the roof overhang is made of wood, you may need to seal the wood before installing the kick out flashing. This will help to prevent water from rotting the wood.
- When installing kick-out flashing on a metal roof, consider using specialized flashing nails or screws designed for metal roofs.
Conclusion
Installing kick out flashing is a relatively easy task that can help to protect your home from water damage. By following the instructions in this article, you can install kick out flashing on your existing roof correctly and safely.


Leave a Reply