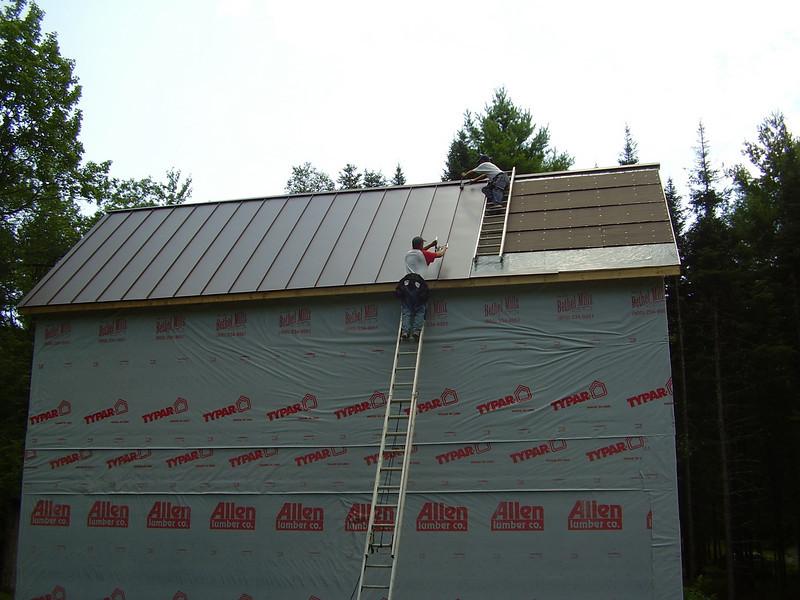
Installing a new roof can be a daunting task, especially when it involves laying steel roofing over existing shingles. This method, however, is becoming increasingly popular due to its cost-effectiveness and durability. In this detailed guide, we will walk you through how to install steel roofing over shingles, highlighting the key considerations, steps, and benefits.

Why Choose Steel Roofing?
Durability
Steel roofing is known for its longevity and durability. Unlike traditional asphalt shingles that may need replacement every 20-30 years, steel roofs can last 50 years or more with proper maintenance.
Energy Efficiency
Steel roofs reflect solar heat, reducing cooling costs in the summer. They can also be coated with reflective paint to enhance their energy efficiency.
Environmental Benefits
Steel roofing is often made from recycled materials and is fully recyclable at the end of its life, making it an environmentally friendly choice.
Low Maintenance
Steel roofs require minimal maintenance compared to other roofing materials. They are resistant to cracking, shrinking, and eroding, and they can withstand extreme weather conditions.
How To Install Steel Roofing Over Shingles
Preparation and Inspection
Before starting the installation process, it’s crucial to prepare and inspect the existing roof.
- Inspect the Existing Roof: Ensure the shingles are in relatively good condition. Look for any signs of damage, moisture, or structural issues.
- Clean the Roof: Remove any debris, leaves, or dirt from the shingle roof to provide a clean surface for the new steel roofing.
Tools and Materials Needed
- Steel roofing panels
- Underlayment
- Furring strips (optional)
- Roofing screws
- Ridge caps and trim
- Metal cutting tools
- Measuring tape
- Chalk line
- Drill
- Safety gear (gloves, safety glasses, harness)
Step-by-Step Installation Guide
Step 1: Install the Underlayment
An underlayment is crucial for adding an extra layer of protection against moisture. Synthetic underlayments are recommended for their durability and resistance to tearing.
- Roll Out the Underlayment: Starting from the bottom edge of the roof, roll out the underlayment horizontally, overlapping each row by about 4 inches.
- Secure the Underlayment: Use roofing nails or staples to secure the underlayment to the shingle roof, ensuring it lies flat without wrinkles.
Step 2: Add Furring Strips (Optional)
Furring strips, also known as battens, create a space between the shingles and the steel roofing. This can improve ventilation and prevent moisture buildup.
- Measure and Cut the Strips: Measure the length of the roof and cut the furring strips to size.
- Install the Strips: Lay the furring strips vertically, spacing them about 24 inches apart, and secure them with roofing nails.
Step 3: Install the Steel Roofing Panels
Now it’s time to lay the steel roofing panels.
- Measure and Cut the Panels: Measure the length of the roof and cut the steel panels to fit, using metal cutting tools. Be sure to wear safety gear to protect against sharp edges.
- Position the Panels: Starting at the bottom edge of the roof, lay the first panel, ensuring it overhangs the edge slightly for water runoff.
- Secure the Panels: Use roofing screws to secure the panels to the roof, placing screws at the ridge and through the furring strips if used. Overlap each panel by one ridge to ensure a watertight seal.
- Continue Installing Panels: Work your way up the roof, installing panels in rows and securing them with screws. Use a chalk line to ensure the panels are straight.
Step 4: Install Ridge Caps and Trim
Finish the installation by adding ridge caps and trim to seal the edges and peaks.
- Install Ridge Caps: Position the ridge caps over the peaks of the roof and secure them with screws, overlapping each piece as you go.
- Add Trim: Install trim along the edges and any roof penetrations (like chimneys or vents) to prevent water from seeping under the panels.
Additional Considerations
Ventilation
Proper ventilation is essential to prevent moisture buildup and ensure the longevity of your steel roof. Consider installing ridge vents or other ventilation systems to maintain airflow.
Insulation
Adding insulation under the steel roofing can improve energy efficiency and help regulate indoor temperatures. Foam insulation or reflective barriers are commonly used for this purpose.
Local Building Codes
Check local building codes and regulations before starting the installation. Some areas may have specific requirements or restrictions regarding roofing installations.
Benefits of Installing Steel Roofing Over Shingles
Cost-Effective
Installing steel roofing over shingles can save money on labor and disposal costs associated with tearing off the old roof.
Time-Saving
The installation process is quicker since there’s no need to remove the existing shingles, reducing the overall project time.
Reduced Environmental Impact
By leaving the old shingles in place, you reduce the amount of waste sent to landfills. Steel roofing is also recyclable, making it an environmentally friendly choice.
Potential Challenges
Uneven Surface
Shingles can create an uneven surface, which may affect the installation and appearance of the steel roofing. Using furring strips can help create a smoother surface.
Weight Considerations
Although steel roofing is relatively lightweight, the combined weight of the shingles and steel panels should be evaluated. Ensure the existing roof structure can support the additional weight.
Moisture and Ventilation
Improper installation can lead to moisture buildup and ventilation issues. Ensuring adequate ventilation and using high-quality underlayment can mitigate these risks.
Read too: Decoding Timelines: How Long Does It Take To Replace A Roof and What to Expect
Conclusion
Knowing how to install steel roofing over shingles can save you time and money while providing a durable and energy-efficient roofing solution. By following the steps outlined in this guide, you can achieve a successful installation that enhances the longevity and performance of your roof. Always consider local building codes and consult with professionals if needed to ensure a safe and effective installation.


Leave a Reply