Are you considering upgrading your roof to a durable metal option without removing the existing shingles? Learn the process of how to put metal roof over shingles effectively and safely.
Introduction to Installing Metal Roof Over Shingles
Installing a metal roof over shingles can be a practical choice for homeowners looking to enhance their roof’s durability and energy efficiency. This method saves time and labor costs by avoiding the need to remove the old shingles, while also providing additional insulation and weather protection. Follow this comprehensive guide to ensure a successful installation process.
Understanding the Benefits of Metal Roofing
Before delving into the installation process, it’s essential to understand why metal roofing is becoming increasingly popular. How to put metal roof over shingles involves leveraging these advantages:
- Durability: Metal roofs are known for their longevity, often lasting 50 years or more.
- Energy Efficiency: Reflective coatings on metal roofs can reduce cooling costs in summer.
- Low Maintenance: Requires minimal upkeep compared to traditional shingle roofs.
- Aesthetics: Available in various styles and colors to complement any home.
Step-by-Step Guide on How To Put Metal Roof Over Shingles
Preparation Steps
Before starting the installation, gather the necessary tools and materials:
- Tools: Screw gun, measuring tape, safety harness, etc.
- Materials: Metal roofing panels, underlayment, fasteners, etc.
Step 1: Assessing the Current Roof Condition
Inspect the existing shingles for any damage or irregularities. Ensure the roof structure can support the additional weight of the metal roofing panels.
Step 2: Cleaning and Repairing Shingles (if necessary)
Clean the shingles thoroughly to remove debris and dirt. Replace any damaged shingles and secure loose ones to create a smooth surface.
Step 3: Adding Underlayment
Install an appropriate underlayment over the shingles. This layer provides an extra barrier against moisture and enhances insulation.
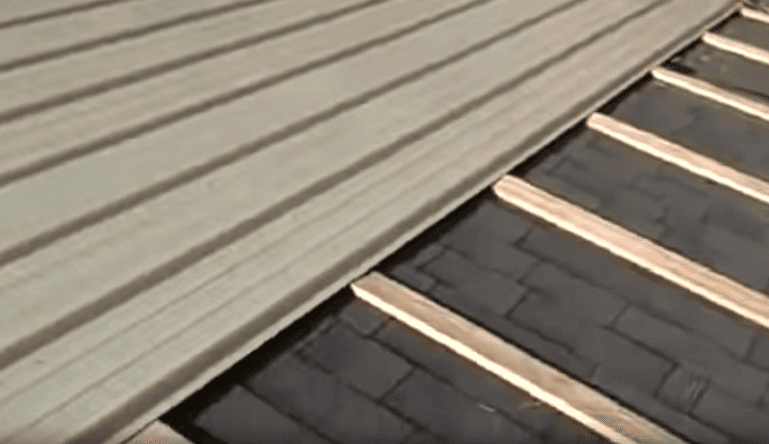
Step 4: Installing Metal Roofing Panels
- Start from one side of the roof and work towards the other.
- Use manufacturer-recommended fasteners to secure the metal panels.
- Overlap panels according to the design specifications to ensure water resistance.
Step 5: Sealing and Finishing Touches
Apply sealant around edges, vents, and chimneys to prevent leaks. Double-check all fastenings and connections to ensure a secure fit.
Safety Considerations
Throughout the how to put metal roof over shingles process, prioritize safety:
- Use proper safety gear, including harnesses and gloves.
- Work on dry days to prevent slipping accidents.
- Avoid working near power lines and take precautions against electrical hazards.
Read too: Is It Reasonable to Ask the Seller to Replace the Roof?
Conclusion
Installing a metal roofs over shingles can be a rewarding DIY project that enhances your home’s durability and aesthetic appeal. By following these steps and understanding the benefits, you can successfully upgrade your roof without the hassle of removing existing shingles.


Leave a Reply