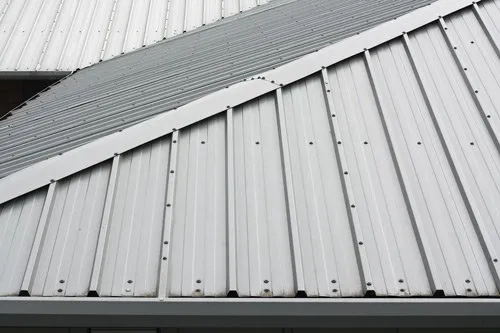
Metal roofing is a popular choice for its durability and longevity. When it comes to installing or repairing a metal roof, one essential aspect is understanding how to securely fasten it in place. In this comprehensive guide, we’ll walk you through the step-by-step process of screwing down a metal roof, ensuring a strong and weather-resistant roofing solution.
Why Screw Down a Metal Roof?
Screwing down a metal roof is a critical part of the installation process. These screws play a vital role in securing the metal panels to the roof’s underlying structure. Here are some reasons why screwing down a metal roof is essential:
- Wind Resistance: Properly secured metal roofing panels are less likely to be lifted by strong winds, making your roof more resistant to storm damage.
- Waterproofing: Screws help create a watertight seal, preventing water from infiltrating the roof and causing leaks.
- Structural Integrity: Secure fastening ensures the structural integrity of the roof, reducing the risk of sagging or damage over time.
Tools and Materials You’ll Need
Before you begin, gather the necessary tools and materials to screw down a metal roof:
Tools:
- Cordless drill or screw gun: These will make the screwing process faster and more efficient.
- Roofing screws: Choose high-quality screws designed for metal roofing applications. Self-tapping metal screws are commonly used.
- Roofing screws washers: These rubber or plastic washers create a waterproof seal when the screws are driven through the metal panels.
- Screwdriver with a magnetic tip: Useful for aligning screws and washers during installation.
Safety Equipment:
- Safety harness and lanyard: Especially important if you’re working on an elevated surface. Safety should be a top priority.
- Work gloves and safety glasses: Protect your hands and eyes from any debris or metal shavings.
Step-by-Step Guide for Screwing Down a Metal Roof
Follow these steps to properly screw down a metal roof:
Safety Precautions
Safety should always come first. Ensure you are wearing the appropriate safety gear, including a safety harness if working at heights.
Layout and Preparation
Before you start screwing down the metal roof, plan the layout. Determine the spacing for the screws, keeping in mind local building codes and the manufacturer’s recommendations. Typically, screws are spaced around 12 to 24 inches apart.
Start at the Gable Edge
Begin screwing down the metal roofing at one of the gable edges. Place the first metal panel in position, aligning it with the edge of the roof.
Align and Drill
Using your cordless drill or screw gun, align the screw with the pre-drilled hole in the metal panel. Apply gentle pressure to start drilling the screw into the metal and the underlying structure.
Add a Washer
Once the screw is partially driven, slide a screw washer over the shaft of the screw. The washer should sit between the metal panel and the roofing material beneath it.
Complete the Screw
Continue driving the screw until it is fully tightened. Be careful not to overtighten, as this can damage the metal or create gaps that allow water to seep in.
Continue Across the Roof
Repeat the process, moving along the roof’s edge and then across the panel. Ensure each panel is properly aligned, and screws are evenly spaced.
Trim the Last Panel
When you reach the opposite gable edge, you may need to trim the final panel to fit. Measure and cut the panel to size before securing it with screws.
Ridge Cap Installation
To finish, install the ridge cap along the roof’s ridge. Use screws and washers to secure the cap in place.
Conclusion
Screwing down a metal roof is a crucial part of the installation process, ensuring the roof’s stability and longevity. By following this step-by-step guide and prioritizing safety, you can effectively secure your metal roofing panels, providing your home with a durable and weather-resistant roofing solution. Whether you’re installing a new metal roof or making repairs, understanding the proper screwing technique is essential to the success of your roofing project.


Leave a Reply