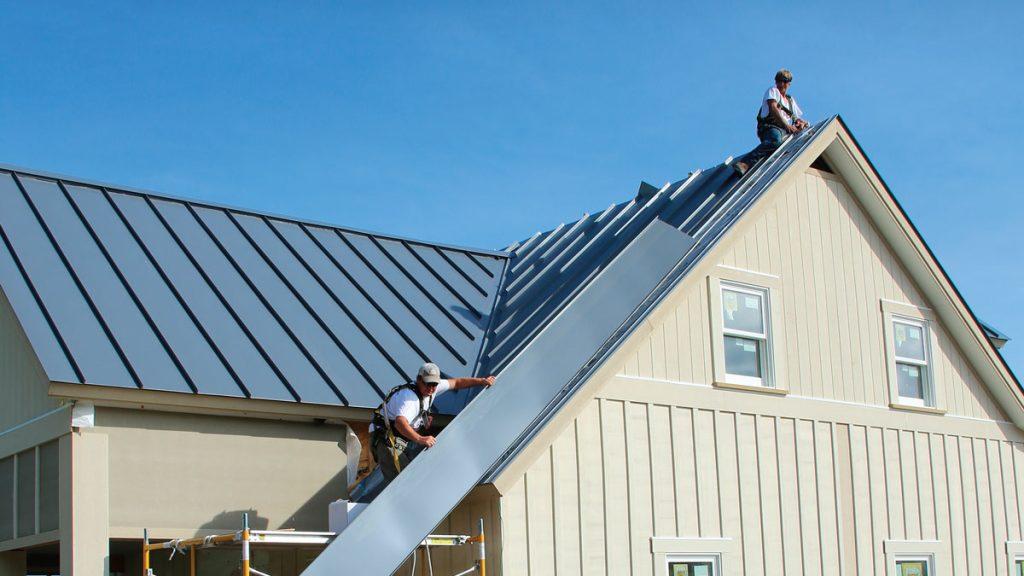
Metal roofing has gained popularity in recent years due to its durability, longevity, and energy efficiency. Among the various metal roofing options, Pro Snap metal roofing is a popular choice for its ease of installation and excellent performance. In this comprehensive guide, we will walk you through the steps to install Pro Snap metal roofing, ensuring a successful and long-lasting roofing project.

Understanding Pro Snap Metal Roofing:
Pro Snap metal roofing is a high-quality metal roofing system known for its snap-together design, making it a suitable option for both DIY enthusiasts and professional installers. The interlocking panels create a secure, weather-resistant barrier that can withstand harsh environmental conditions.
Materials and Tools You Will Need:
Before you start the installation process, gather the necessary materials and tools for the task:
- Pro Snap Metal Roofing Panels: Measure the roof area accurately and purchase enough panels to cover the entire surface.
- Roofing Underlayment: A waterproof and breathable underlayment to install on the roof deck.
- Roofing Scews: Choose appropriate metal roofing screws designed for Pro Snap panels.
- Ridge Cap: For finishing the ridge of the roof.
- Eave Flashing: To protect the edges of the roof and ensure a watertight seal.
- Sealant: Roofing sealant for securing overlaps and flashing.
- Measuring Tape, Chalk Line, and Marker: For precise measurements and markings.
- Circular Saw with a Metal-Cutting Blade: To cut panels to the required size.
- Safety Gear: Safety goggles, gloves, and a harness if working on a steep roof.
Step-by-Step Guide to Installing Pro Snap Metal Roofing:
- Safety Precautions: Prioritize safety by wearing appropriate safety gear, ensuring your ladder is stable, and working on a dry, calm day.
- Roof Inspection: Inspect the existing roof to ensure it’s in good condition. Replace any damaged or rotten materials.
- Underlayment Installation: Lay the roofing underlayment across the roof deck, securing it with roofing nails. Overlap the underlayment sheets by a few inches for watertight protection.
- Measure and Mark: Use a measuring tape and chalk line to measure and mark the starting point for your metal panels, ensuring a straight, level line.
- Install Eave Flashing: Secure eave flashing along the eave edge of the roof, allowing it to hang over the edge slightly. This will prevent water from seeping under the panels.
- Panel Installation: Begin installing the Pro Snap metal roofing panels from the eave, working your way up the roof. Snap the panels together according to the manufacturer’s instructions. Use metal roofing screws to secure each panel to the roof deck.
- Cutting Panels: Use a circular saw with a metal-cutting blade to trim panels as needed to fit the roof dimensions.
- Ridge Cap Installation: Install the ridge cap at the peak of the roof, overlapping it to ensure a secure, watertight seal.
- Sealing Joints and Flashing: Apply roofing sealant to the panel overlaps and flashing to prevent water infiltration.
- Final Inspection: Inspect the entire roof for any loose panels, gaps, or unsealed joints. Make any necessary adjustments or repairs.
Benefits of Pro Snap Metal Roofing:
- Durability: Pro Snap metal roofing is highly durable and can last for decades with minimal maintenance.
- Energy Efficiency: Metal roofs can reflect sunlight, reducing heat absorption and cooling costs.
- Quick Installation: The snap-together design and lightweight panels make for a relatively quick and straightforward installation process.
- Weather Resistance: Metal roofing can withstand extreme weather conditions, including heavy rain, snow, and high winds.
Conclusion:
Installing Pro Snap metal roofing can be a rewarding and cost-effective way to protect your home while enhancing its energy efficiency. This installation guide has provided you with the essential steps and considerations for a successful roofing project. Remember, if you’re unsure about any part of the installation process, it’s wise to consult with a professional roofing contractor who can ensure your metal roof is installed correctly and will provide lasting protection for your home.


Leave a Reply