Steel roof trusses are an essential component in modern construction, providing structural support and stability to roofing systems. When it comes to constructing a durable and reliable roof, proper steel roof truss installation guide is crucial. This comprehensive installation guide aims to walk you through the key steps and considerations involved in installing steel roof trusses to ensure a safe and sturdy roofing system.
Understanding Steel Roof Trusses
Steel roof trusses are pre-fabricated frames made of steel members connected together to form triangular shapes. These trusses are engineered to distribute the weight of the roof evenly and transfer it to the load-bearing walls or supports. Their triangular design provides exceptional strength and rigidity, making them ideal for spanning long distances and supporting heavy roof loads.
Pre-Installation Preparations
Before commencing the steel roof truss installation, thorough preparations are necessary to ensure a smooth and efficient process. This includes obtaining the necessary permits, ensuring the construction site is clear and level, and verifying that the foundation or load-bearing walls are capable of supporting the truss system’s weight.
Consultation with Structural Engineers
Given the critical role steel roof trusses play in a building’s structural integrity, it’s essential to consult with qualified structural engineers during the planning and design phase. They will assess the specific requirements of your project, calculate the appropriate truss sizes and configurations, and ensure the trusses meet all building codes and safety standards.
Truss Delivery and Handling
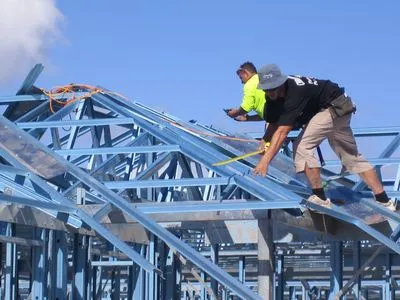
Once the steel roof trusses are fabricated, they are delivered to the construction site for installation. Handling the trusses with care during transportation and on-site is crucial to avoid any damage to their structural integrity. Trusses should be stored on level ground and protected from exposure to adverse weather conditions.
Setting the First Truss
The installation process begins with setting the first truss in place. This truss serves as a reference point for the entire roof structure. Proper alignment and positioning are critical at this stage to ensure that the subsequent trusses fit correctly and the roof system remains stable.
Truss Spacing and Alignment
During the installation progress, meticulously maintain truss spacing and alignment according to the engineer’s specifications. Proper spacing ensures even weight distribution across the roof, preventing any localized stress points. Precise alignment guarantees that the roof structure is level and plumb, avoiding any potential issues with water runoff or structural imbalances.
Securing the Trusses
They secure steel roof trusses to load-bearing walls or supports using appropriate fasteners and connectors. Make these connections following the manufacturer’s guidelines and in compliance with building codes. Using high-quality fasteners and connectors is crucial for the trusses’ stability and long-term performance.
Bracing the Trusses
During installation, temporary bracing ensures trusses’ position and stability until adding roofing materials. After fully sheathing the roof and placing the permanent roofing materials, remove the trusses’ bracing.
Conclusion
The steel roof truss installation guide is a critical phase in constructing a reliable and sturdy roofing system. Proper planning, consulting with structural engineers, and meticulous installation ensure truss stability and overall structural integrity. With this comprehensive installation guide and qualified professionals, confidently install steel roof trusses for long-lasting support and property protection.


Leave a Reply