Planning on putting an addition on a house with a hip roof? Hip roofs, with their sloped sides and complex geometry, present unique challenges for home expansions. Without proper planning, structural integrity, water drainage, and aesthetic alignment can be compromised. This guide provides practical, expert-backed steps to ensure your addition is safe, durable, and visually seamless.
Understanding Hip Roofs
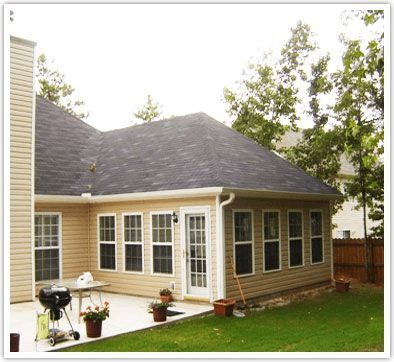
Hip roofs slope on all four sides, forming a consistent ridge. Their design offers stability against wind and better water drainage than gable roofs, but adding an extension requires careful structural consideration.
Read too: Is It Reasonable to Ask the Seller to Replace the Roof?
Key Characteristics:
- Sloped on all sides
- Central ridge with equal slopes
- Often requires complex framing for extensions
Kelebihan vs Kekurangan:
| Feature | Hip Roof | Gable Roof |
|---|---|---|
| Wind Resistance | High | Moderate |
| Complexity | High | Low |
| Water Drainage | Excellent | Moderate |
| Cost | Higher | Lower |
Planning Your Addition
Proper planning avoids costly mistakes:
- Check Local Building Codes: Verify zoning restrictions, setbacks, and roof height limitations.
- Determine Load-Bearing Walls: Identify walls that support the roof’s weight; these may need reinforcement.
- Design for Aesthetic Consistency: Align new roof slopes with existing ones for a seamless look.
- Consider Drainage: Plan gutters and downspouts to prevent water accumulation at joints.
Step-by-Step Process
1. Structural Assessment
Before adding any addition:
- Hire a structural engineer to evaluate foundation and framing.
- Determine if additional support beams or posts are required.
2. Roof Framing Design
Adding to a hip roof involves extending slopes or creating a new hip section:
- Sketch the extension with matching pitch and angles.
- Use ridge beams, rafters, and hip rafters to maintain structural integrity.
- Ensure proper overlap with existing roof to prevent leaks.
3. Roof Decking and Underlayment
- Install plywood decking over new framing.
- Apply high-quality underlayment for moisture protection.
4. Metal or Shingle Roofing Installation
- Match roofing material with existing house for aesthetics.
- Follow manufacturer instructions for fasteners and panel alignment.
- Install ridge caps, flashing, and valleys carefully to prevent leaks.
5. Inspect and Test
- Verify all seams are sealed.
- Test water drainage by spraying water over the roof.
- Inspect for alignment and slope consistency.
External Reference
For technical details about roof types and construction, see Wikipedia on Roof.
Tips for a Successful Hip Roof Addition
- Hire Experienced Contractors: Hip roof additions are complex and often require specialized expertise.
- Use Quality Materials: Durable underlayment, flashing, and roofing materials prevent leaks.
- Plan for Future Maintenance: Ensure easy access to gutters and roof areas.
- Budget for Unexpected Costs: Complex framing and roof integration can increase costs by 10–20%.
FAQ Section
Q1: Can I add a dormer to a hip roof addition?
A: Yes, but it requires careful framing to maintain structural integrity and proper water drainage.
Q2: How much does it cost to put an addition on a hip roof?
A: Costs vary widely but expect $150–$300 per square foot for framing, roofing, and finishing.
Q3: How long does a hip roof addition take to build?
A: Typically 8–12 weeks, depending on complexity, materials, and contractor availability.
Q4: Do I need a permit for a hip roof addition?
A: Yes. Most municipalities require permits for structural additions and roofing changes.
Q5: How do I match the new roof with the existing one?
A: Use the same pitch, roofing material, and color. Align ridge and hip lines for a seamless appearance.
Q6: Can I install solar panels on a hip roof addition?
A: Yes. Ensure panels are installed on south-facing slopes for maximum efficiency and check structural support.
Conclusion
Putting an addition on a house with a hip roof requires careful planning, expert framing, and precise roofing installation. By following these steps and consulting with professionals, you can create a durable, aesthetically pleasing addition that integrates seamlessly with your home.


Leave a Reply