Adding a porch can transform your home’s curb appeal and functionality. But one of the most critical steps is learning How To Tie A Porch Roof Into A House properly. If done incorrectly, you risk leaks, structural issues, and costly repairs.
In this guide, you’ll learn exactly how to connect a porch roof to your existing house roof safely, securely, and according to best construction practices. We’ll break it down into clear, actionable steps—even if you’re an advanced DIYer tackling your first structural addition.
Read too: How Long Do Standing Seam Metal Roofs Last? A Comprehensive Guide to Durability and Longevity
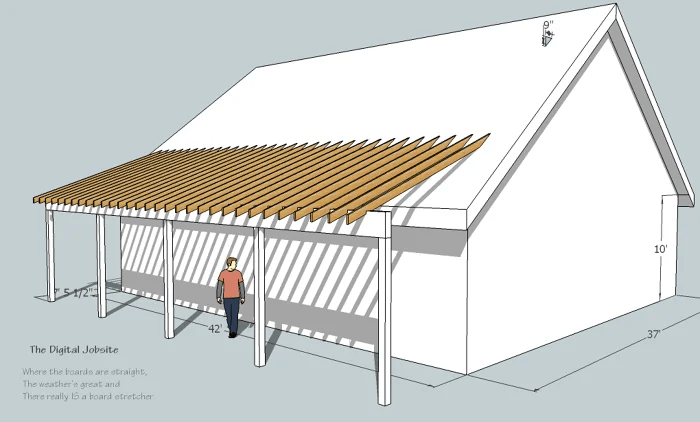
How To Tie A Porch Roof Into A House (Overview & Planning)
Before starting How To Tie A Porch Roof Into A House, understand that this process involves:
- Structural framing
- Ledger board installation
- Proper roof slope alignment
- Flashing and waterproofing
4
Most porch roofs are either:
- Shed-style (lean-to) – Simplest to tie in
- Gable-style – More complex but visually appealing
According to residential construction guidelines, improper roof tie-ins are among the top causes of water intrusion in home additions.
For general roof structure principles, see:
https://en.wikipedia.org/wiki/Roof
What Type of Porch Roof Is Easiest to Tie Into a House?
Shed Roof (Recommended for Beginners)
- Single slope
- Attaches directly below existing roof eave
- Requires simpler framing
Gable Roof (Advanced Option)
- Dual slopes
- Requires valley flashing
- More structural calculations
Recommendation: If this is your first project, choose a shed-style porch roof.
Step 1: Determine Roof Pitch and Alignment
Matching pitch improves appearance and drainage.
How To Measure Existing Roof Pitch
- Place a 12-inch level horizontally.
- Measure vertical rise.
- Example: 6 inches rise over 12 inches run = 6/12 pitch.
For porch roofs, minimum recommended slope is 2/12, but 4/12 or higher improves water runoff.
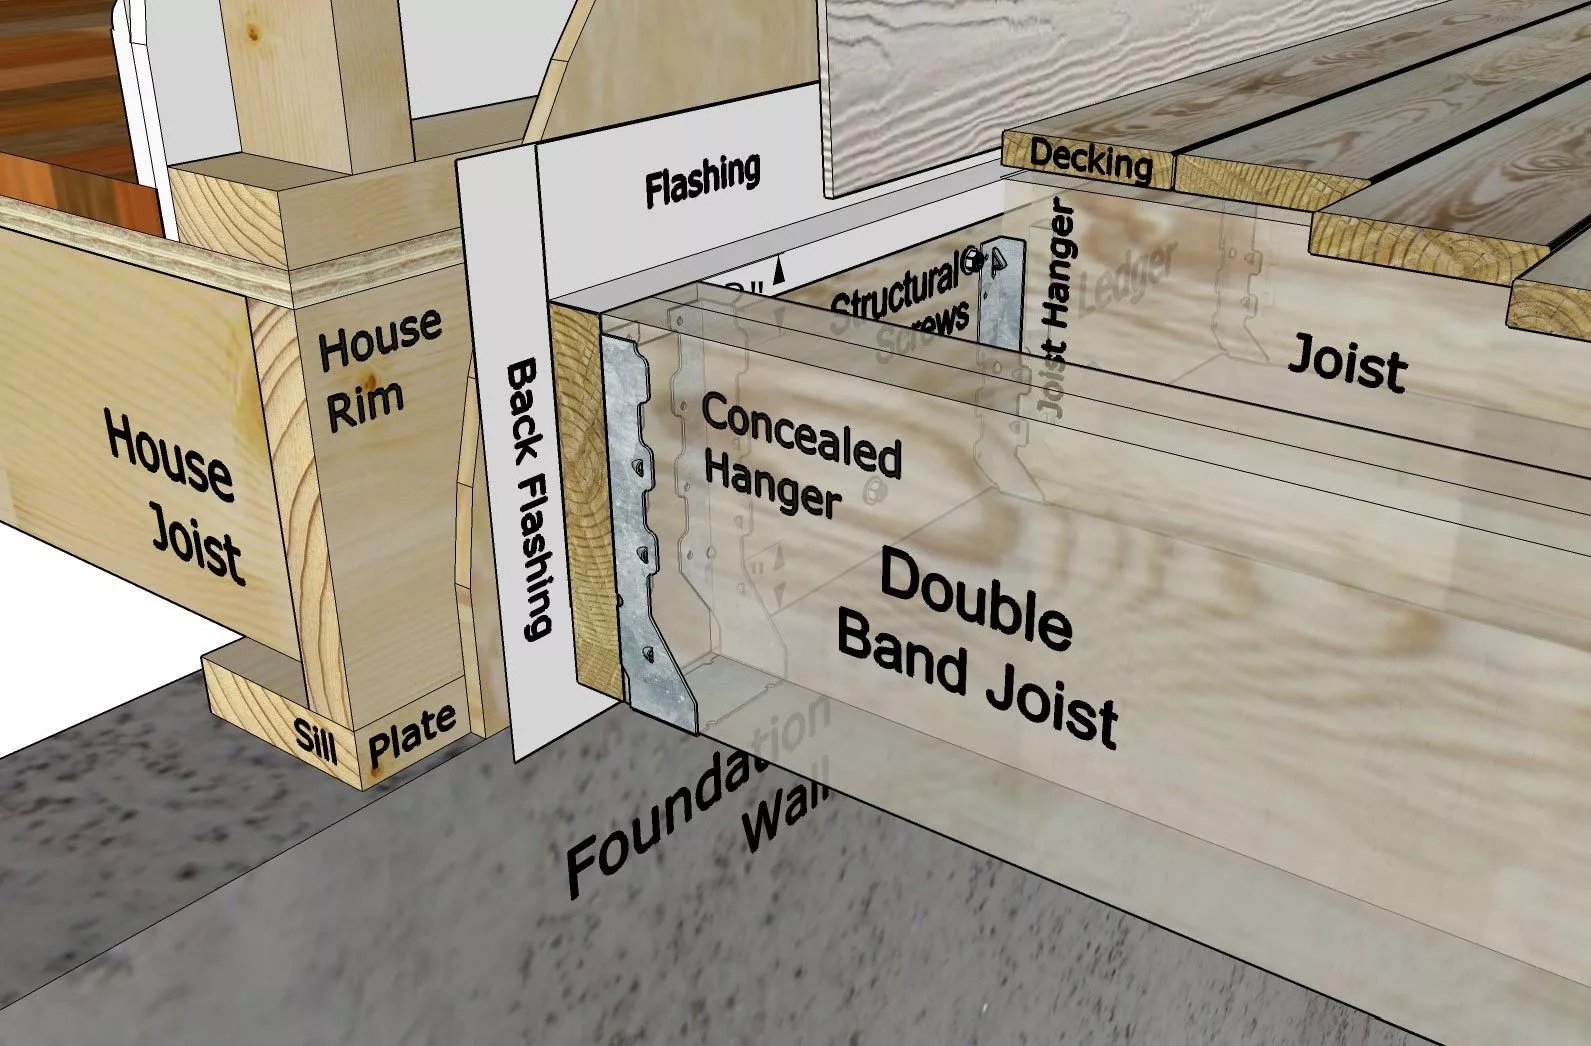
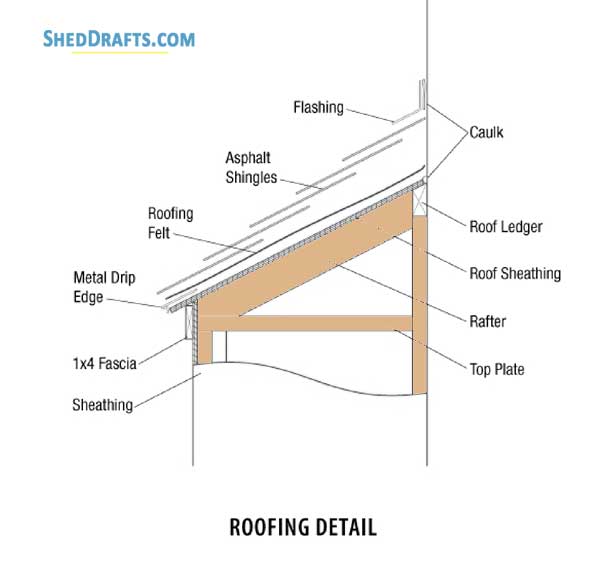
Step 2: Install the Ledger Board
The ledger board connects the porch roof to the house wall framing.
Materials Needed
- Pressure-treated 2×8 or 2×10
- ½-inch lag bolts
- Waterproof flashing membrane
Installation Steps
- Remove siding where ledger will attach.
- Position ledger at correct height.
- Drill pilot holes every 16 inches (into wall studs).
- Install lag bolts with washers.
- Apply waterproof membrane behind ledger.
Proper fastening into structural studs is critical. Never attach only to siding.
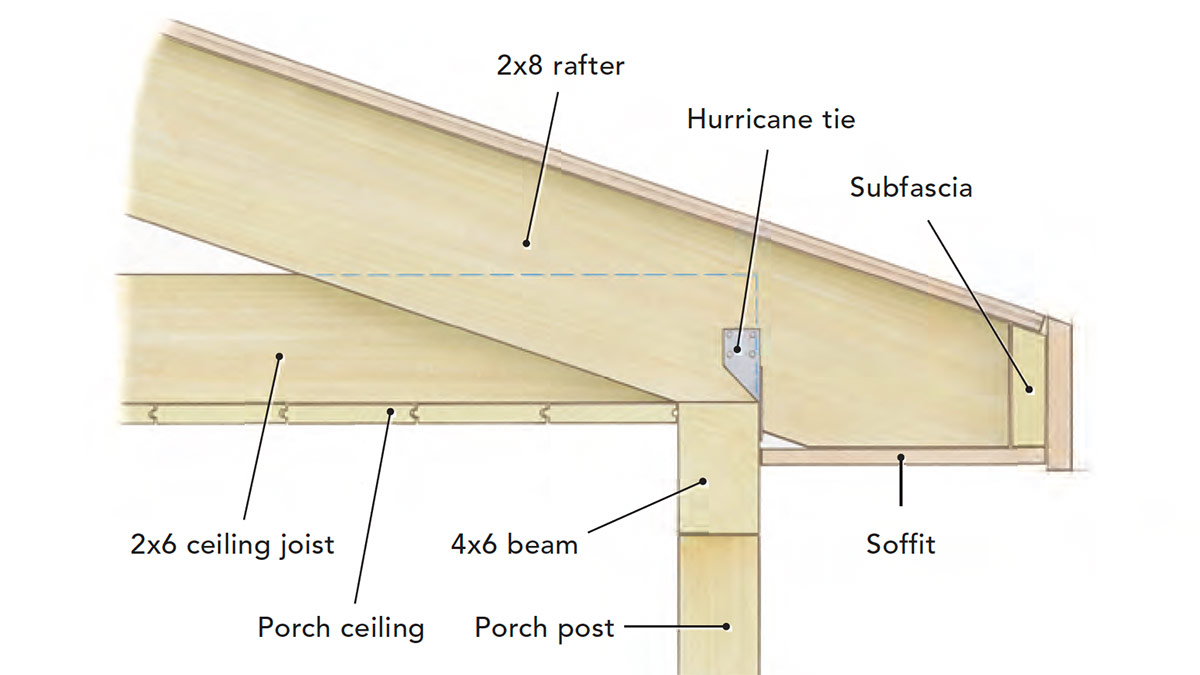
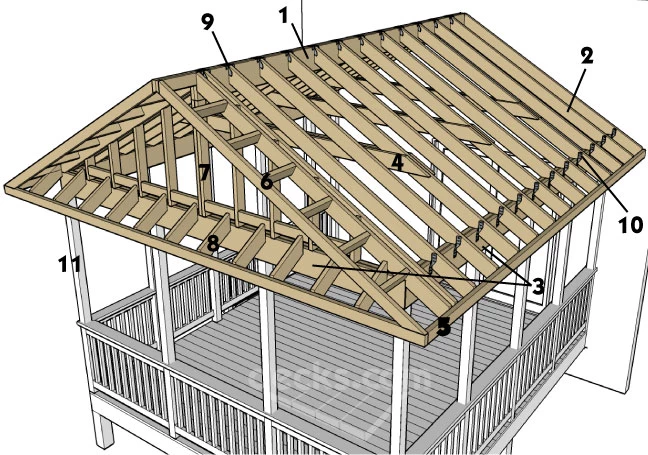
Step 3: Frame the Porch Roof Structure

4
Basic Framing Process
- Attach rafters to ledger board using joist hangers.
- Space rafters 16 inches on center.
- Install front beam supported by posts.
- Secure rafters to beam with hurricane ties.
Example dimensions:
- Rafters: 2×6 for spans under 10 feet
- Beam: Double 2×8 minimum (depending on span)
Check local building codes for exact load requirements.
Step 4: Sheathing Installation
After framing:
- Install ½-inch exterior-grade plywood.
- Leave ⅛-inch expansion gaps.
- Nail every 6 inches along edges.
- Nail every 12 inches in field.
Sheathing provides structural rigidity.
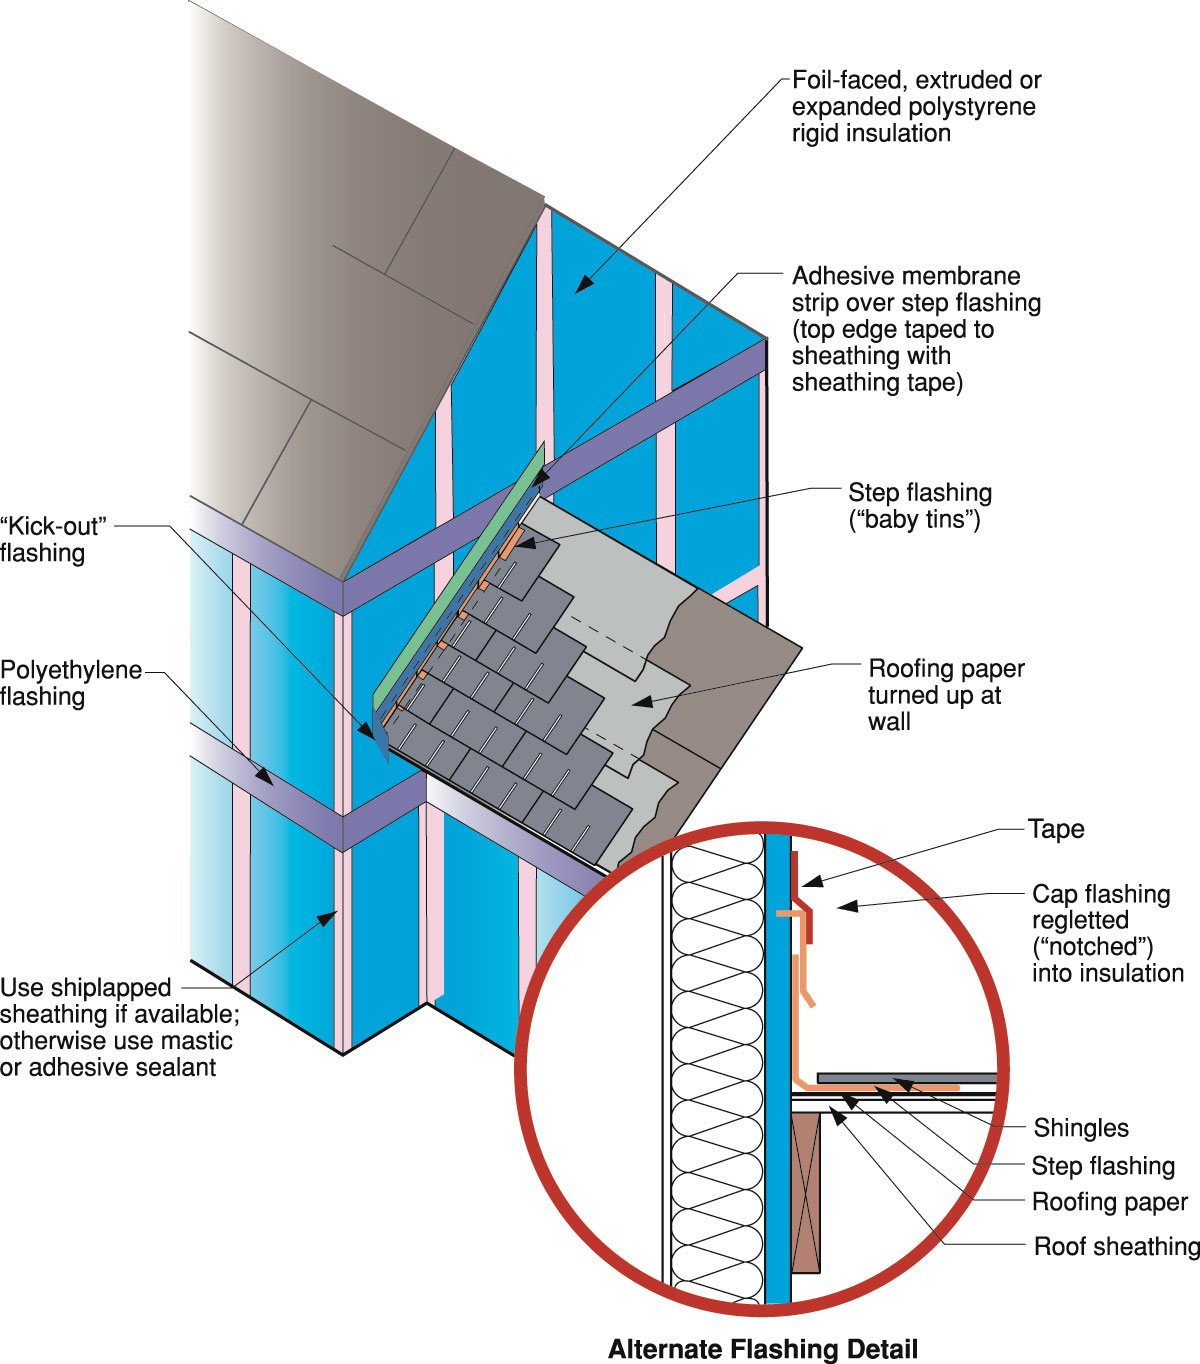
Step 5: Tie Into Existing Roof (Critical Waterproofing Step)
This is the most important part of How To Tie A Porch Roof Into A House.


4
Flashing Installation Steps
- Lift shingles above connection area.
- Install step flashing pieces (8–10 inches long).
- Overlap flashing with each shingle row.
- Install counter flashing if required.
- Seal nail heads with roofing cement.
Improper flashing is responsible for most porch roof leaks.
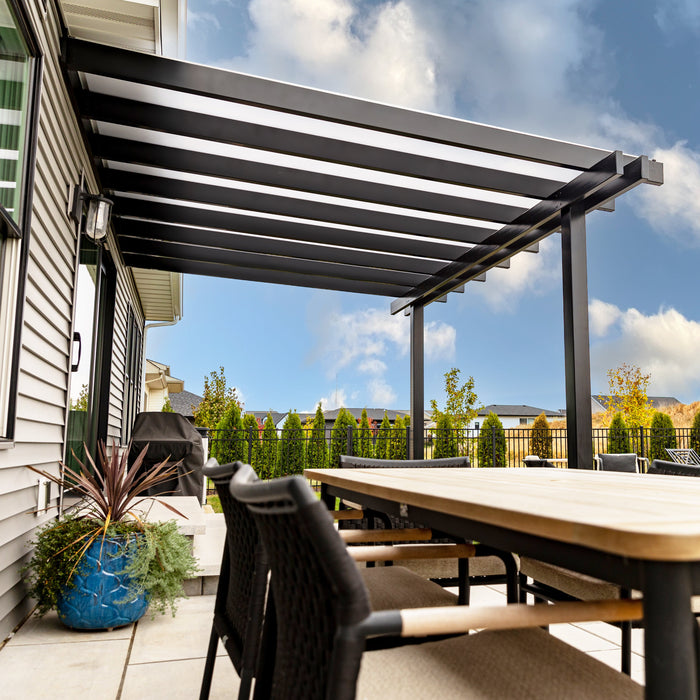
Step 6: Install Roofing Material
Match your home’s roofing material for a seamless look.
Options include:
- Asphalt shingles
- Metal panels
- Architectural shingles
Install roofing starting from bottom upward, overlapping each course correctly.
How Long Does It Take?
Small porch (8×12 ft):
- Framing: 1–2 days
- Roofing: 1 day
- Total: 2–3 days (2-person team)
How Much Does It Cost?
DIY Estimated Cost (8×12 Porch)
| Item | Approximate Cost |
|---|---|
| Lumber | $600–$1,000 |
| Roofing materials | $300–$600 |
| Flashing & hardware | $150–$300 |
| Total | $1,050–$1,900 |
Professional installation can range from $3,000–$7,000 depending on region.
Common Mistakes to Avoid
- Not attaching ledger to studs
- Incorrect pitch alignment
- Skipping flashing
- Using untreated lumber outdoors
- Ignoring local permit requirements
Always check city building codes before starting.
How Do You Prevent Leaks Where Porch Meets House?
Follow these rules:
- Install step flashing properly
- Use waterproof membrane under shingles
- Ensure minimum 2/12 slope
- Avoid driving nails through flashing
Water management is more important than appearance.
FAQ – How To Tie A Porch Roof Into A House
1. Do I need a permit to attach a porch roof?
In most U.S. municipalities, yes. Structural additions typically require permits and inspections.
2. Can I attach a porch roof without removing siding?
No. Siding must be removed so the ledger attaches directly to framing studs.
3. What is the best flashing method?
Step flashing layered with shingles provides the most reliable waterproofing.
4. Can I match a flat porch roof to a pitched house?
Yes, but drainage design must be carefully planned.
5. What lumber size should I use?
For spans under 10 feet, 2×6 rafters may suffice. Larger spans require engineering review.
6. How do I make the connection look seamless?
Match roofing material, paint trim to match house, and align pitch visually.
Conclusion
Now you understand exactly How To Tie A Porch Roof Into A House—from pitch measurement and ledger installation to flashing and final roofing.
A properly connected porch roof:
- Prevents water intrusion
- Improves structural integrity
- Enhances home value
- Creates functional outdoor space
Take your time, prioritize structural attachment and waterproofing, and always follow building codes. If this guide helped you plan your porch addition, share it with others starting their home improvement projects.


Leave a Reply