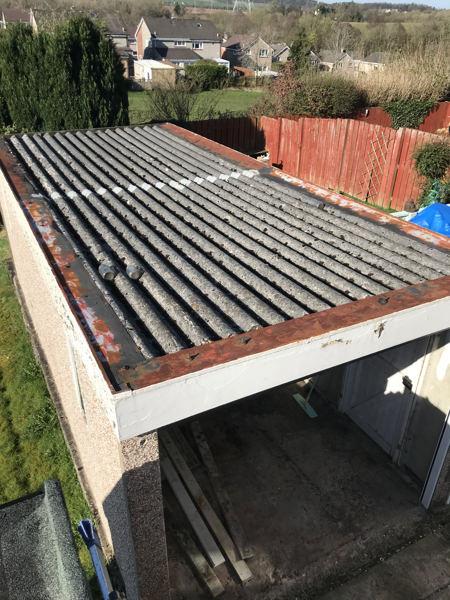
Replacing a garage roof is a necessary task to maintain the integrity of your property and ensure protection against the elements. How To Replace A Garage Roof involves careful planning, proper tools, and adherence to safety measures. In this comprehensive article, we provide a step-by-step guide on replacing a garage roof, considerations before starting, materials needed, and tips for a successful renovation project.

Preparation and Planning
Assessing the Roof Condition
Begin by inspecting the current condition of your garage roof. Look for signs of damage such as leaks, missing shingles, or sagging areas. Assess whether a partial repair or full replacement is necessary based on the extent of damage and roof lifespan.
Budgeting and Material Selection
Determine your budget for the roof replacement project, including costs for materials, tools, and labor if hiring professionals. Choose roofing materials that suit your climate, durability requirements, and aesthetic preferences. Popular options include asphalt shingles, metal roofing, and synthetic materials.
How To Replace A Garage Roof: Step-by-Step Guide
Step 1: Gather Necessary Tools and Materials
Before starting, gather all required tools and materials such as roofing nails, hammer, ladder, safety harness, roofing felt, shingles, and flashing. Ensure safety equipment such as gloves, goggles, and non-slip footwear are readily available.
Step 2: Remove Old Roofing Materials
Begin by removing the old roofing materials carefully to avoid damaging the underlying structure. Use a pry bar or roofing shovel to lift and detach shingles, nails, and any roofing debris. Dispose of old materials responsibly.
Step 3: Inspect and Repair Roof Decking
Inspect the roof decking (plywood or boards) for signs of rot, mold, or damage. Replace any compromised sections to ensure a solid foundation for the new roofing materials. Secure loose boards and address any structural issues.
Installing New Roofing Materials
Step 4: Install Roofing Underlayment
Roll out roofing underlayment across the roof deck, overlapping each row to create a waterproof barrier. Underlayment protects against moisture and improves the roof’s longevity.
Step 5: Apply Roofing Materials
Start from the bottom edge of the roof and work upwards. Install starter strips along the eaves and rake edges. Secure asphalt shingles, metal panels, or other chosen materials according to manufacturer guidelines and local building codes.
Step 6: Install Flashing and Ventilation
Place flashing around roof penetrations such as chimneys, vents, and skylights to prevent water intrusion. Install ridge vents or other ventilation systems to promote air circulation and prevent moisture buildup in the attic space.
Finishing Touches and Maintenance
Step 7: Perform Final Inspections
Conduct a thorough inspection of the newly installed garage roof. Check for proper shingle alignment, secure flashing, and sealed edges. Address any gaps or imperfections promptly to prevent future issues.
Read too: Is It Reasonable to Ask the Seller to Replace the Roof?
Step 8: Clean Up and Dispose of Debris
Remove debris from the work area, including old roofing materials and packaging from new supplies. Dispose of waste materials responsibly according to local regulations or recycling guidelines.
Conclusion
Replacing a garage roof is a manageable project with the right knowledge and preparation. By following our step-by-step guide on How To Replace A Garage Roof, homeowners can ensure a safe and effective renovation that enhances the durability and appearance of their property. Whether tackling the project independently or hiring professionals, prioritizing quality materials and craftsmanship is key to long-term roof performance.
For expert advice and assistance with your garage roof replacement project, consult with licensed roofing contractors who offer specialized services and guidance tailored to your needs.


Leave a Reply