Spanish tile roofs are known for their beauty and durability, but over time, they may require repairs due to weathering, damage, or wear. How To Repair Spanish Tile Roof involves understanding the unique characteristics of these tiles and using proper techniques to ensure a seamless repair. In this article, we provide a detailed step-by-step guide on repairing Spanish tile roofs, common issues to watch for, materials needed, and maintenance tips to extend the lifespan of your roof.
Understanding Spanish Tile Roof Repair
What Makes Spanish Tile Roof Unique?
Spanish tile roofs, often made from clay or concrete, feature distinctive curved shapes that interlock to create a watertight barrier. Repairing these tiles requires careful handling to maintain their integrity and aesthetic appeal.
How To Repair Spanish Tile Roof: Step-by-Step Guide
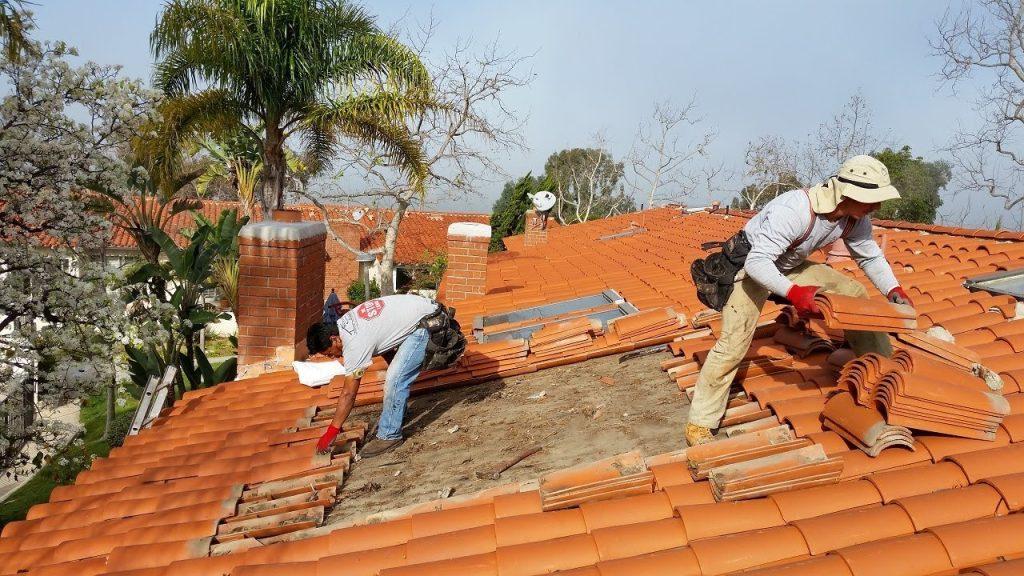
Step 1: Assess the Damage
Begin by inspecting the roof for cracked, chipped, or displaced tiles. Identify areas where water penetration or structural damage may have occurred. Note any underlying issues such as damaged underlayment or flashing.
Step 2: Gather Necessary Tools and Materials
Prepare tools such as a ladder, safety harness, hammer, roofing nails, replacement tiles, mortar or roofing cement, and a trowel. Ensure safety gear including gloves and goggles are worn throughout the repair process.
Repair Techniques for Spanish Tile Roof
Step 3: Remove Damaged Tiles
Carefully lift surrounding tiles using a pry bar or specialized tile removal tool. Remove damaged tiles without causing further breakage to neighboring tiles or roof components. Clean debris from the exposed area.
Step 4: Replace Underlayment and Flashing (if necessary)
Inspect and replace damaged underlayment or flashing to restore the roof’s waterproofing and structural integrity. Use weather-resistant materials that complement the longevity of Spanish tile roofing.
Step 5: Install Replacement Tiles
Apply roofing cement or mortar to the underside of the replacement tile. Slide the tile into place, ensuring it aligns with surrounding tiles and creates a seamless fit. Press down gently to secure the tile in position.
Step 6: Secure and Seal Tiles
Secure replacement tiles with roofing nails or clips as recommended by the manufacturer. Apply additional roofing cement around the edges of the tile to create a watertight seal. Smooth any excess mortar or cement for a clean finish.
Maintenance Tips for Spanish Tile Roof
Regular Inspections
Schedule annual inspections to identify potential issues early. Look for signs of cracked tiles, moss or algae growth, and debris accumulation that could impact roof drainage.
Clear Debris and Maintain Gutters
Keep gutters and drainage systems clear of leaves and debris to prevent water backup and potential roof damage. Trim overhanging branches that could scratch or dislodge tiles during storms.
Read too: Is It Reasonable to Ask the Seller to Replace the Roof?
Conclusion
Repairing a Spanish tile roof requires attention to detail and adherence to specific techniques suited to these unique roofing materials. By following our step-by-step guide on How To Repair Spanish Tile Roof, homeowners can address minor issues promptly and prolong the lifespan of their roof. Whether tackling repairs independently or seeking professional assistance, prioritizing quality materials and craftsmanship ensures long-term roof performance and curb appeal.
For expert advice and assistance with Spanish tile roof repairs, consult with experienced roofing contractors familiar with the intricacies of clay and concrete tile roofing systems. Ensure your roof continues to protect and enhance your home’s value for years to come.


Leave a Reply