Building a gingerbread house is a fun and festive holiday tradition, but giving it the right shape—especially the roof—can be a challenging task. One of the most commonly asked questions during this process is: “How can I give shape to a ginger house roof?” Whether you’re a beginner baker or a seasoned gingerbread architect, crafting a well-shaped and stable roof is key to creating a stunning centerpiece.
This guide will walk you through everything you need to know about shaping, designing, and assembling the roof of a gingerbread house. We’ll explore materials, angles, icing techniques, and creative shaping methods to help you make a structurally sound and visually delightful gingerbread house.
Read too: How To Replace Roof Shingles That Blew Off: A Comprehensive Guide
Why Roof Shape Matters in Gingerbread House Construction
The roof is not only a crucial structural element of a gingerbread house—it’s also the most visually prominent feature. A poorly shaped or collapsing roof can ruin your hard work. But when done right, it adds charm, dimension, and realism to your holiday creation.
Knowing how can I give shape to a ginger house roof ensures:
- Structural integrity (no caving or collapsing)
- Beautiful angles for decoration
- Easy alignment with side and front panels
- A sturdy surface for candy, icing, or snowy effects
Understanding the Basics of Gingerbread House Roof Design
Before diving into shaping techniques, it’s important to understand how gingerbread house roofs are typically designed. Most roofs fall into these styles:
- Gable Roof – A triangular classic shape with two sloping panels.
- A-Frame Roof – Steeply pitched triangular design from ground to top.
- Flat Roof – Easier to assemble, but less traditional.
- Curved or Dome Roof – Decorative but challenging to bake and support.
How Can I Give Shape To A Ginger House Roof — Step-by-Step Guide
This section will answer the core question: how can I give shape to a ginger house roof with practical steps, tested techniques, and pro tips to guide you from dough to decoration.
Step 1: Choose the Right Template
Start by selecting or designing a gingerbread house template that includes accurate roof dimensions. Templates are essential to ensure proper alignment and even shaping.
Tip: Print templates on cardstock to trace onto rolled-out dough.
For a gable roof, you’ll typically need:
- Two large rectangular roof panels
- Two side panels with triangular peaks
- Two front/back panels with matching peaks
Step 2: Cut Dough Precisely
Using your template, cut the gingerbread dough precisely to shape. Use a sharp knife or pizza cutter for straight lines.
Important: Avoid stretching the dough when transferring to the baking tray. Warped panels lead to a misaligned roof.
Step 3: Pre-Bake Shaping (Optional but Advanced)
If you want a curved or dome-shaped roof, you must shape it before baking. Here’s how:
- Wrap dough over a metal can, rolling pin, or oven-safe dome mold.
- Lightly grease the surface before laying dough on it.
- Bake the dough while it’s curved. This method requires close monitoring to avoid burning or cracking.
This answers a unique variation of how can I give shape to a ginger house roof for those aiming to create rounded or stylized roofs.
Step 4: Bake and Let Cool Thoroughly
Bake your gingerbread panels according to the recipe—usually at 350°F (175°C) for 10–15 minutes.
Once baked:
- Place panels on a flat surface.
- Let them cool completely before handling or assembling.
Warm panels are fragile and likely to break.
Step 5: Use the Right Icing for Support
Royal icing is the best adhesive for gingerbread houses. It hardens like cement and supports the weight of roof panels and decorations.
Basic Royal Icing Recipe:
- 3 cups powdered sugar
- 2 egg whites or 4 tbsp meringue powder
- ½ tsp lemon juice (optional for shine)
- Beat until stiff peaks form.
Apply thick lines of icing along the top edge of the side walls and the gables before placing roof panels.
Step 6: Assemble One Panel at a Time
Hold each roof panel in place for 1–2 minutes until it starts to set. Use cans or jars on each side to support them while drying.
Pro tip: Assemble on a piece of cardboard or sturdy base to easily move the house later.
Let icing dry for at least 2–3 hours, ideally overnight, before decorating.
Tricks for Curved or Slanted Roofs
If you’re asking, “How can I give shape to a ginger house roof with curves or slopes?” here are some creative tips:
- Use foil molds: Shape aluminum foil into gentle curves and bake the dough on top.
- Drape over bowls: Small oven-safe bowls make great domed roofs.
- Carve foam templates: Bake flat and while warm, bend panels over foam shapes (carefully!).
- Use pretzel rods or cookie sticks: For log cabin-style slanted roofing.
Decor Tips After Shaping the Roof
Once the roof is assembled and shaped, it’s time to decorate! Here’s how to elevate your gingerbread roof:
- Snowy look: Pipe thick royal icing along edges and dust with powdered sugar.
- Shingles: Use mini cookies, cereal squares, or chocolate pieces.
- Lights and candies: Add gumdrops, mini M&Ms, or licorice along the seams.
Be careful not to overload the roof with heavy candies—it could cause the icing to collapse or break the structure.
Common Mistakes and How to Avoid Them
Even experienced bakers can run into problems when shaping a gingerbread roof. Avoid these pitfalls:
| Mistake | Solution |
|---|---|
| Roof panels don’t fit | Double-check measurements and trim after baking |
| Panels slide off | Use thicker royal icing and let dry longer |
| Curved panels crack | Bake with support, cool slowly |
| Roof caves in | Reinforce with pretzel rods or candy cane beams inside |
Creative Alternatives for Roof Designs
Looking to wow your friends or family? Try these creative roof shapes:
- Victorian-Style Roof: Add layered tiles with fondant or chocolate slices.
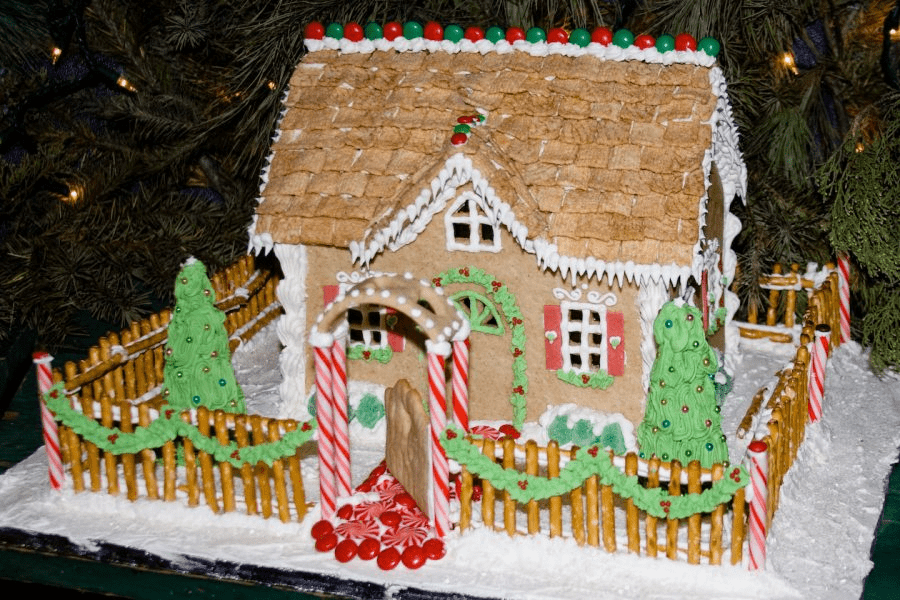
- Thatched Roof: Shredded wheat or crushed cookies give a textured look.
- Icicle Roof: Pipe thin lines of royal icing to mimic hanging icicles.
These creative approaches still stem from the core idea of how can I give shape to a ginger house roof, but with a twist of flair.
Final Tips for Gingerbread Roof Success
- Measure twice, cut once: Accuracy in dough cutting is crucial.
- Let panels dry upright before roof assembly to avoid collapse.
- Decorate the roof last after it has fully dried to avoid ruining the structure.
- Store your gingerbread house in a dry, cool place to prevent moisture from weakening the icing.
Conclusion
So, how can I give shape to a ginger house roof? With careful planning, proper tools, and a bit of patience, you can create a sturdy and beautifully shaped gingerbread roof—flat, curved, domed, or sloped. The roof is both a structural necessity and a creative canvas, so take the time to craft it thoughtfully.
Whether you’re preparing for a competition, making memories with family, or simply indulging in a holiday hobby, the satisfaction of building (and eating!) a gingerbread house is worth the effort.


Leave a Reply