Adding lattice to your patio rafters can enhance the aesthetic appeal of your outdoor space while providing partial shade, support for climbing plants, and improved airflow. Learning how to install lattice on patio rafters to house roof ensures a secure, durable installation that complements your home’s design.
Whether you are creating a cozy patio area, a functional outdoor space, or a decorative feature, installing lattice requires proper planning, tools, and execution. This comprehensive guide will provide step-by-step instructions, helpful tips, and maintenance advice for achieving a professional result.
Understanding Lattice and Its Benefits
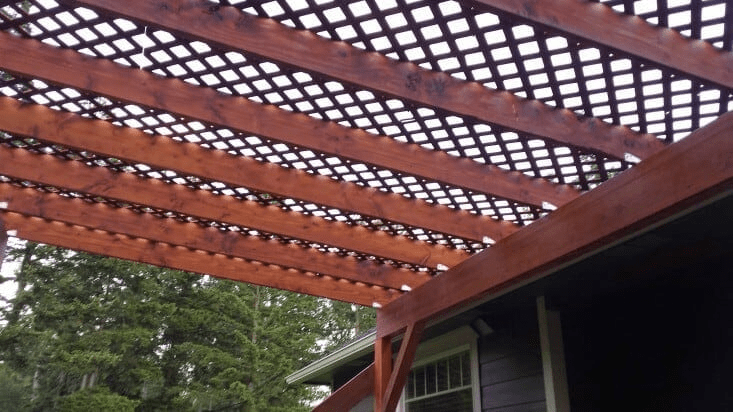
Lattice is a crisscross framework made from wood, vinyl, or composite materials. When installed on patio rafters, it offers several benefits:
- Partial Shade: Reduces direct sunlight while maintaining airflow.
- Decorative Appeal: Enhances the visual appeal of patios, decks, and pergolas.
- Plant Support: Provides a structure for vines and climbing plants.
- Privacy: Creates a subtle barrier without completely blocking the view.
Knowing the advantages helps homeowners appreciate the importance of learning how to install lattice on patio rafters to house roof correctly.
Tools and Materials Needed
Before starting the installation, gather the following tools and materials:
- Lattice panels (wood, vinyl, or composite)
- Measuring tape and pencil
- Circular saw or handsaw
- Drill with screws or nails
- Exterior-grade screws or nails
- L-brackets or framing strips
- Safety gloves and goggles
- Ladder or scaffolding
- Wood or vinyl trim (optional)
Having these items ready ensures a smooth and safe installation process.
Read too: Hail Damage Roof Repair: Essential Guide to Restoring Your Home’s Protection
Step-by-Step Guide: How To Install Lattice On Patio Rafters To House Roof
1. Plan the Layout
Proper planning is essential for a neat installation:
- Measure the area between patio rafters and the house roof.
- Decide whether lattice panels will run vertically, horizontally, or diagonally.
- Account for any overhangs or gaps needed for water drainage.
Planning ensures proper alignment and minimizes waste of materials.
2. Cut Lattice Panels to Size
- Measure each section between rafters and the house.
- Use a circular saw or handsaw to cut lattice panels to the correct size.
- Ensure clean cuts to prevent splintering, especially with wood lattice.
Properly sized panels make installation easier and provide a professional finish.
3. Install Framing or Support Strips
- Attach wood or vinyl strips along the rafters and house edge where the lattice will be mounted.
- Ensure the strips are level and securely fastened using screws or nails.
- Framing strips provide a stable base for attaching the lattice panels.
This step is crucial for stability and longevity of the installation.
4. Attach Lattice Panels
- Position the lattice panel against the framing strips.
- Use screws or nails to secure the panel at each intersection or along the edges.
- Maintain consistent spacing between panels for uniform appearance.
Take care to avoid over-tightening fasteners, which can damage lattice material.
5. Trim Edges and Add Finishing Touches
- Install trim or molding along the edges to conceal gaps and fasteners.
- Sand or smooth any rough edges for wood lattice.
- Paint or stain the lattice as desired to match your patio or home exterior.
Finishing touches enhance both durability and visual appeal.
6. Inspect and Adjust
- Ensure all panels are securely attached and level.
- Check for any gaps or uneven alignment.
- Make minor adjustments to guarantee a clean, professional appearance.
Regular inspection during installation prevents future issues and ensures long-term stability.
Tips for a Durable and Long-Lasting Installation
- Choose Weather-Resistant Materials: Opt for treated wood, vinyl, or composite lattice to withstand sun and moisture.
- Allow for Expansion: Leave small gaps between panels and trim to accommodate temperature changes.
- Use Exterior-Grade Fasteners: Screws or nails resistant to rust will increase lifespan.
- Regular Maintenance: Clean lattice annually and repaint or reseal wooden panels to prevent deterioration.
Following these tips ensures your patio lattice remains attractive and functional for years.
Common Mistakes to Avoid
- Incorrect Measurements: Always double-check measurements to avoid gaps or misaligned panels.
- Skipping Support Strips: Attaching lattice directly to rafters without framing may lead to sagging or damage.
- Improper Fasteners: Using indoor-grade nails or screws can cause rust and weaken the structure.
- Neglecting Finishing: Exposed edges or untreated wood can deteriorate quickly from weather exposure.
Avoiding these mistakes ensures a sturdy, visually appealing installation.
Benefits of Proper Lattice Installation
Properly installed lattice provides multiple advantages:
- Enhanced Aesthetics: Complements the house and patio design.
- Improved Comfort: Provides shade while allowing airflow.
- Versatility: Supports plants and can create semi-private areas.
- Durability: Proper fastening and materials ensure long-term performance.
These benefits make the effort of learning how to install lattice on patio rafters to house roof worthwhile.
Maintenance and Care
Maintaining your lattice installation extends its life and keeps it looking fresh:
- Inspect panels for damage or loose fasteners yearly.
- Clean vinyl or composite lattice with mild soap and water.
- Repaint or reseal wooden lattice every 2–3 years.
- Trim nearby plants to prevent interference with lattice panels.
Consistent maintenance preserves both appearance and functionality of the patio structure.
Conclusion
Learning how to install lattice on patio rafters to house roof is an excellent way to enhance your patio’s beauty, comfort, and functionality. By planning the layout, cutting panels accurately, installing support strips, and securing panels properly, you can achieve a professional-looking result.
With proper maintenance and care, lattice adds shade, privacy, and style to your outdoor space, providing long-term value for your home. Following this step-by-step guide ensures a secure, durable, and visually appealing installation that homeowners can enjoy for years to come.


Leave a Reply