The timeless beauty and durability of concrete and clay roof tiles have made them a popular choice for homeowners and builders alike. Whether you’re considering a new tile roof or planning to replace an existing one, proper installation is crucial to ensure longevity and performance. In this comprehensive guide, we will walk you through the concrete and clay roof tile installation process, offering valuable insights and tips to help you achieve a roof that not only protects your home but also enhances its aesthetic appeal.
Understanding Concrete and Clay Roof Tiles
Types of Tiles
Concrete and clay roof tiles come in various profiles and styles, allowing homeowners to choose a look that complements their architectural preferences. From the classic Spanish “S” tile to flat tiles and barrel tiles, each type offers a unique appearance.
Benefits of Concrete and Clay Tiles
Concrete and clay tiles are renowned for their numerous advantages:
- Durability: These tiles can last for decades, often outlasting other roofing materials.
- Fire Resistance: They are inherently fire-resistant, adding an extra layer of protection to your home.
- Energy Efficiency: Tiles can help regulate indoor temperatures, reducing heating and cooling costs.
- Aesthetics: Their elegant and timeless appearance enhances the curb appeal of any home.
The Installation Process
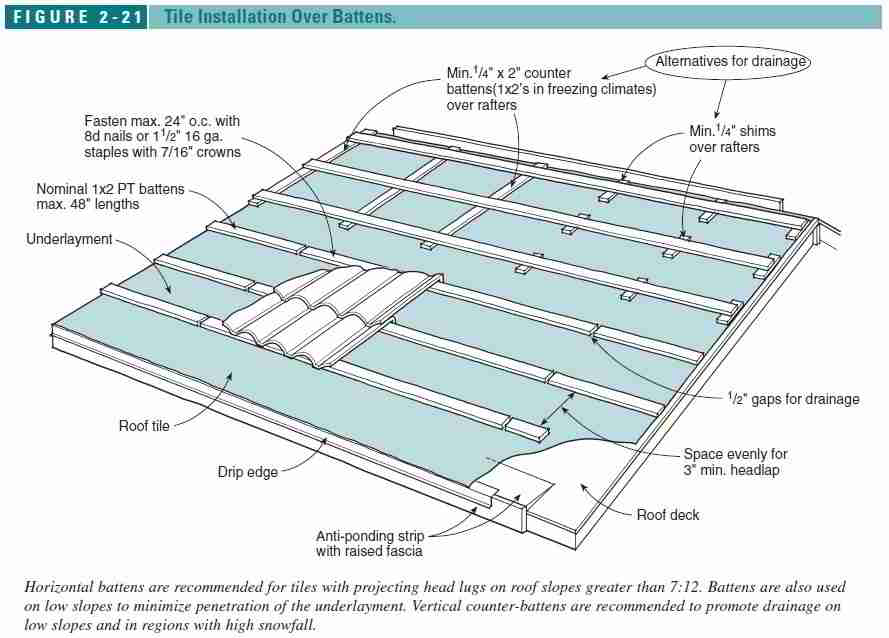
1. Roof Preparation
Before installing concrete and clay tiles, the roof structure must be prepared. This includes:
- Ensuring the roof deck is clean, dry, and free from debris.
- Installing an underlayment to provide an additional weather barrier.
- Checking for proper ventilation to prevent moisture buildup.
2. Tile Layout and Placement
- Begin by locating the roof’s centerline and installing a starter course of tiles along this line.
- Lay out tiles from the centerline to the eaves and hips to ensure a symmetrical appearance.
- Secure tiles with roofing nails or screws, making sure they are properly aligned and spaced.
3. Flashing and Edging
- Install flashing around roof penetrations such as chimneys and vents to prevent water infiltration.
- Use special edging tiles to finish the perimeter of the roof, providing a clean and watertight edge.
4. Ridge and Hip Installation
- Secure ridge and hip tiles along the roof’s ridgeline and hips.
- Use mortar or foam adhesive to bond these tiles and create a weatherproof seal.
5. Valleys and Transition Areas
- Pay special attention to valleys and areas where two roof sections meet. Install valley flashing to channel water away from these vulnerable areas.
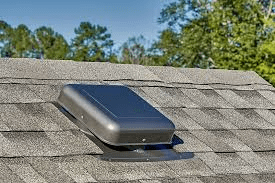
6. Ventilation
- Adequate roof ventilation is crucial for temperature regulation and moisture prevention.
- Install roof vents and ensure that the attic space is properly ventilated.
Maintaining Your Tile Roof
A well-installed concrete and clay tile roof can provide decades of reliable service. To maximize its lifespan, follow these maintenance tips:
- Regularly inspect for damaged or displaced tiles and replace them promptly.
- Clean the roof’s surface to remove debris, moss, and algae growth.
- Trim nearby trees to prevent branches from damaging the tiles.
- Check flashing and sealants for signs of wear and deterioration.
Conclusion
Concrete and clay roof tile installation manual requires precision and attention to detail, but the results are well worth the effort. A properly installed tile roof not only offers exceptional durability and protection but also adds timeless beauty to your home. Whether you’re a homeowner embarking on a DIY project or a professional roofer, this installation manual serves as a valuable resource to ensure that your concrete and clay tile roof stands the test of time.


Leave a Reply