Are you considering installing an Equinox Louvered Roof in your outdoor space? Look no further, as this article will provide you with step-by-step instructions on how to install this innovative and functional roofing system. Whether you’re a seasoned DIY enthusiast or a first-time installer, this guide will help you successfully set up your Equinox Louvered Roof and create an inviting outdoor environment for relaxation and entertainment.
Preparing for Installation:
Before diving into the installation process, it’s important to gather all the necessary tools and materials. The Equinox Louvered Roof installation kit typically includes the roof panels, support beams, brackets, screws, and a control system. Additionally, you will need a ladder, measuring tape, level, drill, and screwdriver. Ensure that you have all these items ready before you begin the installation process.
Step 1: Site Preparation The first step is to prepare the installation site.
Clear the area of any debris, and ensure that the ground is level. This will provide a stable foundation for your Equinox Louvered Roof. Take measurements and mark the locations where the support beams will be installed.
Step 2: Installing the Support Beams
Using the measurements you previously marked, position and secure the support beams to the designated areas. Ensure that they are level and properly aligned. The support beams serve as the framework for the louvers and play a crucial role in the stability of the roof system.
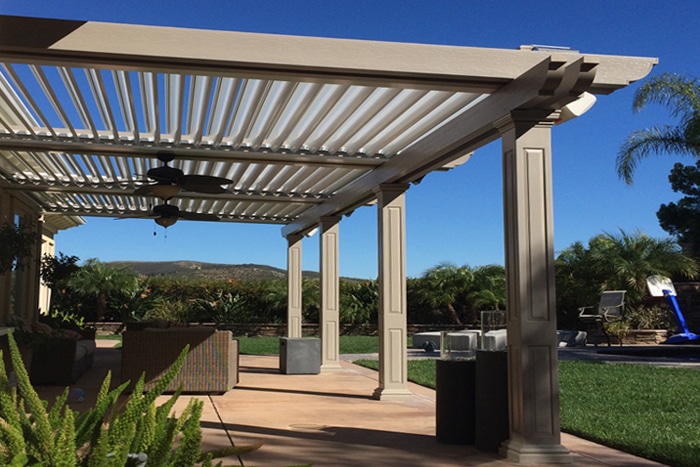
Step 3: Attaching the Louvered Panels
Once the support beams are securely in place, it’s time to attach the louvered panels. These panels are designed to open and close, allowing you to control the amount of sunlight and ventilation in your outdoor space. Carefully follow the manufacturer’s instructions on how to properly attach and interlock the panels to ensure a tight fit and smooth operation.
Step 4: Electrical Connections
If your Equinox Louvered Roof is equipped with a motorized control system, you will need to make the necessary electrical connections. This typically involves connecting the control box to a power source and wiring the control switch. It’s crucial to follow the wiring diagram provided by the manufacturer and ensure that all connections are secure.
Step 5: Testing and Adjustments
Once the installation is complete, it’s important to test the functionality of your Equinox Louvered Roof. Open and close the panels to verify that they operate smoothly. Check the electrical connections and make any necessary adjustments to ensure proper functioning.
Conclusion:
In conclusion, installing an Equinox Louvered Roof can enhance your outdoor living space by providing shade, protection from the elements, and control over sunlight and ventilation. By following the step-by-step instructions provided in this guide, you can successfully install this innovative roofing system. Remember to carefully read and follow the manufacturer’s instructions for your specific model to ensure a safe and efficient installation process. Enjoy the benefits of your Equinox Louvered Roof and create a comfortable outdoor oasis for years to come.


Leave a Reply