If you’re a handy homeowner looking to upgrade your roofing system, you might be asking, “How do I install a metal roof on my house?” Whether you’re doing it to save money, extend roof life, or modernize your home’s look, installing a metal roof is one of the most durable and energy-efficient choices available.
This in-depth, easy-to-follow guide walks you through everything you need to know about metal roofing—from preparation and tools to final installation and safety tips. By the end, you’ll understand not just how to install a metal roof, but how to do it correctly and safely.
Read too: How To Replace Roof Shingles That Blew Off: A Comprehensive Guide
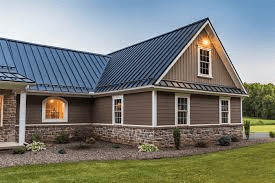
Why Choose Metal Roofing?
Before diving into the installation steps, it’s helpful to understand why metal roofs are increasingly popular among homeowners.
Benefits of Metal Roofs:
- Longevity: Can last 40–70 years compared to asphalt shingles (15–20 years).
- Durability: Resistant to fire, wind, hail, and pests.
- Energy Efficiency: Reflects solar heat, reducing cooling costs.
- Low Maintenance: Less prone to leaks and requires minimal upkeep.
- Eco-Friendly: Often made from recycled materials and fully recyclable.
Given these advantages, it’s no surprise that many are exploring how do I install a metal roof on my house to cut costs and ensure quality.
Tools & Materials You’ll Need
To start your project right, gather the essential tools and materials for installing a metal roof:
Tools:
- Safety harness & ladder
- Cordless drill or impact driver
- Tin snips or metal-cutting shears
- Chalk line
- Measuring tape
- Metal roofing screws
- Screw gun with magnetic driver
- Circular saw with metal-cutting blade
- Utility knife
- Work gloves & safety goggles
Materials:
- Metal roof panels (corrugated, standing seam, or ribbed)
- Underlayment (synthetic preferred over felt)
- Closure strips
- Ridge cap
- Eave trim and flashing
- Sealant/caulk
- Roofing nails or screws (zinc-coated preferred)
Make sure to check local building codes before purchasing materials—some municipalities have restrictions on roofing types, panel size, or attachment methods.
Preparation Is Key
1. Measure Your Roof Area
Start by calculating the square footage of your roof. Multiply the length by the width of each section and add them together. Add 10–15% to your total for waste or miscuts.
2. Inspect the Roof Decking
Your roof decking (plywood sheathing beneath the old roof) must be structurally sound. If it shows signs of rot or sagging, replace or repair it before proceeding.
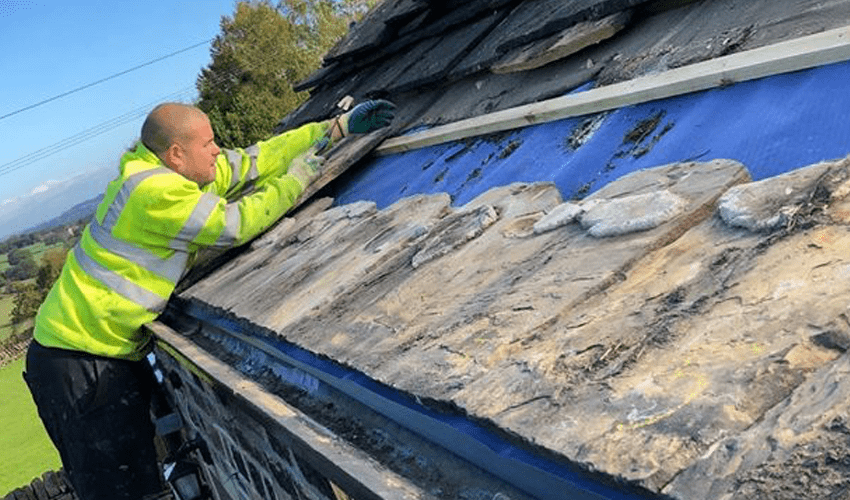
3. Remove Old Roofing (Optional)
Some homeowners install metal roofing over existing shingles. While this is possible, it’s often better to remove old shingles for:
- Better inspection
- Smoother underlayment application
- Avoiding trapped moisture
Check your local code—some areas limit the number of layers you can cover.
Installing Underlayment
This is your roof’s moisture barrier and helps protect against leaks.
Steps:
- Roll out synthetic underlayment horizontally, starting at the eaves and working up.
- Overlap each row by at least 4 inches.
- Secure it with roofing nails or plastic cap nails every 12–18 inches.
- Use a utility knife to trim excess around edges, vents, and chimneys.
Don’t skip underlayment—it’s vital, especially when learning how do I install a metal roof on my house for the first time.
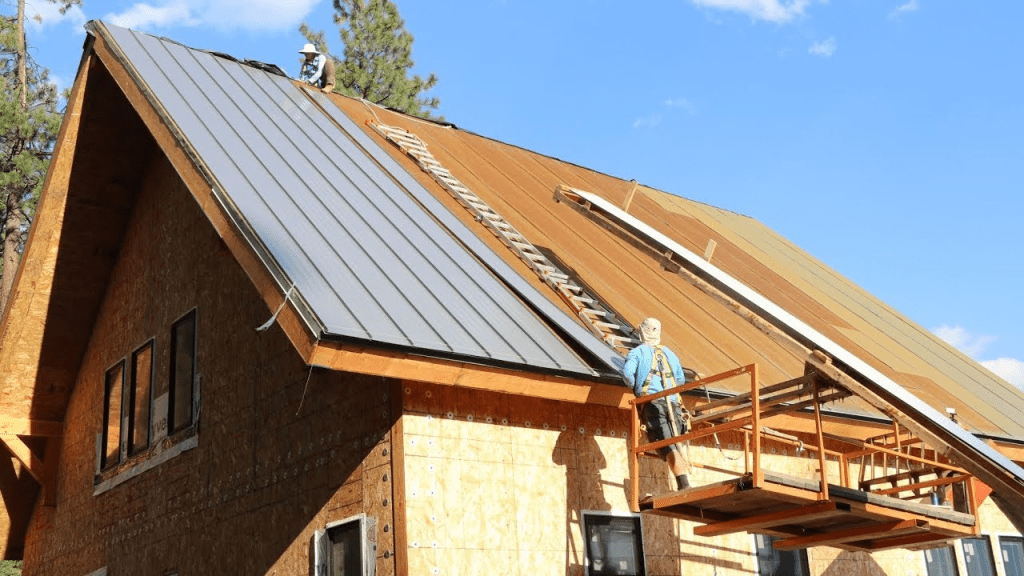
How Do I Install A Metal Roof On My House? Step-by-Step Guide
Let’s get into the core of this article—the actual metal roof installation process. Whether using corrugated panels or standing seam metal, the process is similar.
Step 1: Install Drip Edge and Eave Trim
- Install a metal drip edge along the eaves using roofing nails.
- Overlap trim pieces by 1 inch at each end.
- Use sealant where overlaps occur.
Step 2: Lay Down the Starter Strip
A starter strip locks the bottom edge of your metal panels in place. Some panels may have an integrated starter strip; if not, install a metal one along the eave line.
Step 3: Place the First Panel
- Start from the bottom corner of the roof (left or right depending on your panel orientation).
- Place the first panel square to the roof edge, overhanging the eaves by about 1 inch.
- Use chalk lines to keep panels aligned.
Step 4: Secure the Panels
- Fasten metal panels to the decking using metal roofing screws with rubber washers.
- Place screws every 12–18 inches along the panel’s flat areas.
- Do not over-tighten—this can deform the panel or damage the rubber washer.
Step 5: Overlap the Next Panel
- Overlap panels by one ridge (for corrugated) or per manufacturer instructions.
- Seal overlaps with a butyl tape or approved caulk to prevent moisture intrusion.
Step 6: Continue Across the Roof
- Continue placing panels across the roof, ensuring consistent overlaps and screw placement.
- Use chalk lines frequently to maintain alignment.
Step 7: Install Ridge Cap
- Apply closure strips along the roof’s ridge to block insects and water.
- Place ridge cap over closures and secure with metal roofing screws.
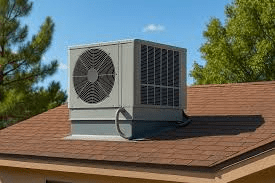
Step 8: Add Flashing Around Penetrations
- Flash chimneys, skylights, and vents with compatible metal flashing.
- Seal all joints with roofing sealant or caulk to ensure waterproofing.
Step 9: Inspect and Seal
- Walk the roof carefully (using soft shoes) to inspect for missed screws or loose edges.
- Apply sealant at screw heads, joints, and cuts.
Common Mistakes to Avoid
Even experienced DIYers can make errors. Avoid these pitfalls when figuring out how do I install a metal roof on my house:
- Misaligned panels: Always use chalk lines for guidance.
- Overdriven screws: Damages washers and creates leaks.
- Inadequate flashing: Leads to leaks around chimneys and vents.
- Improper overlaps: Can let water in during heavy rains.
- No ridge vent: Reduces attic ventilation and increases energy costs.
How Much Does It Cost to Install a Metal Roof?
DIY metal roof installation can save you significant labor costs. However, material and equipment expenses still apply.
Average DIY cost per square foot: $3 to $6
Professional install cost per square foot: $8 to $14
Sample Breakdown (For a 2,000 sq. ft. roof):
- Metal panels: $5,000 – $8,000
- Underlayment: $300 – $600
- Trim, screws, flashing: $1,000+
- Tools (if buying new): $200 – $500
Total DIY estimate: $6,500 – $9,500
Safety Tips for DIY Metal Roofing
- Use a safety harness at all times.
- Don’t install in wet or windy weather.
- Always wear gloves—metal panels are sharp!
- Have a partner for lifting panels and ensuring alignment.
Roofing is inherently risky, so don’t compromise on safety measures.
Should I DIY or Hire a Pro?
Doing it yourself can be rewarding and cost-effective, but it’s not for everyone. Hire a professional if:
- Your roof has steep pitches.
- You’re uncomfortable with heights.
- You don’t have the proper tools or help.
- Local codes require licensed installers.
Even if you’re confident, consult a professional for a quick assessment or second opinion.
Final Thoughts
So, how do I install a metal roof on my house? The process involves careful planning, the right tools, attention to safety, and a methodical approach to layering and sealing components. With patience and preparation, many homeowners can complete the job themselves and enjoy the lasting benefits of a durable, energy-efficient metal roof.
If you’re ready to move forward, start with measuring your roof, planning your materials, and watching a few manufacturer-specific installation videos to reinforce what you’ve learned here.
Would you like a printable step-by-step checklist or a list of the best-reviewed metal roofing panels for DIY? Let me know—I’d be happy to help!
Leave a Reply