Adding a garage to a home with a hip roof can be both a rewarding and challenging project. Unlike gable roofs, where the roofline ends with vertical walls, hip roofs slope on all sides, creating a more complex integration process when attaching new structures. If you’ve ever wondered how to attach a garage to a hip roof house, you’re not alone. This guide walks you through everything you need to know to plan, design, and build a garage addition that blends beautifully with your existing hip-roofed home.
Why Add a Garage to a Hip Roof House?
Homeowners with hip roof houses often hesitate when considering a garage addition due to the architectural challenges involved. However, there are several compelling reasons why it’s worth the effort:
- Added storage space and security
- Increased property value
- Protection for vehicles and equipment
- Enhanced curb appeal with a properly integrated design
- Potential for a bonus room or loft above the garage
Read too: How To Replace Roof Shingles That Blew Off: A Comprehensive Guide
Before we explore how to attach a garage to a hip roof house, it’s essential to understand the unique structure of hip roofs and how it affects the attachment process.
Understanding the Hip Roof Structure
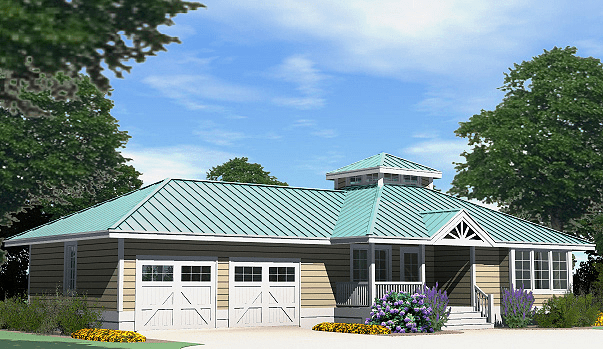
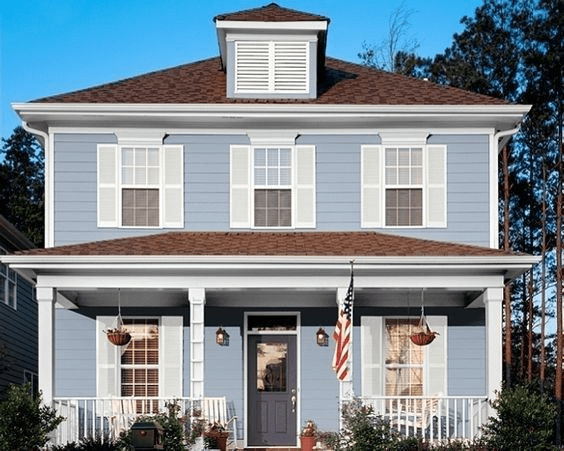
A hip roof features slopes on all four sides that meet at the top to form a ridge or point. These sides are typically equal in length and create a pyramid-like shape. The lack of gable ends (vertical triangle walls) complicates garage attachments because there’s no straightforward flat face to tie into.
Planning the Project
Before you start construction, thorough planning is crucial. Here’s what you need to consider when preparing to attach a garage to a hip roof house:
1. Zoning and Permits
Check with your local building department to determine setback rules, height limitations, and required permits for your garage addition.
2. Design Compatibility
Work with an architect or draftsman to ensure your garage complements your home’s hip roof style. Matching roof pitches and materials creates a cohesive look.
3. Foundation Requirements
A new concrete slab or footer may need to be poured for the garage base. Soil tests may be necessary for structural integrity.
4. Access Points
Decide whether the garage will have interior access to the house. If so, you’ll need to create a structural opening in the exterior wall.
Tools and Materials You’ll Likely Need
- Framing lumber (2x4s, 2x6s, etc.)
- Concrete, rebar, anchor bolts (for slab/foundation)
- Hip roof trusses or rafters
- Roofing underlayment and shingles
- Siding and trim to match existing home
- Flashing and waterproofing materials
- Framing hardware (hurricane ties, joist hangers, nails)
- Circular saw, level, chalk line, framing square
How To Attach A Garage To A Hip Roof House: Step-by-Step Overview
This process can vary depending on your home’s layout, garage size, and local codes. However, these are the general steps involved:
Step 1: Site Preparation and Foundation Work
Before framing begins, ensure the garage foundation is properly laid:
- Clear and level the construction area.
- Excavate for the slab and footers according to plan.
- Install form boards, reinforcement bars, and anchor bolts.
- Pour concrete and allow it to cure fully.
Pro Tip: Match the floor elevation of the garage with your home’s existing floor if you plan to create an interior door.
Step 2: Framing the Garage Walls
Once the slab is cured:
- Frame exterior walls using treated sill plates anchored to the foundation.
- Install vertical studs, headers, and top plates.
- Frame out the opening for the garage door.
- Include framing for windows, side entry doors, or attic access if applicable.
Be sure to brace the walls securely before roofing begins.
Step 3: Modifying the Hip Roof for Integration
This is one of the most complex parts of learning how to attach a garage to a hip roof house. You typically have three options for roof integration:
Option A: Tie Into the Existing Hip Roof
This involves cutting into the existing roof and extending rafters or trusses from the house into the new garage roof structure.
- Use a valley roof tie-in technique to connect sloped garage roof planes to the existing hip roof.
- Add flashing and waterproofing along all seams to prevent leaks.
- Carefully match the pitch of the existing roof.
This method ensures a seamless look but may require structural modifications and is best suited for experienced builders or contractors.
Option B: Build a Separate Roof with a Connector
If tying directly into the roof proves too complex or expensive, build a separate garage roof and connect the structures with a breezeway or mudroom.
- Requires separate roof framing, often simpler to build.
- Offers flexibility in materials and design.
Option C: Attach Below the Eaves
If your existing hip roof has extended eaves or overhangs, you may attach the garage below the roofline and use step flashing and shed-style tie-in at the junction.
This is typically the easiest and most cost-effective method but may not blend as seamlessly.
Step 4: Install Roof Trusses or Rafters
Depending on your chosen method:
- Use pre-engineered roof trusses if the span is wide and you want added attic space.
- Install rafter pairs and a ridge board for a conventional framed roof.
Use hurricane ties or metal connectors to reinforce connections, especially in areas prone to high winds.
Step 5: Sheathing and Roofing
Sheathe the roof with OSB or plywood, then:
- Apply underlayment or felt paper
- Install flashing at all roof intersections
- Match existing shingles or roofing material for a uniform appearance
- Include a ridge vent or other ventilation as needed
Step 6: Weatherproof and Finish Exterior
Finish the garage exterior to match the home:
- Apply siding that blends with your house (vinyl, fiber cement, wood)
- Trim corners, windows, and doors
- Seal all joints and apply caulk as needed
- Paint or finish to match your home’s color scheme
Step 7: Interior Framing and Electrical (Optional)
If the garage will be insulated or finished on the inside:
- Install wall insulation, vapor barriers, and drywall
- Run electrical wiring and outlets according to code
- Add lighting, garage door opener, and other finishing touches
Challenges Specific to Hip Roof Garage Additions
- Complex angles and valleys: Hip roofs have more angles, which can make structural framing and flashing more difficult.
- Roof pitch mismatch: Matching the pitch of a hip roof with a garage can be tricky, especially with lower slopes.
- Aesthetic transitions: Ensuring your new garage doesn’t look like an afterthought requires careful design.
Tips to Simplify the Process
- Consult with an architect or structural engineer early in the process
- Consider pre-fabricated trusses to simplify hip roof framing
- Always match materials (shingles, fascia, soffits, gutters) with your existing home
- Flash thoroughly where new roof meets existing house to avoid leaks
- Start construction during dry seasons for fewer delays
When to Hire a Contractor
While experienced DIYers may feel confident building walls or installing siding, roof tie-ins are another matter. You should consider hiring a contractor if:
- Your hip roof requires major cutting or structural modification
- The addition affects plumbing, HVAC, or electrical systems
- You’re unfamiliar with flashing and waterproofing methods
- The garage requires structural inspections
Professional builders have the tools, knowledge, and licensing to ensure everything is done to code — and safe.
FAQs
Can I attach a garage to a hip roof house without removing part of the roof?
Yes, but it limits your design options. Using a breezeway or connector can allow attachment without modifying the main roof.
Will a garage addition increase my home’s value?
Absolutely. Attached garages can add convenience, storage, and square footage, all of which are desirable for future buyers.
What is the most common roof pitch for garages?
A 4/12 to 6/12 pitch is standard and typically matches most residential homes, but it depends on your existing roofline.
Conclusion
Learning how to attach a garage to a hip roof house can be a game-changer for your home’s functionality and value. While the process involves more complexity than gable roof attachments, with the right planning, design, and construction approach, you can create a beautiful, cohesive garage addition that looks like it was always part of the original structure.
Whether you’re going the DIY route or hiring professionals, understanding the key elements of attachment, structural support, and aesthetic blending will help ensure your project’s success.


Leave a Reply