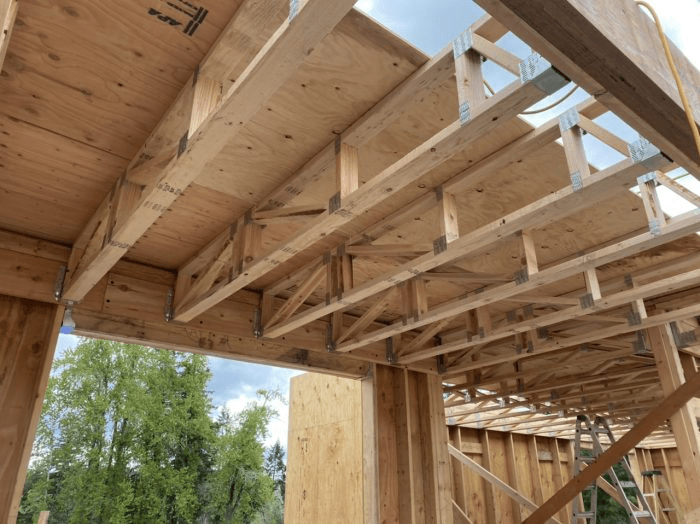
Roof trusses are the backbone of a home’s structure, supporting the roof and transferring loads down into the wall frames. Whether you’re building a small cabin, a full-sized house, or a workshop, knowing how to build a house roof truss into wall frame is an essential skill for any serious DIY builder.
In this comprehensive guide, we’ll walk you through every step — from planning and measuring to assembling and installing — so you can construct roof trusses that fit perfectly into your wall frame. You’ll also learn safety tips, tool recommendations, and common mistakes to avoid so your project is strong, safe, and long-lasting.
Read too: How Long Do Standing Seam Metal Roofs Last? A Comprehensive Guide to Durability and Longevity
Why Learn How to Build a House Roof Truss Into Wall Frame?
Before diving into the process, it’s important to understand why this is such a valuable skill:
- Structural Stability – A properly installed truss system ensures your roof can handle heavy loads from snow, rain, and wind.
- Cost Savings – Building and installing your own trusses can save thousands compared to pre-fabricated options.
- Customization – DIY trusses allow you to tailor pitch, span, and shape to your exact design needs.
- Durability – Well-constructed trusses, when properly fastened into wall frames, can last decades with minimal maintenance.
Planning Your Roof Truss Installation
Step 1: Measure the Span and Pitch
The span is the distance between the outer walls that the truss will cover, and the pitch is the slope of the roof. These measurements determine your truss design and lumber sizes.
Step 2: Choose Your Truss Type
Common types include:
- Common truss – The most standard triangular shape.
- Scissor truss – Provides vaulted ceiling space.
- Attic truss – Allows for additional storage or living space in the attic.
Step 3: Select Quality Lumber
Choose straight, dry, and structurally graded lumber. Avoid boards with large knots, splits, or warps, as they compromise strength.
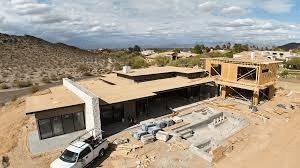
Step 4: Prepare the Wall Frame
Ensure your wall frame is square, level, and braced before adding roof trusses. This prevents alignment issues and makes installation easier.
How To Build A House Roof Truss Into Wall Frame Step-by-Step
1. Lay Out Your Truss Design
Use a large, flat surface to mark the truss shape with chalk or pencil. Lay out your top chords, bottom chord, and web members according to your plan.
2. Cut Lumber to Size
Using a circular saw or miter saw, cut each piece precisely to match your measurements. Small errors can create big alignment problems later.
3. Assemble the Truss on the Ground
- Lay the chords and web members in place.
- Secure joints with metal truss plates on both sides of each connection.
- Use clamps to hold everything in place while fastening.
4. Raise the First Truss
With at least two helpers, lift the first truss into position on the wall frame. Align it carefully so it sits flush with the wall’s top plate.
5. Secure the Truss to the Wall Frame
- Use metal hurricane ties or framing anchors for maximum strength.
- Nail or screw through the truss base into the top plate.
6. Install Remaining Trusses
- Space trusses evenly according to your building plans (commonly 24 inches apart).
- Use temporary bracing to keep trusses upright and evenly spaced until the roof sheathing is installed.
7. Add Permanent Bracing
Install lateral bracing between trusses to prevent twisting. Follow local building codes for bracing requirements.
Tools and Materials You’ll Need
Tools:
- Circular saw or miter saw
- Hammer or nail gun
- Measuring tape and chalk line
- Carpenter’s square
- Level and plumb bob
- Ladder or scaffolding
Materials:
- Dimensional lumber for chords and web members
- Metal truss plates
- Hurricane ties or framing anchors
- Nails or screws
- Temporary bracing boards
Safety Considerations
- Always wear protective gear, including gloves, safety glasses, and hard hats.
- Use stable ladders or scaffolding when raising trusses.
- Never work alone — at least two helpers are recommended for lifting.
- Follow OSHA guidelines for fall protection when working above ground.
Common Mistakes to Avoid
- Poor Measurements – Incorrect cuts can cause uneven rooflines and gaps in your wall-to-truss connections.
- Skipping Bracing – Lack of proper bracing can lead to structural failure.
- Over- or Under-Nailing – Using too few fasteners reduces strength, while too many can split the wood.
- Not Checking Wall Frame Alignment – A crooked wall frame means misaligned trusses.
Benefits of DIY vs. Pre-Made Trusses
DIY Trusses:
- Customizable design
- Lower cost
- Flexibility in materials and pitch
Pre-Made Trusses:
- Faster installation
- Precision manufacturing
- Often required for complex designs
If your build is straightforward, learning how to build a house roof truss into wall frame yourself is both rewarding and cost-effective.
Cost Estimate for Building and Installing Roof Trusses
For a small to medium-sized house:
- Lumber: $500–$1,500
- Metal Plates & Hardware: $100–$300
- Tools & Miscellaneous Supplies: $100–$200
Total: Around $700–$2,000 depending on size and materials.
Final Thoughts
Building and installing roof trusses into a wall frame may seem intimidating at first, but with the right measurements, quality materials, and a clear step-by-step process, it’s a project that can be completed successfully by most dedicated DIY builders.
By mastering how to build a house roof truss into wall frame, you’re not only creating a strong and stable roof but also enhancing your skills for future construction projects. Remember to prioritize safety, precision, and code compliance for a build that stands the test of time.

Leave a Reply