Building a comfortable and weather-resistant home for your furry friend is a great way to show them love and care. If you’ve got a bigger breed, you’ll need a design that is roomy, sturdy, and offers protection from rain, wind, and snow. That’s where learning how to build a large dog house w slanted roof comes in handy.
A slanted roof design not only keeps rainwater and snow from piling up, but it also adds a sleek look and allows for easier construction compared to a complex gabled roof. Whether you’re an experienced DIYer or a beginner, this guide will walk you through planning, building, and finishing a dog house that will keep your pet safe, dry, and happy.
Read too: How Long Do Standing Seam Metal Roofs Last? A Comprehensive Guide to Durability and Longevity
Why Build a Large Dog House With a Slanted Roof?
Before diving into the build, here are a few reasons this design is ideal:
- Weather Protection – The slanted roof directs rainwater away quickly.
- Easy Cleaning – A single-pitch roof allows easier access when cleaning or doing maintenance.
- Simple Construction – Fewer cuts and angles compared to complex roofs.
- Better Space – The interior height can be adjusted for large dogs without overcomplicating the build.
Planning Your Large Dog House
Step 1: Determine the Size
Your dog should be able to stand, turn around, and lie comfortably inside. A good rule is to measure your dog from nose to tail, add a few inches, and use that as the length. For height, measure from the ground to the top of your dog’s head and add 6–8 inches.
Step 2: Select Durable Materials
For outdoor durability, use:
- Pressure-treated lumber for the base and frame
- Exterior-grade plywood for walls and roof
- Waterproof sealants or paint for weatherproofing
Step 3: Design the Roof Slope
A slanted roof typically has a pitch of 10–20 degrees. This ensures water runs off easily without creating too steep of a slope.
Tools and Materials Needed
Tools:
- Circular saw or hand saw
- Drill and drill bits
- Tape measure
- Carpenter’s square
- Hammer or nail gun
- Sandpaper or power sander
Materials:
- Pressure-treated 2x4s (for framing)
- Exterior plywood sheets (for walls, floor, and roof)
- Galvanized screws or nails
- Outdoor wood sealant or exterior paint
- Hinges (optional for roof access)
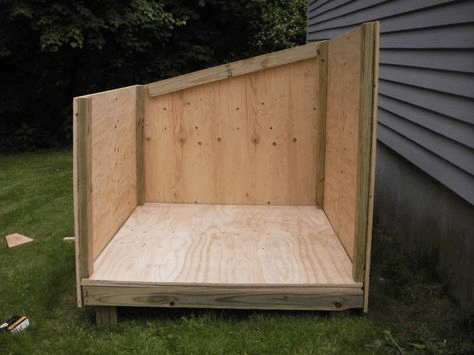
How To Build A Large Dog House W Slanted Roof Step-by-Step
1. Build the Base Frame
Cut your 2x4s to the desired size for the floor frame. Screw or nail them together in a rectangular shape. Add two or three cross braces for extra stability.
2. Add the Floor
Attach a piece of exterior plywood to the base frame using galvanized screws. Sand the edges to prevent splinters. You can insulate the floor by adding rigid foam underneath before securing the plywood.
3. Construct the Wall Frames
Cut your wall studs from 2x4s. The front wall should be taller than the back wall to accommodate the slanted roof. Assemble each wall frame separately before attaching them to the base.
4. Attach the Wall Panels
Cut plywood panels to fit each wall frame. Attach with galvanized screws. Cut out the entrance hole on the front wall — make it large enough for your dog to enter comfortably, but small enough to retain heat in colder months.
5. Build the Roof Frame
Measure the roof slope based on your chosen pitch. Cut and attach 2×4 rafters from the taller front wall to the shorter back wall.
6. Install the Roof Panels
Cut exterior plywood to cover the roof frame. If you want easy cleaning access, hinge the roof panel on one side so it can lift open.
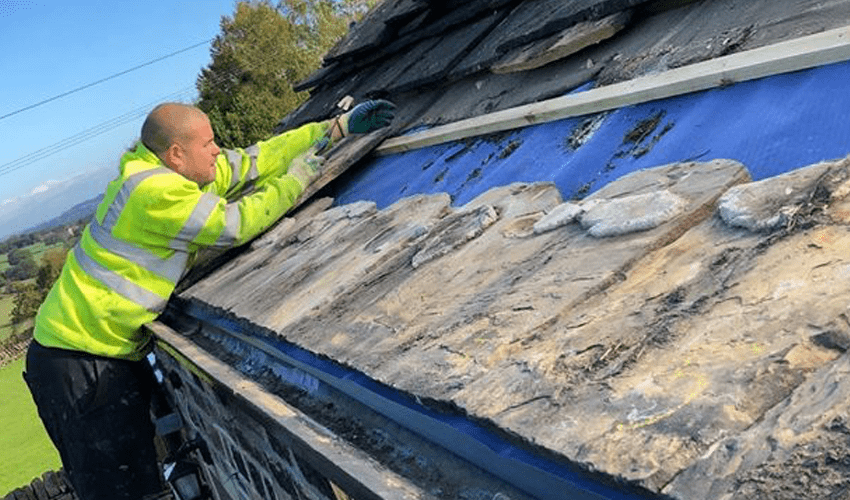
7. Weatherproof the Dog House
Seal all joints with outdoor caulk, then paint or stain the exterior with waterproof coating. You can also add asphalt shingles or corrugated metal to the roof for extra durability.
Optional Add-Ons for Comfort
- Insulation – Add foam boards between wall studs for temperature control.
- Removable Roof – Makes cleaning much easier.
- Covered Porch – Provides shade and a dry spot for lounging.
- Raised Base – Keeps the dog house off the ground to prevent moisture buildup.
Safety Tips When Building
- Wear safety glasses and gloves.
- Make sure there are no sharp edges or exposed nails inside.
- Use non-toxic sealants and paints safe for pets.
Common Mistakes to Avoid
- Making It Too Big – An overly large house can be harder to keep warm in winter.
- Ignoring Ventilation – Poor airflow can cause mold and odors.
- Forgetting the Overhang – A small roof overhang keeps rain from dripping directly onto the entrance.
Cost Estimate
- Lumber & Plywood: $80–$150
- Roofing Materials: $20–$50
- Hardware & Fasteners: $15–$30
- Paint/Sealant: $15–$25
Estimated total: $130–$250 depending on size and material quality.
Final Thoughts
Knowing how to build a large dog house w slanted roof allows you to create a shelter tailored to your dog’s size and needs while saving money compared to buying a pre-made one. With the right materials, proper planning, and attention to detail, you’ll end up with a durable, weather-resistant dog house that will keep your canine companion comfortable year-round.
Building it yourself also gives you the chance to personalize the design — from paint color to added features — making it as unique as your pet.
Leave a Reply