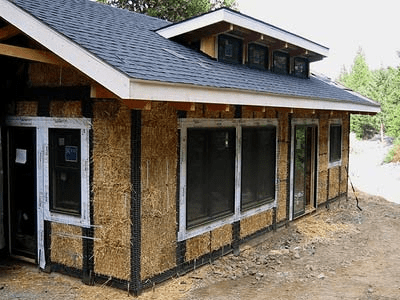
Building with straw bales has become increasingly popular for eco-conscious homeowners seeking energy efficiency, natural aesthetics, and sustainable construction methods. But while stacking bales to form walls is relatively straightforward, the roof is one of the most critical components. The roof must not only shelter the home but also protect the straw bales from moisture—their biggest enemy.
If you’re wondering how to build a roof on a straw bale house, this article provides a step-by-step approach, essential design considerations, and long-term maintenance tips. By the end, you’ll feel confident about constructing a strong and durable roof that keeps your straw bale home safe and beautiful.
Read too: Hail Damage Roof Repair: Essential Guide to Restoring Your Home’s Protection
Why the Roof Design Matters for Straw Bale Houses
Unlike conventional homes, straw bale houses are extremely sensitive to moisture. Even small leaks can compromise insulation, cause mold growth, or weaken the structure. That’s why roof design is critical. A well-constructed roof will:
- Provide ample overhang to shield walls from rain and snow.
- Offer durability against wind, storms, and heavy snow loads.
- Maintain ventilation to reduce condensation inside.
- Enhance aesthetics to match the natural look of straw bale construction.
The key is balancing functionality with sustainability while keeping the unique needs of straw bale walls in mind.
Tools and Materials for Building a Straw Bale Roof
Before learning step-by-step how to build a roof on a straw bale house, gather the following tools and materials.
Tools
- Circular saw
- Power drill with screw bits
- Hammer and nails
- Level and measuring tape
- Carpenter’s square
- Ladder or scaffolding
- Safety gear (goggles, gloves, harness)
Materials
- Structural timber or engineered trusses
- Plywood or OSB sheathing
- Roofing underlayment (felt or synthetic barrier)
- Roofing material (metal panels, clay tiles, or shingles)
- Galvanized screws and nails
- Moisture barrier tape
- Insulation (optional, depending on climate)
Choosing the Right Roof Style
When deciding how to build a roof on a straw bale house, consider the climate and local environment.
- Gable Roof – Popular for its simplicity and ability to shed rain and snow.
- Hip Roof – Stronger against wind, though more complex to build.
- Shed Roof – Single slope design, often used for modern straw bale homes.
- Green Roof – Eco-friendly but requires careful waterproofing.
Tip: Always include extended eaves of at least 2 feet to protect the bales from splashing rain.
Step-by-Step Guide: How To Build A Roof On A Straw Bale House
Here’s a straightforward guide to help you build a durable, protective roof:
Step 1: Prepare the Wall Plate
- Install a wooden wall plate (a reinforced beam) on top of the straw bale walls.
- Secure it with rebar or wooden stakes driven through the bales into the foundation.
- This plate distributes the roof’s weight evenly and prevents bale compression.
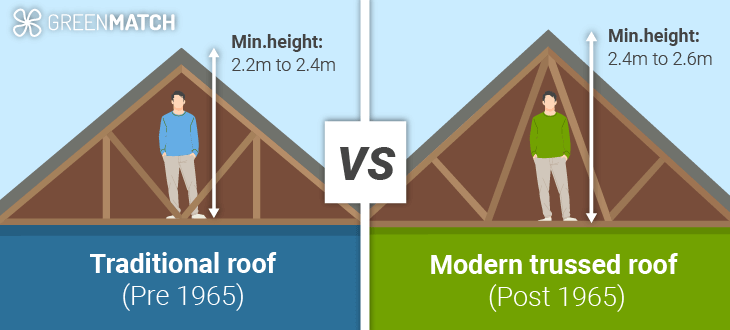
Step 2: Install Roof Trusses or Rafters
- Position trusses or rafters at equal intervals along the wall plate.
- Secure with hurricane ties or brackets to withstand wind loads.
- Double-check alignment with a level before fastening.
Step 3: Add Roof Sheathing
- Nail plywood or OSB panels across rafters to create a stable surface.
- Overlap edges slightly for strength and stability.
Step 4: Apply Underlayment
- Roll out roofing felt or synthetic underlayment.
- Overlap seams by at least 6 inches to prevent leaks.
- Use roofing staples or nails to fasten securely.
Step 5: Install Roofing Material
- For metal roofs, align panels and fasten with roofing screws.
- For shingles, begin from the eaves and work upward.
- For clay tiles, ensure proper support, as tiles are heavier than shingles.
Step 6: Ensure Proper Overhang and Flashing
- Extend the roof well beyond the straw walls—minimum 24 inches.
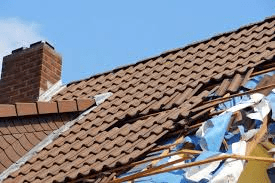
- Add flashing around chimneys, vents, and edges to prevent leaks.
Step 7: Ventilation and Insulation
- Add roof vents or ridge vents to allow airflow.
- Consider installing insulation under the sheathing for added energy efficiency.
Common Mistakes to Avoid
When learning how to build a roof on a straw bale house, avoid these pitfalls:
- Short overhangs: Leads to water damage on straw walls.
- Insufficient sealing: Allows moisture infiltration.
- Using heavy roofing without reinforcement: Can cause wall stress.
- Poor ventilation: Results in condensation buildup.
Cost Breakdown for Building a Straw Bale Roof
The cost will vary based on materials, size, and location. Here’s an estimate for a 1,000-square-foot straw bale home:
- Timber/trusses: $2,000 – $4,000
- Sheathing (OSB/Plywood): $800 – $1,500
- Underlayment: $400 – $700
- Roofing materials:
- Asphalt shingles: $2,000 – $4,000
- Metal panels: $3,500 – $6,000
- Clay tiles: $6,000 – $10,000
- Fasteners and flashing: $300 – $600
Total average cost: $5,500 – $15,000, depending on roofing choice.
Long-Term Maintenance Tips
- Inspect roof annually for missing shingles, rust, or cracks.
- Reapply sealant around flashing every few years.
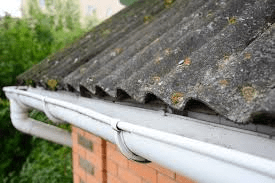
- Clean gutters and downspouts to prevent water overflow.
- Monitor for condensation in the attic or roof cavity.
- Trim nearby trees to prevent branches from damaging the roof.
Advantages of a Well-Built Roof on a Straw Bale House
- Longevity: Protects the straw bale structure for decades.
- Energy efficiency: A properly insulated roof lowers heating and cooling costs.
- Eco-friendliness: Compatible with renewable roofing materials.
- Resale value: Adds durability and increases confidence for future buyers.
Final Thoughts
If you’re researching how to build a roof on a straw bale house, the key is planning a design that prioritizes moisture control, durability, and energy efficiency. By using extended overhangs, high-quality roofing materials, and proper ventilation, you’ll safeguard your home while preserving its natural beauty.
Straw bale houses are a sustainable choice, and with the right roof, they can last for generations. Whether you choose a gable, hip, or modern shed design, following these principles ensures your roof will stand strong against the elements.
Leave a Reply