Designing and constructing a roof is a challenging task for any home, but when it comes to an L-shaped structure, the complexity increases significantly. The unique layout requires careful planning, precise measurements, and attention to both aesthetics and structural integrity. If you’re wondering how to build a roof on an L shaped house, this guide will walk you through the essential steps, design considerations, and common pitfalls to avoid.
By the end, you’ll have a clear roadmap to ensure your roof is durable, attractive, and perfectly suited to your L-shaped home.
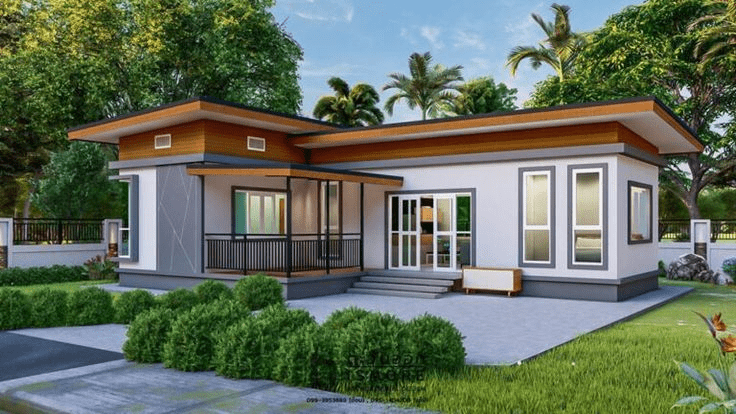
Why L-Shaped Houses Need Special Roof Planning
Unlike rectangular homes, L-shaped houses feature an angled corner where two wings of the house meet. This intersection is the most challenging part of the roofing project because:
- Water must drain properly away from the valley between roof sections.
- The roof design must complement the unique geometry of the house.
- Structural loads need even distribution to prevent sagging.
A well-constructed roof not only protects your home from weather damage but also enhances curb appeal and property value.
Read too: Hail Damage Roof Repair: Essential Guide to Restoring Your Home’s Protection
Roof Styles Suitable for L-Shaped Houses
Before learning how to build a roof on an L shaped house, you need to choose the right style. The roof type you select will impact not only construction but also maintenance and cost.
- Gable Roof with Valley
- The simplest choice for L-shaped layouts.
- Creates a valley where two gable roofs meet.
- Excellent for water drainage if valleys are flashed properly.
- Hip Roof
- Offers sloping sides on all edges.
- Provides superior wind resistance and visual balance.
- More complex to frame but highly durable.
- Cross-Gable Roof
- Adds dimension by combining two or more gables.
- Perfect for highlighting different wings of the house.
- Creates striking curb appeal.
- Combination Roof
- Mixes different roof types, such as gables and hips.
- Often used in modern architectural designs.
Tools and Materials You’ll Need
When planning how to build a roof on an L shaped house, gather the right tools and materials for efficiency and safety.
Tools
- Circular saw
- Hammer and nails or nail gun
- Carpenter’s square
- Power drill
- Measuring tape and level
- Ladder and scaffolding
- Safety harness, gloves, goggles
Materials
- Lumber for rafters, trusses, and ridge boards
- Roof sheathing (plywood or OSB)
- Roofing underlayment (felt or synthetic barrier)
- Shingles, tiles, or metal roofing panels
- Flashing for valleys and edges
- Roofing nails, screws, or staples
Step-by-Step Guide: How To Build A Roof On An L Shaped House
Now let’s dive into the process itself.
Step 1: Measure and Plan
- Take precise measurements of both wings of the L-shaped house.
- Create a scaled drawing to visualize how the roof sections will meet.
- Decide on the pitch (slope) for both wings—ensuring they match for seamless alignment.
Step 2: Install the Ridge Board
- Position the ridge board at the highest point of the roof.
- Ensure it is perfectly level and secure.
- This board serves as the central spine of your roof.
Step 3: Frame Rafters or Trusses
- Cut rafters to fit the chosen slope.
- Secure them to the ridge board and wall plates.
- For L-shaped designs, you’ll need to construct valley rafters at the junction where the two wings meet.
Step 4: Build Valleys and Hips
- Install valley rafters diagonally where the two sections intersect.
- If using a hip design, install hip rafters extending from the ridge to the corners.
- Reinforce valleys with jack rafters for added strength.
Step 5: Add Roof Sheathing
- Attach plywood or OSB sheets across rafters.
- Stagger seams for added stability.
- Leave a small gap (about 1/8 inch) between panels for expansion.
Step 6: Apply Underlayment
- Roll out roofing felt or synthetic underlayment.
- Overlap layers to direct water downwards.
- Pay extra attention to valleys, which are prone to leaks.
Step 7: Install Roofing Material
- Begin laying shingles, tiles, or panels from the eaves upward.
- Use flashing in valleys, around chimneys, and at ridges.
- Ensure overhangs extend at least 1 foot to protect walls.
Step 8: Final Touches
- Add ridge caps for protection and aesthetics.
- Install gutters and downspouts for water management.
- Double-check all flashing to prevent leaks.
Challenges in Building an L-Shaped Roof
When considering how to build a roof on an L shaped house, expect a few unique challenges:
- Water Drainage: Valleys must be carefully designed to avoid pooling.
- Structural Support: Additional framing is required to handle intersecting loads.
- Aesthetic Balance: Poorly planned roofs may look mismatched.
- Material Waste: Angled cuts lead to more leftover material compared to standard roofs.
Cost Breakdown
Building a roof on an L-shaped house can be more expensive than standard rectangular homes. Here’s a rough breakdown:
- Framing lumber and trusses: $4,000 – $8,000
- Roof sheathing: $1,500 – $3,000
- Underlayment and flashing: $800 – $1,500
- Shingles or roofing material: $4,000 – $10,000 (depending on material)
- Labor costs: $5,000 – $12,000 (if hiring professionals)
Estimated total cost: $15,000 – $35,000, depending on size, design, and material selection.
Maintenance Tips for L-Shaped Roofs
- Inspect valleys after heavy rainfall or snow.
- Clean gutters regularly to prevent water overflow.
- Replace damaged shingles immediately to avoid leaks.
- Apply waterproof sealants every few years for extra protection.
- Check for sagging or shifting rafters in the valley area.
Advantages of a Well-Built L-Shaped Roof
- Visual Appeal: Creates architectural interest.
- Functionality: Provides effective drainage and durability.
- Customization: Allows mixing of styles like gables and hips.
- Longevity: With proper care, lasts decades.
Conclusion
Learning how to build a roof on an L shaped house requires extra planning, precise measurements, and careful construction. By focusing on the unique challenges of valleys, ensuring proper drainage, and choosing the right roof style, you can create a structure that is both functional and visually striking.
Whether you’re a DIY enthusiast or hiring professionals, this guide gives you the foundation to tackle an L-shaped roofing project with confidence.

Leave a Reply