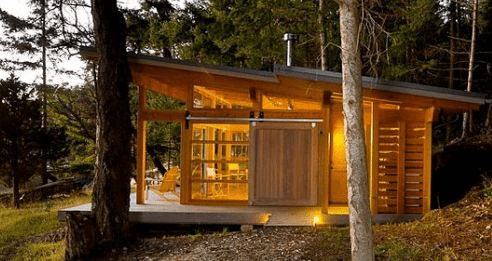
Tiny houses have become increasingly popular due to their affordability, minimalism, and eco-friendly nature. One crucial aspect of tiny house design is the roof. A slanted roof, also known as a shed or single-pitch roof, is a practical choice for tiny homes because it promotes water drainage, allows for loft space, and adds aesthetic appeal. If you are wondering how to build a slanted roof for a tiny house, this comprehensive guide will provide step-by-step instructions, materials, tips, and design considerations to make your project successful.
How To Build A Slanted Roof For A Tiny House: Understanding the Basics
Before constructing a slanted roof, it’s essential to understand its basic principles and advantages. Unlike traditional pitched roofs with multiple angles, a slanted roof consists of a single slope from one side to the other. Key benefits include:
- Efficient Water Drainage
The slope ensures rainwater or snow easily runs off, reducing the risk of leaks or structural damage. - Increased Interior Space
A slanted roof can provide extra vertical space on one side, making it ideal for lofts or storage areas. - Modern Aesthetic
Shed-style roofs are often associated with modern and minimalist designs, which suit tiny houses perfectly. - Simplified Construction
Compared to complex pitched roofs, a single-sloped roof requires fewer materials and simpler framing techniques, making it perfect for beginners.
Understanding these benefits helps you plan the angle, orientation, and materials for your tiny house roof effectively.
Materials You Will Need
To build a sturdy slanted roof for a tiny house, gather the following materials:
- Lumber: 2×4 or 2×6 boards for rafters and framing
- Plywood Sheets: For roof decking
- Roofing Material: Metal panels, shingles, or corrugated sheets
- Nails or Screws: Galvanized to prevent rust
- Roof Flashing: To seal edges and prevent leaks
- Insulation: Foam boards or fiberglass insulation for energy efficiency
- Weatherproofing Membrane: To protect against moisture infiltration
Having the right materials before starting ensures smoother construction and better roof performance.
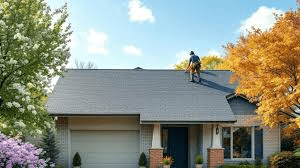
Read too: Is It Reasonable to Ask the Seller to Replace the Roof?
Step 1: Planning the Roof Pitch and Dimensions
The roof pitch determines the slope of your slanted roof and is critical for water drainage and interior space. Standard recommendations for tiny houses:
- Low Slope: 10°–15° for modern minimalistic designs
- Moderate Slope: 20°–30° for effective drainage in rainy regions
- Steep Slope: 30°–45° for snowy climates to prevent accumulation
Measure the width and length of your tiny house to calculate rafter lengths accurately. Use a pitch calculator or basic trigonometry to determine the correct slope for your space.
Step 2: Building the Wall Frames
A slanted roof requires walls of different heights: a higher wall at the front (or rear, depending on orientation) and a shorter wall at the opposite end. Steps include:
- Construct the Taller Wall: Use 2×4 or 2×6 lumber to build the frame. Ensure vertical alignment and reinforce corners.
- Build the Shorter Wall: This wall sets the slope of the roof. Use precise measurements to ensure the pitch is consistent.
- Attach Wall Frames to the Base: Secure walls to the tiny house floor using anchors or brackets. Verify that walls are plumb and level.
Step 3: Installing Rafters for the Slanted Roof
Rafters are the backbone of your slanted roof. Follow these steps:
- Cut Rafters to Length: Based on roof width and desired slope
- Attach Rafters to Wall Plates: Secure the top of the rafters to the taller wall and the bottom to the shorter wall
- Space Rafters Evenly: Typically 16”–24” apart for standard load-bearing
- Add Collar Ties (Optional): To enhance stability in areas with high winds or heavy snow
Double-check alignment and angles to ensure the slope is uniform across the entire roof.
Step 4: Adding Roof Decking
After rafters are installed, add plywood sheets or OSB boards to create the roof deck:
- Begin at the bottom edge and work upwards
- Secure each sheet with nails or screws
- Leave small gaps between sheets for expansion
- Ensure edges align with rafters for proper support
The roof decking provides a base for roofing materials and contributes to structural stability.
Step 5: Applying Waterproofing and Roofing Material
Proper waterproofing is crucial to prevent leaks:
- Install Underlayment: Place a waterproof membrane or roofing felt over the decking
- Attach Flashing: Seal edges, corners, and joints with metal flashing
- Install Roofing Material: Choose metal panels for durability, asphalt shingles for traditional appeal, or corrugated sheets for a modern look
- Secure Roofing Properly: Use appropriate nails or screws based on the material to prevent wind damage
Ensure overlaps between panels or shingles follow manufacturer guidelines for optimal water runoff.
Step 6: Insulating and Ventilating the Roof
Tiny houses require efficient insulation to maintain comfort:
- Install Foam or Fiberglass Insulation: Between rafters before finishing the interior
- Add Ventilation: Ridge vents or soffit vents prevent moisture buildup and mold formation
- Consider Reflective Barriers: For hot climates, reflective insulation reduces heat gain
Proper insulation and ventilation enhance energy efficiency and longevity of your tiny house.
Step 7: Interior Finishing
After roofing and insulation, finish the interior:
- Ceiling Panels: Plywood, tongue-and-groove boards, or drywall
- Paint or Stain: Enhance aesthetics while protecting surfaces
- Lighting: Install ceiling lights or skylights if desired
A well-finished interior complements the slanted roof and maximizes the use of space.
Tips and Tricks for a Successful Slanted Roof
- Choose the Right Lumber: Pressure-treated or kiln-dried lumber resists warping and rot
- Consider Roof Overhangs: Extending the roof edges protects walls from rain
- Use Temporary Supports: During construction, braces keep rafters in place
- Plan for Snow or Wind Loads: Adjust slope and reinforcement based on local climate
By following these tips, your slanted roof will be durable, functional, and visually appealing.
Advantages of a Slanted Roof for Tiny Houses
Slanted roofs offer several advantages:
- Easy Construction: Simplified angles reduce construction complexity
- Water Drainage: Effective slope prevents water accumulation
- Loft Opportunities: Higher interior walls allow for small sleeping or storage lofts
- Modern Design Appeal: Fits minimalist and contemporary tiny house aesthetics
These benefits make a slanted roof an ideal choice for tiny home builders.
How To Build A Slanted Roof For A Tiny House: Final Thoughts
Learning how to build a slanted roof for a tiny house is essential for creating a functional, durable, and attractive tiny home. By understanding the principles of slope, using quality materials, and following proper construction steps, you can achieve a roof that enhances both form and function.
From choosing the right pitch to installing rafters, decking, roofing material, and insulation, every step contributes to the stability and longevity of your tiny house. With careful planning and execution, a slanted roof not only protects your home but also opens up opportunities for creative interior design, loft spaces, and modern aesthetics.

Leave a Reply