Adding a roof to your deck is one of the best ways to expand your living space while protecting it from rain, snow, and harsh sunlight. However, many homeowners get stuck on the tricky part: how to connect deck roof to house of roofs together safely and effectively. Done right, the project creates a seamless extension of your home’s architecture. Done poorly, it can lead to leaks, structural instability, and expensive repairs.
This guide will walk you through the essentials of connecting a deck roof to your house, from planning and design to structural considerations, step-by-step installation, and common mistakes to avoid. Whether you’re a DIY enthusiast or planning to hire a contractor, this article will give you the knowledge to make informed decisions.
Read too: Is It Reasonable to Ask the Seller to Replace the Roof?
Why Connecting a Deck Roof to Your House Matters
When you build a deck roof, you’re not just adding shade—you’re creating an extension of your home. How the roof connects to your existing house roof determines:
- Weatherproofing: A poor connection can cause leaks, mold, and rot.
- Structural Stability: The connection must handle the weight of snow, wind loads, and the roof itself.
- Aesthetic Appeal: A seamless design blends the new roof with your home’s style.
- Property Value: Professional-looking deck roofs can boost resale value significantly.
That’s why understanding how to connect deck roof to house of roofs together is essential before starting construction.
Planning the Project
Before picking up a hammer, planning is critical. Consider these steps:
- Check Local Building Codes – Municipalities often have strict rules for roof additions, including load requirements, flashing standards, and permits.
- Choose Roof Style – Options include gable, shed, or hip-style deck roofs. Each connects differently to your house.
- Assess House Structure – Identify the existing house roof type (asphalt shingle, metal, tile, etc.) and the wall structure where the roof will attach.
- Plan for Water Drainage – Make sure the slope directs water away from the house.
- Budget and Materials – Factor in lumber, flashing, shingles, fasteners, and professional labor if needed.
Structural Options for Connection
There are two main ways to connect a deck roof to your house:
1. Ledger Board Connection
This is the most common method. A ledger board is fastened horizontally to the house wall, providing an anchor for the new roof rafters. Proper flashing is critical to prevent leaks.
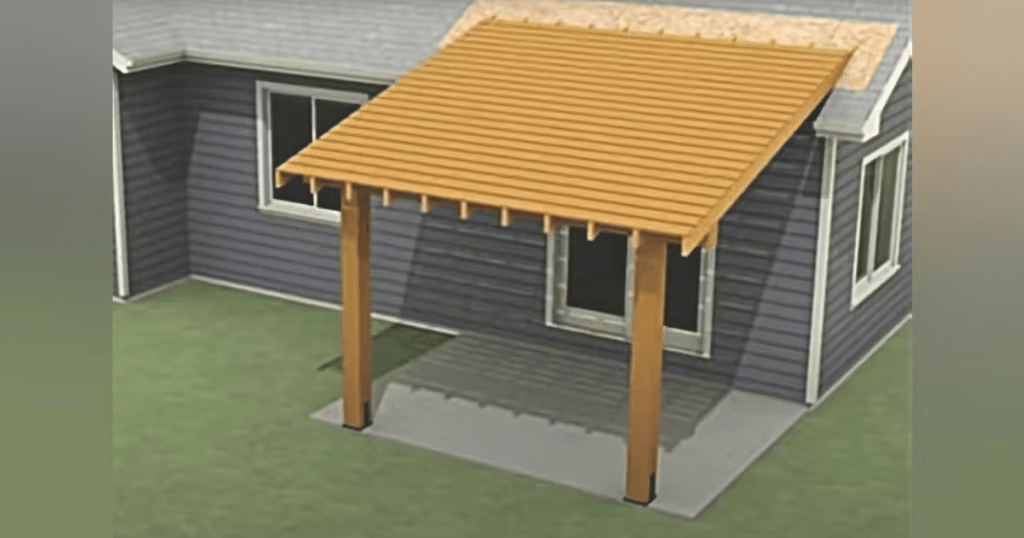
2. Over-Roof Connection
In some cases, the deck roof ties directly into the existing house roof by extending under shingles and integrating with rafters. This method requires precise waterproofing but provides a stronger, more seamless finish.
Step-by-Step: How To Connect Deck Roof To House Of Roofs Together
Here’s a simplified step-by-step guide to help you visualize the process:
Step 1: Prepare the Attachment Point
- Remove siding or shingles where the deck roof will connect.
- Mark the level line for your ledger board or roof tie-in.
Step 2: Install the Ledger Board
- Secure the ledger board to the house framing using lag bolts or structural screws.
- Use flashing above and below the ledger to prevent water infiltration.
Step 3: Frame the Deck Roof
- Attach posts to support the opposite end of the roof.
- Install beams across the posts.
- Secure rafters from the ledger board to the beam, ensuring proper spacing.
Step 4: Tie Into the House Roof
- For over-roof connections, slide flashing and shingles over new rafters.
- Seal with roofing cement to prevent leaks.
Step 5: Add Roofing Materials
- Install sheathing (plywood or OSB).
- Add underlayment for waterproofing.
- Apply shingles or metal roofing to match your house.
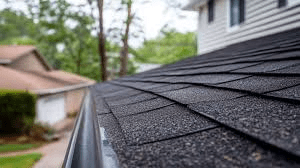
Step 6: Finish with Trim and Gutters
- Install fascia boards and soffits for a polished look.
- Add gutters to direct rainwater away from the deck and foundation.
Safety Considerations
When learning how to connect deck roof to house of roofs together, don’t overlook safety:
- Always wear proper protective gear (gloves, goggles, harnesses).
- Ensure ladders and scaffolding are secure.
- Check weather before starting roofing tasks.
- If unsure, consult a professional roofer or carpenter.
Common Mistakes to Avoid
- Improper Flashing – Skipping or poorly installing flashing leads to leaks.
- Wrong Pitch – Too flat of a roof won’t drain properly; too steep may look mismatched.
- Under-Secured Ledger Boards – This can cause structural failure.
- Ignoring Building Codes – Can result in fines or forced removal.
- Poor Material Match – Using shingles or colors that clash reduces curb appeal.
Design Ideas for Seamless Integration
- Match Roofing Materials – Use the same shingles or metal panels as your house roof.
- Coordinate Trim Colors – Align fascia and soffits with your existing home.
- Add Skylights – Bring natural light to the deck while keeping it covered.
- Blend Posts with Architecture – Choose wood or composite posts that echo your home’s style.
Cost Considerations
The cost of connecting a deck roof to your house depends on size, materials, and labor:
- DIY Materials Only: $3,000–$6,000
- Professional Installation: $8,000–$15,000+
While DIY saves money, hiring professionals ensures code compliance, structural integrity, and watertight connections.
Maintenance After Installation
Once your deck roof is connected:
- Inspect flashing annually for wear.
- Clean gutters to prevent overflow.
- Re-seal joints with roofing cement if needed.
- Repaint or stain posts and beams every few years.
Final Thoughts
So, how to connect deck roof to house of roofs together? The process requires careful planning, proper materials, and meticulous attention to waterproofing and structure. By installing a ledger board or tying directly into your existing roof, you can create a durable, seamless extension of your living space.
Whether you’re a DIY enthusiast or planning to hire a professional, following these guidelines will help you avoid costly mistakes and enjoy a beautiful, functional deck roof for years to come.

Leave a Reply