When it comes to ensuring the longevity and functionality of your metal roof, proper installation of roof valleys is crucial. A roof valley is where two roof planes meet and channel water off the roof, making it a vital component in preventing leaks and water damage. This guide will walk you through how to install a metal roof valley, providing detailed steps, tips, and necessary precautions to ensure a successful installation.
Why Metal Roof Valleys Matter
Before diving into the installation process, it’s essential to understand the importance of metal roof valleys. These valleys handle a significant amount of water runoff and, if not installed correctly, can lead to severe water damage. Metal roof valleys are durable and can withstand harsh weather conditions, making them an ideal choice for long-term roof protection.
Tools and Materials Needed
To install a metal roof valley, you’ll need the following tools and materials:
- Metal valley flashing
- Roofing nails or screws
- Hammer or screwdriver
- Roofing cement or sealant
- Metal snips
- Measuring tape
- Chalk line
- Roofing underlayment
- Safety gear (gloves, safety glasses, harness)
Preparation Steps
Proper preparation is key to a successful installation. Follow these steps to prepare your roof for the valley installation:
- Clean the Roof Surface: Ensure the roof surface is clean and free of debris. This will help the flashing adhere better and provide a smoother installation process.
- Inspect the Roof: Check for any existing damage or weak spots on the roof. Repair any issues before proceeding with the valley installation.
- Measure and Mark: Use a measuring tape and chalk line to mark the centerline of the valley. This will guide you in placing the metal valley flashing accurately.
Step-by-Step Guide on How to Install Metal Roof Valley
Step 1: Install Roofing Underlayment
Begin by installing the roofing underlayment. This layer provides additional protection against moisture. Roll out the underlayment along the roof and secure it with roofing nails or staples. Make sure to overlap each row by at least 4 inches to prevent water infiltration.
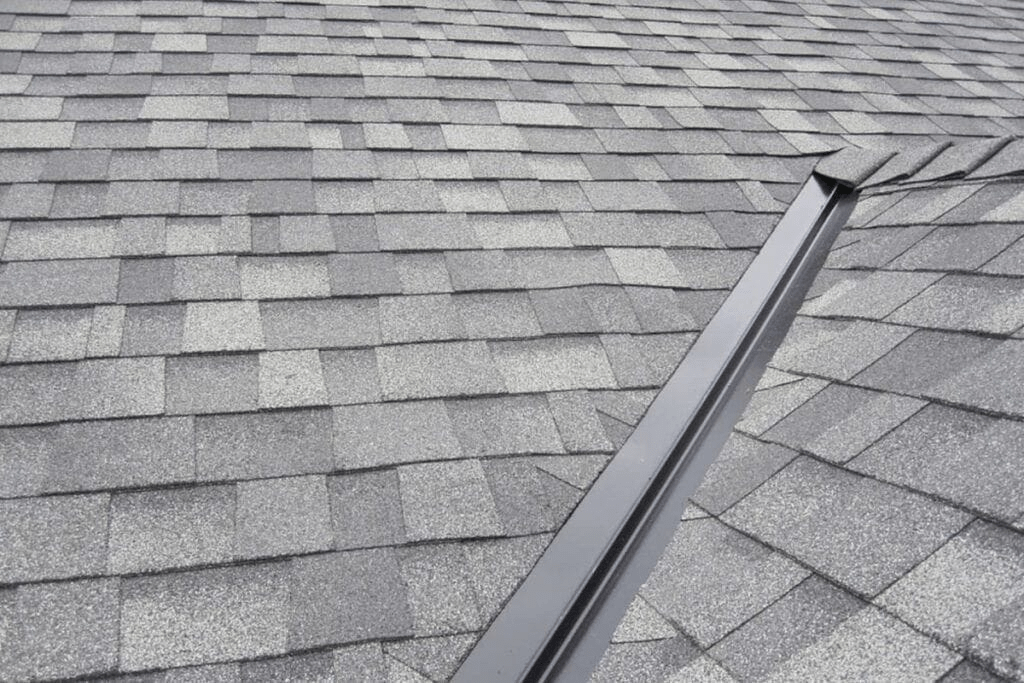
Step 2: Cut and Place the Metal Valley Flashing
Measure the length of the roof valley and cut the metal flashing accordingly using metal snips. Place the metal valley flashing along the centerline you marked earlier. Ensure the flashing extends beyond the eaves to direct water into the gutters.
Step 3: Secure the Flashing
Secure the metal valley flashing to the roof using roofing nails or screws. Place the fasteners along the edges of the flashing, spacing them about 12 inches apart. Be careful not to place fasteners in the center of the valley, as this can obstruct water flow and lead to leaks.
Step 4: Seal the Edges
Apply roofing cement or sealant along the edges of the metal valley flashing. This will create a watertight seal and prevent water from seeping under the flashing. Smooth out the sealant with a trowel or your finger to ensure even coverage.
Step 5: Install Shingles or Metal Panels
Once the flashing is secured and sealed, you can proceed with installing the shingles or metal panels on either side of the valley. For shingles, start at the bottom of the valley and work your way up, overlapping each row. For metal panels, follow the manufacturer’s instructions for proper installation.
Step 6: Trim Excess Flashing
After installing the shingles or metal panels, trim any excess flashing that extends beyond the roof edges using metal snips. Ensure the edges are smooth to prevent water from catching and causing damage.
Tips for a Successful Installation
- Use Quality Materials: Investing in high-quality metal flashing and roofing materials will ensure durability and longevity.
- Double-Check Measurements: Accurate measurements are crucial for a proper fit and effective water drainage.
- Ensure Proper Overlapping: Overlapping shingles or panels correctly prevents water infiltration.
- Regular Maintenance: Inspect your roof valleys periodically to check for any signs of wear or damage and address issues promptly.
Common Mistakes to Avoid
- Incorrect Fastener Placement: Avoid placing fasteners in the center of the valley to ensure unobstructed water flow.
- Insufficient Sealing: Failing to seal the edges properly can lead to leaks and water damage.
- Ignoring Manufacturer Instructions: Always follow the manufacturer’s guidelines for installing metal panels to ensure proper fit and performance.
Read too: Decoding Timelines: How Long Does It Take To Replace A Roof and What to Expect
Conclusion
Learning how to install a metal roof valley is an essential skill for anyone looking to protect their home from water damage. By following this comprehensive guide, you can ensure a successful installation that will enhance the durability and functionality of your roof. Remember to use quality materials, follow each step carefully, and avoid common mistakes to achieve the best results. With the right preparation and attention to detail, you can install a metal roof valley that will provide reliable protection for years to come.


Leave a Reply