Installing roofing felt is a crucial step in any roofing project, whether you’re repairing an old roof or installing a new one. How to Install Roofing Felt is a topic that can significantly impact the effectiveness and longevity of your roofing system. This guide will walk you through the process, providing detailed instructions and tips to ensure your roofing felt is installed correctly and efficiently.
What is Roofing Felt and Why is it Important?
1. Definition and Purpose
Roofing felt, also known as tar paper or underlayment, is a layer of material placed between the roofing deck and the final roofing material, such as shingles or metal panels. It serves several key functions:
- Waterproofing: Roofing felt acts as a barrier to prevent water from penetrating the roof deck, protecting the underlying structure from leaks.
- Protection: It provides an additional layer of protection against ice dams, wind-driven rain, and other weather conditions that can cause damage.
- Smooth Surface: Roofing felt creates a smooth surface for the installation of roofing materials, which helps in achieving a more uniform and secure final roof.
Read too: Is It Reasonable to Ask the Seller to Replace the Roof?
2. Types of Roofing Felt
There are two primary types of roofing felt:
- Asphalt-Saturated Felt: Made from a base of fiberglass or organic felt saturated with asphalt, this type is commonly used for residential roofing. It is typically available in 15-pound and 30-pound weights, with the latter offering greater durability.
- Rubberized Asphalt: This type includes a rubber component for added flexibility and waterproofing. It is often used in areas with high moisture or extreme temperatures.
Tools and Materials Needed
Before diving into the installation process, gather the following tools and materials:
- Roofing Felt Rolls: Choose the appropriate type and weight for your roofing project.
- Utility Knife: For cutting the roofing felt to size.
- Stapler or Roofing Nails: For securing the felt to the roof deck.
- Roofing Cement or Adhesive: Optional, for additional sealing.
- Measuring Tape: To measure and cut the felt accurately.
- Ladder: For accessing the roof safely.
- Safety Gear: Including gloves, safety glasses, and a harness if working on a steep roof.
How to Install Roofing Felt: Step-by-Step Instructions
1. Preparation
Before installing roofing felt, ensure that your roof deck is clean and dry. Remove any debris, old roofing materials, or damaged sections. Inspect the roof deck for signs of damage or rot and make necessary repairs before proceeding.
2. Measure and Cut the Felt
- Measure the Roof: Use a measuring tape to determine the length and width of the roof sections where the felt will be installed. Roofing felt typically comes in rolls that are 36 inches wide, so you’ll need to cut it to fit the length of your roof sections.
- Cut the Felt: Unroll the roofing felt on a flat surface and cut it to the required length. Use a utility knife for clean, straight cuts. Be sure to add a few extra inches to each piece to ensure proper overlap.
3. Install the First Layer
- Start at the Bottom: Begin at the bottom edge of the roof, working your way up. This ensures that the felt overlaps correctly and prevents water from seeping underneath.
- Align the Felt: Position the first strip of felt along the bottom edge of the roof deck. Make sure it is aligned properly and extends slightly beyond the edges of the roof for proper coverage.
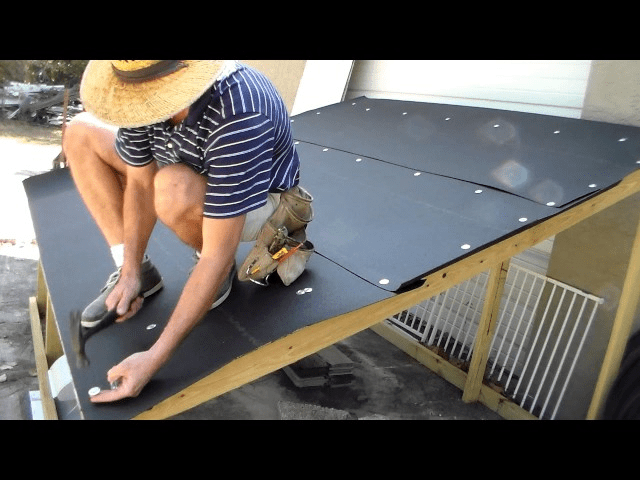
- Secure the Felt: Use a stapler or roofing nails to secure the felt to the roof deck. Place fasteners about 6 to 8 inches apart along the edges and 12 inches apart in the middle of the felt strip. Be cautious not to drive the fasteners too deep, as this can damage the felt.
4. Install Additional Layers
- Overlap the Felt: As you move up the roof, overlap each new strip of felt by at least 2 to 4 inches over the previous layer. This overlap ensures that water flows over the felt rather than underneath it.
- Secure Each Layer: Continue securing each layer of felt with staples or roofing nails, maintaining proper spacing. Check that each piece is flat and smooth to prevent wrinkles and bubbles.
- Install Around Obstacles: For areas around chimneys, vents, or other obstacles, cut the felt to fit and secure it around the obstacles, ensuring a tight seal. You may need to use roofing cement or adhesive to seal these areas effectively.
5. Final Inspection and Sealing
- Inspect the Installation: Once all the felt is installed, inspect the roof to ensure there are no gaps, overlaps, or wrinkles. Make any necessary adjustments or additional securing.
- Apply Roofing Cement: For extra protection, apply roofing cement or adhesive to the edges and seams of the felt. This helps to seal any potential leaks and provides additional waterproofing.
- Prepare for Shingle Installation: If you are installing shingles or other roofing materials, ensure that the roofing felt is fully dry and secure before proceeding with the next steps.
Tips for Successful Roofing Felt Installation
1. Work in Dry Conditions
Install roofing felt during dry weather to ensure that it adheres properly and remains effective. Avoid working in wet or windy conditions, as this can make the installation more challenging and affect the performance of the felt.
2. Use Proper Safety Measures
Always use safety gear when working on a roof, including a harness and safety glasses. Be cautious of slippery surfaces and maintain a stable position on the ladder.
3. Ensure Proper Ventilation
Proper ventilation is essential for maintaining the integrity of your roofing system. Ensure that the roof deck has adequate ventilation to prevent moisture buildup and potential damage.
4. Check Local Building Codes
Before starting your roofing project, check local building codes and regulations to ensure that you are in compliance. Some areas may have specific requirements for roofing felt installation.
5. Consider Professional Help
If you are unsure about any aspect of the installation process or if the project seems too complex, consider hiring a professional roofer. Experienced contractors can ensure that the roofing felt is installed correctly and efficiently.
Conclusion
Understanding How to Install Roofing Felt is essential for ensuring the longevity and effectiveness of your roofing system. By following the steps outlined in this guide and taking proper safety precautions, you can successfully install roofing felt and provide your home with an added layer of protection. Whether you are a DIY enthusiast or considering professional help, proper installation of roofing felt is a crucial component of a well-functioning roof.


Leave a Reply