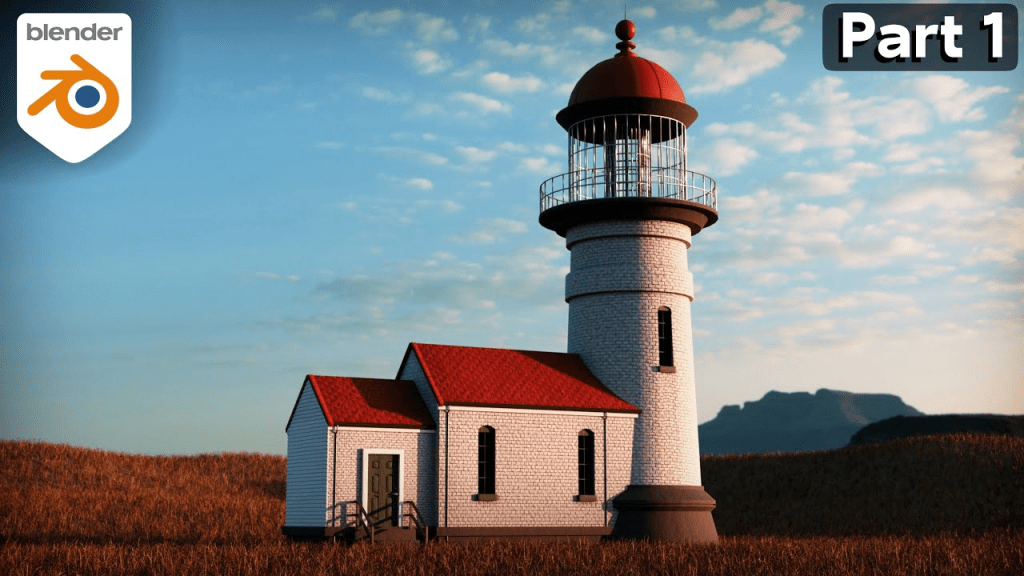
Creating realistic architectural structures in Blender is one of the most satisfying projects for 3D artists. A lighthouse, with its iconic cylindrical tower and pointed roof, makes an excellent modeling challenge that blends geometry, texturing, and creativity. If you’ve ever wondered how to make a light house roof in Blender 3D, you’re in the right place.
In this article, we’ll walk you through the process step by step, explain key Blender tools, and give you practical tips to improve your workflow. By the end, you’ll know how to design, texture, and render a lighthouse roof that fits naturally into a full scene.
Why Create a Lighthouse Roof in Blender?
Before diving into the technical steps, let’s explore why the lighthouse is such a rewarding project for beginners and intermediate Blender users:
- Simple but Iconic Shape – The lighthouse roof typically has a conical or polygonal form that’s relatively easy to model but still teaches valuable techniques.
- Practice with Modifiers – You’ll use extrusion, loop cuts, and modifiers like bevel or solidify.
- Texturing Opportunities – Adding shingles, metal framing, and weather effects helps build material skills.
- Scene Integration – A roof sits atop a tower, so you can practice matching proportions and scaling.
- Creative Freedom – You can design a realistic, stylized, or fantasy-themed lighthouse roof.
Tools You’ll Use in Blender
To learn how to make a light house roof in Blender 3D, you’ll need to be comfortable with a few basic tools:
- Mesh Primitives (cone, cylinder, cube)
- Extrude (E) to extend geometry
- Loop Cut (Ctrl + R) to add segments
- Scale (S) to resize vertices or faces
- Modifiers like Bevel, Array, and Subdivision Surface
- UV Unwrapping for texturing
- Shading Nodes for realistic materials
Read too: How Long Do Standing Seam Metal Roofs Last? A Comprehensive Guide to Durability and Longevity
Planning Your Lighthouse Roof
Like any 3D project, planning is key. Here are a few things to decide before modeling:
- Roof Style: Will it be conical, hexagonal, or octagonal?
- Scale: Does it need to fit a detailed tower model?
- Detail Level: Simple geometry for animation or high-poly detail for close-up renders?
- Materials: Metal, shingles, or weathered stone?
Sketching your design on paper or referencing real-world lighthouse photos can guide your modeling process.
How To Make A Light House Roof In Blender 3D
Now let’s break down the steps into a beginner-friendly workflow.
Step 1: Create the Base Shape
- Open Blender and delete the default cube.
- Add a cone mesh (Shift + A → Mesh → Cone).
- Adjust the vertices count to 6 or 8 if you want a polygonal roof, or keep it higher for a smooth cone.
- Scale (S) the cone to match the proportion of your lighthouse tower.
Step 2: Add Roof Thickness
- Select the cone in Edit Mode.
- Use the Solidify Modifier to give the roof thickness so it looks realistic.
- Apply the modifier when satisfied.
Step 3: Create Roof Overhang
- Select the bottom edge loop (Alt + Left Click).
- Extrude slightly downward and scale outward to create an overhang.
- This detail makes the roof look functional rather than flat.
Step 4: Add Windows or Openings (Optional)
Many lighthouse roofs have small openings near the top for ventilation.
- Insert loop cuts near the top of the cone.
- Select faces and delete them to make openings.
- You can later add glass materials or small frames.
Step 5: Add Details with Modifiers
- Use the Bevel Modifier on edges for a smoother, polished look.
- Add a Subdivision Surface Modifier if you want rounded, stylized geometry.
- For shingles, use a Displacement Modifier with a texture pattern.
Step 6: UV Unwrap for Texturing
- In Edit Mode, select the whole roof.
- Mark seams vertically down one edge.
- Use Unwrap (U) to flatten the roof’s UVs.
- Export the UV map if you want to paint custom textures.
Step 7: Apply Materials and Shaders
- Switch to the Shading tab.
- Create a new material with Principled BSDF Shader.
- Add texture maps (color, roughness, bump).
- Shingles: Use an image texture of tiles or shingles.
- Metal Cap: Add a metallic material for the roof’s top point.
- Use Noise Texture + Bump Node to add weathering effects.
Step 8: Add the Lighthouse Lantern Room (Optional)
Many lighthouse roofs are part of a lantern room.
- Use a cylinder to create the glass housing.
- Add transparent glass material.
- Insert a point light inside to simulate the lighthouse lamp.
Step 9: Lighting and Rendering
- Add an HDRI environment for realistic lighting.
- Place spotlights or sun lamps to highlight the roof’s textures.
- Render in Cycles for realistic output or Eevee for faster previews.
Tips for Improving Your Lighthouse Roof Model
- Reference Real Photos: Study real-world lighthouses for accurate proportions.
- Use Array Modifier for Shingles: Create one shingle and duplicate it around the cone.
- Experiment with Colors: Many lighthouse roofs are painted red, green, or black for visibility.
- Add Weathering: Use procedural textures to simulate rust, moss, or chipped paint.
- Keep Scale Consistent: Match the roof size to the tower base for realism.
Common Mistakes Beginners Make
When learning how to make a light house roof in Blender 3D, here are pitfalls to avoid:
- Too Few Vertices – A cone with only 4 vertices looks unrealistic for most roofs.
- Forgetting Thickness – Without the Solidify Modifier, the roof looks paper-thin.
- Ignoring UV Maps – Poor UVs cause stretched or warped textures.
- Overusing Subdivision – Too many subdivisions can make the mesh heavy without adding detail.
- No Realistic Materials – Geometry alone won’t sell realism; textures are crucial.
Advanced Add-Ons for Lighthouse Roof Modeling
Blender has powerful add-ons that can enhance your workflow:
- Archipack – Useful for architectural elements.
- Node Wrangler – Speeds up shader setup.
- Asset Browser – Store reusable roof materials or details.
- HardOps – Great for clean bevels and hard-surface work.
Rendering Your Finished Lighthouse Roof
Once your roof is modeled and textured, it’s time to render:
- Camera Angle: Position the camera slightly below the roof for dramatic perspective.
- Composition: Add background elements like the sea, sky, or cliffs.
- Post-Processing: Use Blender’s compositor for color grading and glare effects.
This transforms your roof from a simple cone into a cinematic centerpiece.
Final Thoughts
Learning how to make a light house roof in Blender 3D is a rewarding project that blends geometry, materials, and lighting. By starting with a simple cone and gradually refining it with modifiers, UV mapping, and textures, you can create a realistic roof that crowns your lighthouse tower beautifully.
Whether you’re a beginner looking to practice modeling basics or an intermediate artist adding detail to a full scene, this project offers endless opportunities for creativity. With patience and experimentation, your lighthouse roof can become the highlight of your 3D environment.

Leave a Reply