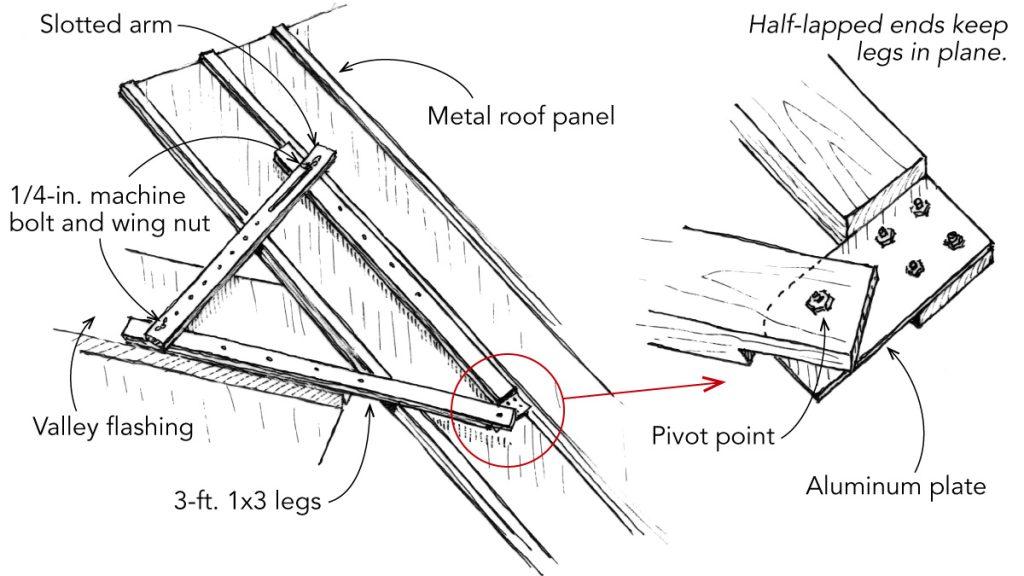
When it comes to installing or replacing a metal roof, one of the critical aspects is measuring for valleys. Valleys are the areas where two roof planes intersect, and they require precise measurements to ensure a proper fit and prevent water leakage. Whether you’re a seasoned contractor or a DIY enthusiast, knowing how to measure metal roofing for valleys is essential for a successful roofing project.

Understanding the Importance of Accurate Measurements
Before we delve into the measuring process, let’s emphasize why accurate measurements for valleys are crucial. Valleys are vulnerable points in any roof, as they channel rainwater and snowmelt towards the gutters. If the measurements are off, even slightly, it can lead to water pooling or leaking, causing damage to the roof structure and the interior of the building. Therefore, taking the time to measure correctly is a small investment that can save you from significant headaches and expenses down the road.
Step-by-Step Guide to Measuring Metal Roofing for Valleys
Gather the Necessary Tools
To start measuring for valleys, you’ll need some essential tools on hand. These include a measuring tape, a level, a chalk line, and a pen or marker. Having a helper to assist you with the measurements can also be beneficial, especially for larger roofing projects.
Identify the Roof Pitch
The first step is to determine the roof pitch. The pitch is the angle of the roof’s slope and plays a crucial role in measuring for valleys. You can use a level and a measuring tape to find the rise and run of the roof. The rise is the vertical distance from the bottom of the roof to the top, and the run is the horizontal distance from one end of the roof to the other.
Measure the Width of the Valley
Next, measure the width of the valley from the center of one valley to the center of the other. For accuracy, it’s best to take measurements at multiple points along the valley’s length and then calculate the average width. Use the chalk line to mark the centerline of the valley on the roof surface.
Determine the Metal Panel Overhang
Metal roofing panels typically overhang the eaves and rakes of the roof to direct water away from the fascia and walls. Measure the overhang length and ensure it is consistent along the entire valley. The standard overhang is usually between 1.5 to 2 inches, but it may vary based on your specific metal roofing system.
Account for Roofing Material Thickness
The thickness of the metal roofing panels is essential when measuring for valleys. Measure the thickness accurately and consider this dimension when calculating the size of the valley flashing or underlayment needed.
Calculate the Valley Flashing Size
Now that you have all the measurements, it’s time to calculate the size of the valley flashing. The valley flashing is a crucial component that directs water away from the valley area. It is typically made of metal or another waterproof material and runs along the centerline of the valley. The size of the flashing should be slightly larger than the width of the valley to ensure adequate coverage.
Conclusion
Accurate measurements are the foundation of a successful metal roofing project, especially when it comes to valleys. Taking the time to measure properly can prevent water leakage, damage, and costly repairs. Remember to use the right tools and enlist the help of a partner if needed. By following the step-by-step guide above, you can ensure a well-fitted and watertight metal roofing system that will protect your home or building for years to come.


Leave a Reply