If you’re looking to upgrade your shed with a durable and weather-resistant roof, installing a metal roof is an excellent choice. In this comprehensive guide, we’ll walk you through the entire process of how to put metal roof on shed, ensuring you have all the information you need to complete the project successfully. From gathering materials to finalizing the installation, this guide covers it all.
Why Choose a Metal Roof for Your Shed?
Before diving into the detailed steps of installation, it’s essential to understand why a metal roof is a great option for your shed. Metal roofs are known for their durability, longevity, and resistance to extreme weather conditions. They require minimal maintenance and provide excellent protection against rain, snow, and wind. Additionally, metal roofs are available in various styles and colors, allowing you to customize the look of your shed.
Materials and Tools Needed
Before starting the installation, gather the necessary materials and tools. Here’s a checklist to help you prepare:
Materials:
- Metal roofing panels
- Metal trim pieces (eave trim, ridge cap, and gable trim)
- Underlayment (roofing felt or synthetic underlayment)
- Roofing screws with rubber washers
- Closure strips (foam or metal)
- Sealant
Read too: Decoding Timelines: How Long Does It Take To Replace A Roof and What to Expect
Tools:
- Measuring tape
- Pencil or marker
- Drill with screwdriver bit
- Metal snips or circular saw with metal cutting blade
- Ladder
- Safety gear (gloves, safety glasses, harness)
Preparing the Shed
Before you start installing the metal roof, you need to prepare the shed structure. This includes checking the roof’s integrity, removing the old roofing material, and installing the underlayment.
1. Inspect the Roof Structure
Ensure that the roof deck and rafters are in good condition. Replace any damaged or rotting wood to provide a solid foundation for the metal roof.
2. Remove Old Roofing Material
If your shed has an existing roof, remove it completely. This includes shingles, nails, and any debris. A clean surface is crucial for a successful installation.
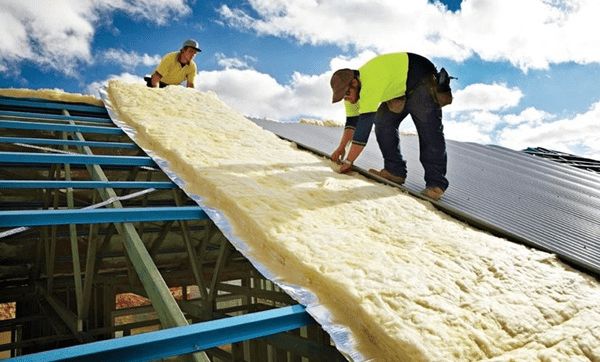
3. Install the Underlayment
Roll out the underlayment over the entire roof deck. Start at the bottom edge and work your way up, overlapping each row by about 4 inches. Secure the underlayment with roofing nails or staples.
How To Put Metal Roof On Shed: Step-by-Step Guide
Now that your shed is prepped and ready, let’s dive into the step-by-step process of installing the metal roof.
1. Measure and Cut the Metal Panels
Measure the length and width of your shed roof to determine the size of the metal panels you’ll need. Use metal snips or a circular saw with a metal cutting blade to cut the panels to the required size.
2. Install the Eave Trim
Begin by installing the eave trim along the bottom edge of the roof. This trim piece helps direct water away from the roof and into the gutters. Secure the eave trim with roofing screws, ensuring it’s straight and level.
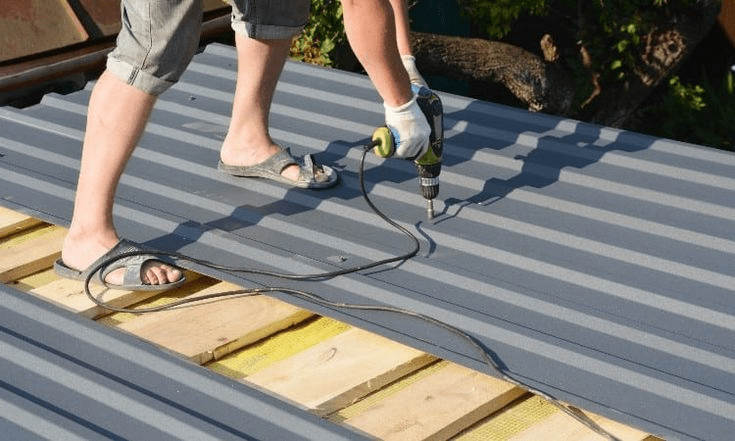
3. Place the Metal Panels
Starting at one end of the roof, place the first metal panel over the eave trim, allowing it to overhang the edge slightly. Secure the panel with roofing screws, placing them about 12 inches apart along the panel’s ridges.
4. Overlap and Secure Subsequent Panels
Continue placing the metal panels, overlapping each one by at least one ridge to ensure a watertight seal. Secure each panel with roofing screws, maintaining the 12-inch spacing.
5. Install the Ridge Cap
Once all the metal panels are in place, install the ridge cap along the roof’s peak. The ridge cap covers the gap between the two sides of the roof, preventing water from entering. Secure the ridge cap with roofing screws, making sure it overlaps the top edge of the metal panels.
6. Install the Gable Trim
Finally, install the gable trim along the sides of the roof. This trim piece covers the edges of the metal panels, giving the roof a finished look and preventing water from getting underneath. Secure the gable trim with roofing screws.
7. Add Closure Strips and Sealant
To prevent pests and water from entering, add closure strips at the ends of the panels. Apply a bead of sealant along the edges of the panels and trim pieces for added protection.
Tips for a Successful Installation
Here are some additional tips to ensure your metal roof installation goes smoothly:
- Safety First: Always wear safety gear, including gloves, safety glasses, and a harness when working on the roof.
- Work with a Partner: Having an extra set of hands can make the installation process easier and safer.
- Double-Check Measurements: Accurate measurements are crucial for a precise fit. Double-check all measurements before cutting the metal panels.
- Use Quality Materials: Invest in high-quality metal panels and roofing screws to ensure the longevity and durability of your roof.
- Follow Manufacturer Instructions: Always follow the manufacturer’s instructions for installing metal roofing panels and trim pieces.
Maintaining Your Metal Roof
Once your metal roof is installed, it’s essential to maintain it properly to ensure its longevity. Here are some maintenance tips:
1. Regular Inspections
Inspect your metal roof regularly for signs of damage, such as loose screws, dents, or rust. Address any issues promptly to prevent further damage.
2. Clean the Roof
Remove debris, leaves, and dirt from the roof surface regularly. Use a soft-bristle broom or a leaf blower to avoid scratching the metal panels.
3. Check Sealants
Inspect the sealant along the edges of the panels and trim pieces. Reapply sealant if it shows signs of wear or cracking.
4. Clear Gutters
Keep the gutters clean and free of debris to ensure proper water drainage and prevent water from backing up onto the roof.
Conclusion
Installing a metal roof on your shed is a rewarding DIY project that can significantly enhance the durability and appearance of your structure. By following this step-by-step guide on how to put metal roof on shed, you can achieve a professional-looking result that will protect your shed for years to come. Remember to take safety precautions, use quality materials, and perform regular maintenance to keep your metal roof in excellent condition.

Leave a Reply