Maintaining the integrity of your roof is essential to protect your home from the elements. One crucial aspect of roofing is ensuring that water flows correctly and does not infiltrate your home. Valley flashing plays a significant role in this, as it directs rainwater away from vulnerable areas. If you’re wondering how to install valley flashing on an existing roof, you’ve come to the right place. In this article, we will guide you through the process, step by step.
Understanding Valley Flashing:
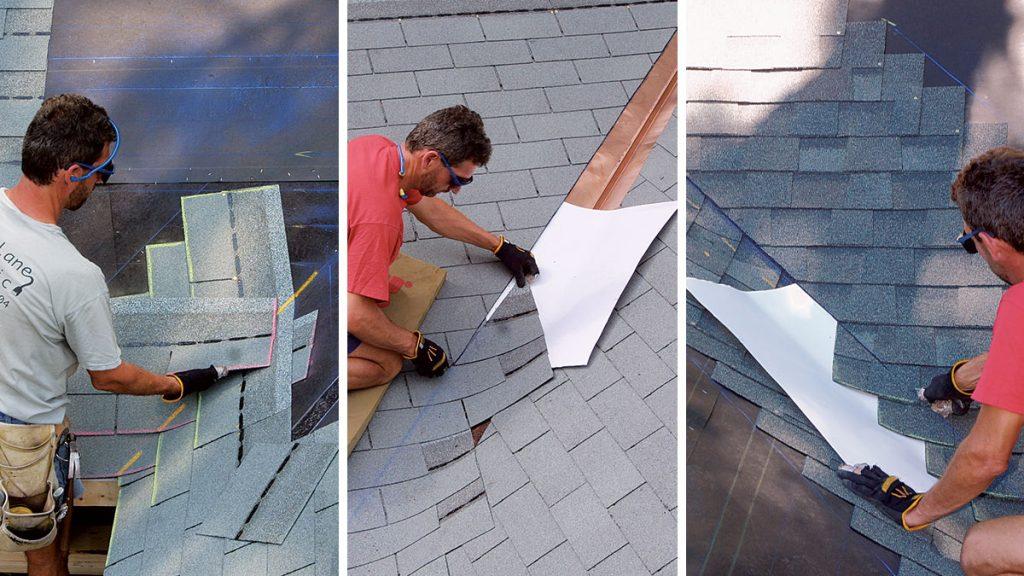
Valley flashing is a metal or other durable material used in the valleys of a roof where two roof slopes meet. The purpose of valley flashing is to channel rainwater down the slope and into the gutters, preventing it from seeping into your home. Proper installation is crucial to ensure the effectiveness of your roof in protecting your property.
Materials and Tools You’ll Need:
Before you start the installation process, gather the necessary materials and tools, including:
- Valley Flashing Material: Choose a suitable material such as galvanized steel, aluminum, or copper. Ensure that it matches the existing roof.
- Safety Gear: Safety goggles, gloves, and a harness if your roof is steep.
- Roofing Nails or Screws: To secure the flashing.
- Roofing Cement: For sealing the edges of the flashing.
- Tape Measure and Marker: For precise measurements and markings.
- Tin Snips or Metal Shears: To cut the flashing to the required size.
Step-by-Step Guide to Installing Valley Flashing:
- Assessment and Preparation: Before you start, carefully inspect the existing roof and identify the valleys where the flashing is required. Measure the length of each valley and cut the flashing material accordingly.
- Safety First: Prioritize safety by wearing the necessary gear and ensuring you have stable footing on the roof.
- Laying the Flashing: Place the cut flashing material along the valley, ensuring that it overlaps the edges of the roof on both sides. Secure the flashing in place with roofing nails or screws, leaving an inch or two of space between fasteners.
- Overlap and Seal: If you have multiple pieces of flashing, make sure they overlap by at least three inches. Apply roofing cement to seal the seam and ensure it’s watertight.
- Secure the Edges: Seal the edges of the flashing with roofing cement to prevent any water from seeping underneath.
- Testing and Inspection: Once the valley flashing is installed, run a hose to simulate rain and check if the water flows properly into the gutters. Inspect the flashing to ensure there are no gaps or loose edges.
- Clean-Up: Remove any debris and excess roofing cement from the roof to maintain a clean and efficient system.
Benefits of Installing Valley Flashing:
Properly installed valley flashing offers several advantages:
- Water Diversion: Valley flashing directs water away from the roof’s vulnerable junctions, preventing leaks and water damage.
- Extended Roof Lifespan: By keeping water away from critical areas, you can extend the life of your roof.
- Reduced Maintenance: Less water damage means less maintenance and repair work in the long run.
- Improved Aesthetics: A well-installed valley flashing enhances the appearance of your roof and home.
Conclusion:
Install valley flashing on an existing roof is a critical aspect of roof maintenance. It ensures that rainwater is effectively directed away from vulnerable areas, preventing water damage to your home. By following the step-by-step guide and using the right materials and tools, you can enhance the longevity of your roof and protect your investment.
Remember that if you are unsure about the installation process, it’s always a good idea to consult a professional roofing contractor. They have the experience and expertise to ensure the job is done correctly, providing you with peace of mind and a well-protected home.


Leave a Reply