When it comes to roofing options, few materials offer the unique combination of beauty, durability, and energy efficiency quite like Spanish tile roofing. This traditional roofing style not only enhances the architectural appeal of a home but also provides exceptional performance. In this comprehensive guide, we will explore the intricacies of Spanish tile roof installation, ensuring you have all the information you need for a successful project.
What is Spanish Tile Roofing?
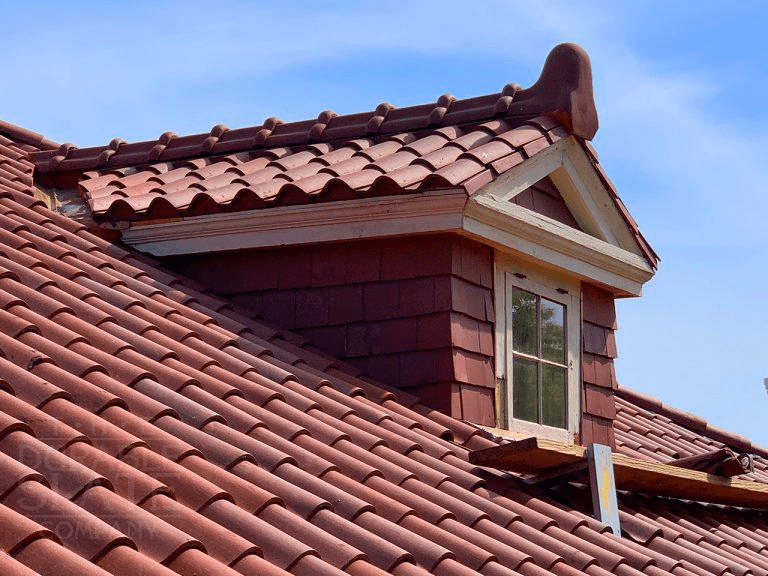
Spanish tile roofing typically refers to clay or concrete tiles that feature a distinctive, curved shape. These tiles are commonly associated with Mediterranean-style architecture, though they can complement a variety of home designs. Available in numerous colors and styles, Spanish tiles offer versatility, making them a popular choice among homeowners.
Read too: How To Replace A Mobile Home Roof: Step-by-Step Guide for Homeowners
Benefits of Spanish Tile Roofing
Before diving into the installation process, it’s essential to understand the advantages of choosing Spanish tile roofing:
- Durability: Spanish tiles are resistant to harsh weather conditions, including heavy rain, high winds, and extreme temperatures. Properly installed tiles can last 50 years or more.
- Energy Efficiency: The natural materials used in Spanish tiles provide excellent insulation, helping to keep your home cooler in the summer and warmer in the winter. This can lead to reduced energy costs.
- Aesthetic Appeal: The unique design of Spanish tiles enhances the visual appeal of your home, adding character and charm. They are available in various colors, allowing homeowners to match their roofing to their overall home design.
- Low Maintenance: Once installed, Spanish tile roofs require minimal maintenance, primarily consisting of occasional cleaning to remove debris and ensure proper drainage.
Planning Your Spanish Tile Roof Installation
Before beginning your Spanish tile roof installation, proper planning is crucial to ensure a successful project. Here are the steps you should take:
1. Choose the Right Tiles
Selecting the right type of tiles is critical to the success of your roofing project. Consider the following factors:
- Material: Decide between clay or concrete tiles. Clay tiles tend to be lighter and more durable, while concrete tiles are often more affordable.
- Color: Spanish tiles come in various colors. Choose one that complements your home’s exterior.
- Style: Tiles are available in different styles, such as flat, curved, or interlocking. Select a style that fits your aesthetic preferences.
2. Assess the Structural Integrity
Before installing a new roof, it’s vital to evaluate the structural integrity of your home. Ensure that the roof frame can support the weight of Spanish tiles, which can be heavier than traditional roofing materials. You may need to consult with a structural engineer or a professional roofing contractor to assess your home’s readiness for a tile roof.
3. Obtain Necessary Permits
Check local building codes and regulations regarding roofing projects. Many areas require permits for roofing installations, especially if you are replacing an existing roof. Ensure you have the necessary permits before starting the installation process.
4. Gather Tools and Materials
Ensure you have all the necessary tools and materials before beginning the installation process. Common tools include:
- Ladder
- Hammer
- Roofing nails
- Tile cutter
- Chalk line
- Roofing felt
- Flashing materials
Additionally, ensure you have enough tiles to cover the entire roof, along with some extra for future repairs.
Spanish Tile Roof Installation Process
Now that you have completed the planning stage, it’s time to begin the installation process. Follow these steps for a successful Spanish tile roof installation:
Step 1: Prepare the Roof Deck
Before laying tiles, ensure the roof deck is clean and structurally sound. Remove any old roofing materials, debris, or loose shingles. Inspect for damaged wood and replace any compromised sections.
Step 2: Install Underlayment
Lay a layer of roofing felt over the roof deck. This underlayment provides an extra layer of protection against moisture. Start from the bottom and work your way up, overlapping the edges to ensure proper coverage.
Step 3: Install Flashing
Flashing is crucial for preventing leaks around chimneys, vents, and valleys. Install flashing materials in these areas to create a watertight seal. Ensure that the flashing is correctly positioned and secured.
Step 4: Begin Laying the Tiles
Start at the lowest point of the roof and work your way up. Here’s how to lay Spanish tiles properly:
- Start with the First Row: Begin by laying the first row of tiles along the eaves, securing them with roofing nails. Ensure that they are level and aligned.
- Continue Upward: Lay subsequent rows of tiles, overlapping each tile according to the manufacturer’s specifications. This overlap is crucial for preventing water from penetrating the roof.
- Cut Tiles as Necessary: Use a tile cutter to cut tiles to fit around vents, chimneys, or at the roof edges. Ensure that cut tiles fit snugly against adjacent tiles to maintain a watertight seal.
- Secure Each Tile: Each tile should be secured with nails to prevent them from being lifted by wind or weather. Ensure that nails are placed in the designated areas as per the manufacturer’s instructions.
Step 5: Install Ridge Cap Tiles
Once all the main tiles are installed, finish with ridge cap tiles along the peak of the roof. These tiles provide a finished look and additional protection against the elements.
Step 6: Inspect the Installation
After completing the installation, conduct a thorough inspection of the roof. Ensure that all tiles are securely in place and that there are no gaps or loose areas that could lead to leaks.
Step 7: Clean Up
Remove any debris or leftover materials from the installation process. A clean job site will help you identify any issues and create a safer environment.
Maintenance Tips for Spanish Tile Roofs
Once your Spanish tile roof is installed, regular maintenance is essential to ensure its longevity and performance. Here are some maintenance tips:
- Regular Inspections: Inspect your roof at least once a year for signs of damage, such as cracked or broken tiles.
- Clean Gutters and Downspouts: Ensure that gutters and downspouts are clear of debris to prevent water buildup, which can lead to leaks.
- Remove Debris: Regularly remove leaves, branches, and other debris from the roof surface to prevent mold and moss growth.
- Address Issues Promptly: If you notice any damaged tiles or leaks, address them immediately to prevent more extensive damage.
Conclusion
Installing a Spanish tile roof can significantly enhance your home’s aesthetic appeal and durability. By following the steps outlined in this guide, you can ensure a successful Spanish tile roof installation that provides lasting benefits. Whether you choose to hire a professional contractor or tackle the project yourself, being well-informed will help you make the best choices for your roofing needs.


Leave a Reply