Standing seam metal roofing is renowned for its durability, aesthetic appeal, and low maintenance requirements. Its vertical seams and interlocking panels make it a popular choice for both residential and commercial buildings. If you’re considering installing a standing seam metal roof, understanding the installation details is crucial for ensuring a long-lasting and effective roofing system. This guide will provide you with all the essential information, from preparation to finishing touches.
Why Choose Standing Seam Metal Roofing?
Before diving into the installation details, it’s important to understand why standing seam metal roofing might be the right choice for your project.
1. Durability and Longevity
Standing seam metal roofs are highly durable and can last 40 to 70 years with proper maintenance. They are resistant to harsh weather conditions, including high winds, heavy snowfall, and hail.
Read too: Decoding Timelines: How Long Does It Take To Replace A Roof and What to Expect
2. Low Maintenance
Unlike traditional roofing materials, metal roofs require minimal maintenance. Their design prevents water from seeping through seams, reducing the risk of leaks and damage.
3. Energy Efficiency
Metal roofs reflect solar heat, which can help reduce cooling costs in hot climates. They are also highly recyclable, making them an environmentally friendly option.
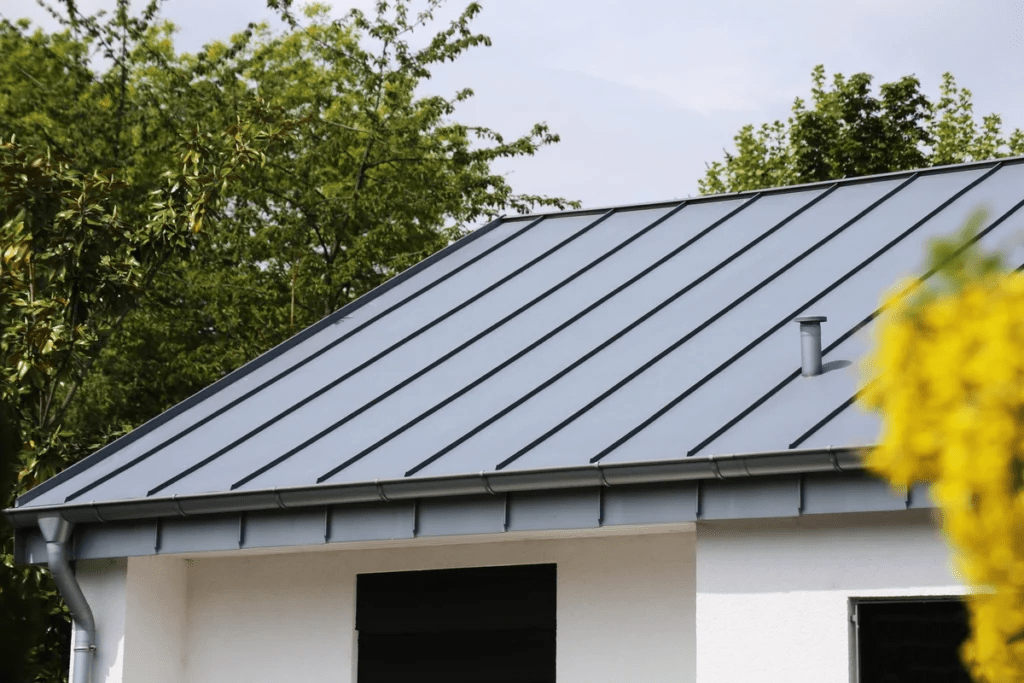
4. Aesthetic Appeal
Standing seam metal roofs offer a sleek, modern appearance that can enhance the visual appeal of any building. They come in various colors and finishes to match different architectural styles.
Standing Seam Metal Roof Installation Details
Proper installation is key to maximizing the benefits of a standing seam metal roof. Here’s a step-by-step guide to the installation process:
1. Preparation and Planning
a. Inspect the Roof Deck
Before installation, inspect the roof deck for any damage or irregularities. Ensure that the deck is clean, dry, and structurally sound. Replace or repair any damaged sections.
b. Gather Materials and Tools
Ensure you have all necessary materials and tools, including:
- Metal panels
- Trim pieces
- Fasteners
- Underlayment (such as synthetic felt or a waterproof membrane)
- Roofing screws and clips
- Safety gear (gloves, safety glasses, harnesses)
c. Plan the Layout
Plan the layout of the metal panels, ensuring that the seams align properly and that there is adequate overlap at the edges. The layout should also account for any roof features like chimneys, skylights, or vents.
2. Install Underlayment
Underlayment serves as an additional layer of protection against water infiltration.
a. Apply the Underlayment
Roll out the underlayment across the roof deck, starting from the eaves and working up to the ridge. Overlap each row by at least 6 inches to ensure a watertight seal. Secure the underlayment with roofing nails or staples.
b. Trim Around Roof Features
If your roof has any features such as vents or chimneys, carefully cut the underlayment to fit around these areas. Seal the edges with roofing tape to prevent water infiltration.
3. Install Flashing
Flashing is critical for preventing water from seeping into the roof at joints and transitions.
a. Install Roof Edge Flashing
Attach the roof edge flashing along the eaves, ensuring that it extends over the underlayment and overlaps the gutter. Secure it with roofing nails or screws.
b. Install Step Flashing
For areas where the roof meets vertical surfaces (such as walls or chimneys), install step flashing. Step flashing should be interwoven with the metal panels to direct water away from seams.
c. Install Counter Flashing
Counter flashing is used to cover the top edge of the step flashing and provide an extra layer of protection. Install it by sliding it under the roofing material and securing it with screws or nails.
4. Install Metal Panels
The metal panels are the primary component of a standing seam roof and must be installed with precision.
a. Begin at the Bottom
Start installing the metal panels at the bottom of the roof, working your way up. This ensures that each panel overlaps the one below it, directing water away from the seams.
b. Secure Panels with Clips
Attach the metal panels using clips that are fastened to the roof deck. These clips allow the panels to expand and contract with temperature changes without causing damage.
c. Snap Panels into Place
Once the clips are secured, align and snap the metal panels into place. Ensure that the seams are properly interlocked to create a watertight seal.
5. Install Ridge Cap and Other Trim
Trim pieces and ridge caps provide a finished look and protect the roof’s edges and ridges.
a. Install Ridge Cap
The ridge cap covers the peak of the roof where the two slopes meet. Secure it with screws or clips, ensuring it extends over the top of the metal panels and overlaps the adjoining panels.
b. Install Sidewall and Headwall Flashing
Attach the sidewall and headwall flashing to cover any vertical transitions. These flashing pieces help to ensure that water is properly channeled away from seams and joints.
c. Install End Caps and Gutters
Install end caps at the roof’s edges to provide a finished look and prevent water from seeping through the ends of the panels. If applicable, install gutters and downspouts to direct rainwater away from the foundation.
6. Inspect the Installation
After completing the installation, perform a thorough inspection to ensure everything is properly secured and sealed.
a. Check for Leaks
Verify that all seams, joints, and flashings are watertight. Use a garden hose to simulate rain and check for any signs of leakage.
b. Inspect Panel Alignment
Ensure that all metal panels are properly aligned and securely fastened. Adjust any panels that appear misaligned or loose.
c. Clean the Roof
Remove any debris or tools from the roof surface. Ensure that all installation materials are properly disposed of or stored.
Maintenance Tips for Standing Seam Metal Roofs
Proper maintenance will help extend the life of your standing seam metal roof and keep it looking its best.
1. Regular Inspections
Inspect your roof regularly, at least twice a year and after severe weather events. Look for signs of damage, rust, or loose panels.
2. Clean the Roof
Keep the roof clean by removing leaves, branches, and other debris. Use a soft-bristle brush or a leaf blower to avoid scratching the surface.
3. Address Repairs Promptly
Address any repairs or maintenance issues promptly to prevent further damage. Replace any damaged panels or flashings as needed.
4. Check Flashing and Seals
Inspect all flashing and seals to ensure they remain intact and effective. Replace any worn or damaged seals to maintain a watertight roof.
Conclusion
Standing seam metal roofing offers numerous advantages, including durability, low maintenance, and aesthetic appeal. Understanding the installation details and following best practices is essential for ensuring a successful installation. By adhering to the steps outlined in this guide, you can achieve a high-quality standing seam metal roof that will provide lasting protection and enhance the beauty of your building.


Leave a Reply