Tile roofing is a popular choice for homeowners due to its durability, aesthetic appeal, and energy efficiency. Whether you’re considering a new tile roof or replacing an existing one, understanding the tile roof installation process is essential for ensuring a successful project. This article will provide an in-depth look at the various stages involved in installing a tile roof, along with helpful tips and considerations to keep in mind.
What Is Tile Roofing?
Tile roofing consists of tiles made from various materials, including clay, concrete, and slate. These tiles are designed to interlock, creating a waterproof barrier that protects the home from the elements. Tile roofs are known for their long lifespan, often lasting over 50 years with proper maintenance. They also provide excellent insulation, helping to regulate indoor temperatures and reduce energy costs.
Benefits of Tile Roofing
Before diving into the tile roof installation process, it’s important to understand the benefits of tile roofing:
- Durability: Tile roofs are resistant to extreme weather, including high winds and heavy rainfall. They also do not rot, warp, or crack like other roofing materials.
- Low Maintenance: Once installed, tile roofs require minimal maintenance compared to asphalt shingles. Regular inspections and occasional cleaning are typically sufficient to keep them in good condition.
- Energy Efficiency: Tile roofs reflect sunlight, helping to keep homes cooler in the summer. This energy efficiency can lead to lower utility bills.
- Aesthetic Appeal: Available in various colors and styles, tile roofing can enhance a home’s curb appeal and increase its value.
Read too: Hail Damage Roof Repair: Essential Guide to Restoring Your Home’s Protection
The Tile Roof Installation Process
The tile roof installation process involves several key steps that require careful planning and execution. Below, we will break down each stage to help you understand what to expect during your roofing project.
1. Preparing the Site
Before any installation can begin, the site must be adequately prepared. This step involves several important tasks:
- Inspection: A thorough inspection of the existing roof structure is crucial. Any signs of damage or rot in the underlying materials must be addressed before new tiles are installed.
- Removal of Old Roofing: If you are replacing an existing roof, the old roofing materials must be removed. This process includes tearing off shingles, tiles, or any other roofing materials to expose the underlying structure.
- Cleaning the Area: After removing the old roofing, the area should be cleaned of debris, nails, and other materials to ensure a safe working environment.
2. Inspecting and Repairing the Underlayment
Once the area is prepared, the next step is to inspect the underlayment, which is the layer of material placed directly over the roof deck. This underlayment is essential for providing additional waterproofing and insulation.
- Assessing the Roof Deck: The roof deck should be checked for any signs of damage, such as rot or deterioration. Any compromised areas should be repaired or replaced.
- Installing Underlayment: A high-quality underlayment is then installed over the roof deck. This material is typically made from synthetic or felt materials and acts as a barrier against water infiltration.
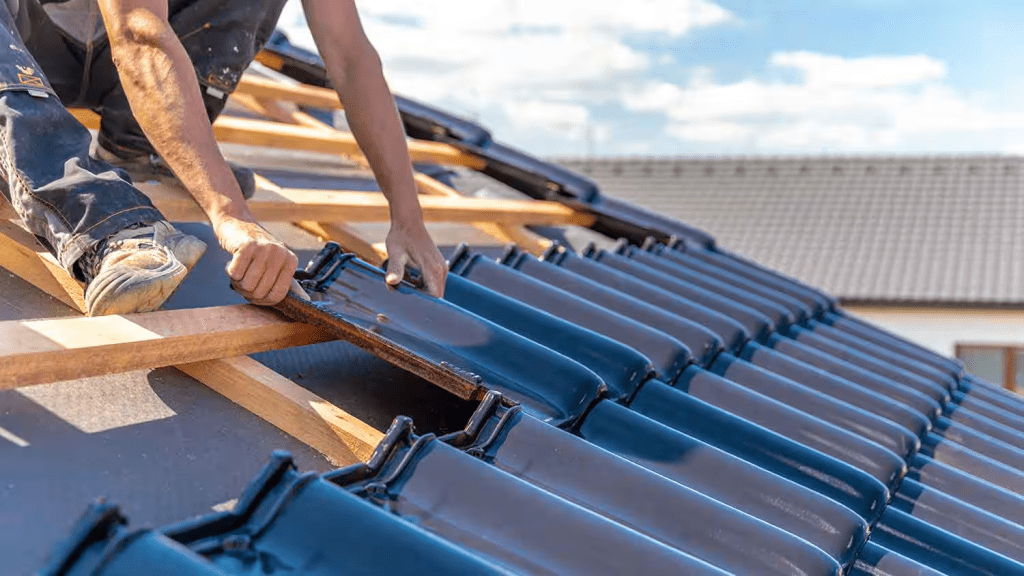
3. Installing the Tile Roof
With the underlayment in place, the tile roof installation process can officially begin. This step involves laying the tiles in a specific pattern to ensure optimal coverage and aesthetic appeal.
a. Choosing the Right Tiles
Before installation, it’s essential to choose the right tiles for your roof. Consider the following factors:
- Material: Common tile materials include clay, concrete, and slate. Each has its advantages and disadvantages in terms of cost, weight, and appearance.
- Style and Color: Tiles come in various styles and colors, allowing homeowners to select options that match their home’s architectural style and personal preferences.
b. Laying the Tiles
The actual installation process involves several steps:
- Starting at the Eaves: The installation typically begins at the lowest part of the roof (the eaves) and works upward. This ensures that each row of tiles overlaps the one below it, preventing water from penetrating the roof.
- Cutting Tiles: Tiles may need to be cut to fit around roof features such as chimneys, vents, and ridges. A tile cutter or wet saw can be used for this purpose.
- Securing Tiles: Each tile should be secured using fasteners recommended by the manufacturer. This helps prevent tiles from being dislodged by high winds or heavy rain.
4. Installing Flashing
Flashing is an essential component of the tile roof installation process. It is installed in areas where the roof meets vertical surfaces, such as chimneys or walls, to provide additional waterproofing.
- Types of Flashing: Different types of flashing materials can be used, including metal and rubber. The choice depends on the specific roof design and local building codes.
- Proper Installation: Flashing should be installed under the tiles and sealed with roofing cement to ensure a watertight barrier.
5. Finishing Touches
Once the main roof tiles are installed, several finishing touches are necessary to complete the project:
- Ridge Cap Installation: The ridge caps are the final tiles placed along the peak of the roof. They serve both functional and aesthetic purposes, providing a finished look while protecting against water infiltration.
- Ventilation: Proper ventilation is crucial for maintaining the longevity of your tile roof. Install ridge vents or other ventilation systems to allow heat and moisture to escape from the attic.
- Final Inspection: After installation, a thorough inspection should be conducted to ensure that all tiles are secure, flashing is properly installed, and there are no gaps or vulnerabilities.
Maintenance Tips for Tile Roofs
While tile roofs are known for their durability and low maintenance, it’s essential to conduct regular inspections and upkeep to prolong their lifespan:
- Regular Inspections: Inspect your roof at least twice a year and after severe weather events to identify any potential issues.
- Cleaning: Keep your tile roof clean by removing debris, leaves, and dirt. A gentle wash with water and a soft brush can help prevent mold and algae growth.
- Addressing Repairs Promptly: If you notice any cracked or broken tiles, replace them as soon as possible to prevent water infiltration and further damage.
Conclusion
Understanding the tile roof installation process is crucial for homeowners considering this durable and aesthetically pleasing roofing option. By following the outlined steps and ensuring proper maintenance, you can enjoy the benefits of a tile roof for decades to come. Whether you’re planning a new installation or replacing an existing roof, consulting with a professional roofing contractor can help ensure the project is completed safely and effectively.


Leave a Reply