When it comes to roofing, ensuring proper water management is crucial for preventing leaks and protecting your home. One essential component of a well-functioning roofing system is “Kick Out Flashing.” In this article, we will delve into what kick out flashing is, its importance in preventing water damage, and how it’s installed.
Understanding Kick Out Flashing:
1. Defining Kick Out Flashing:
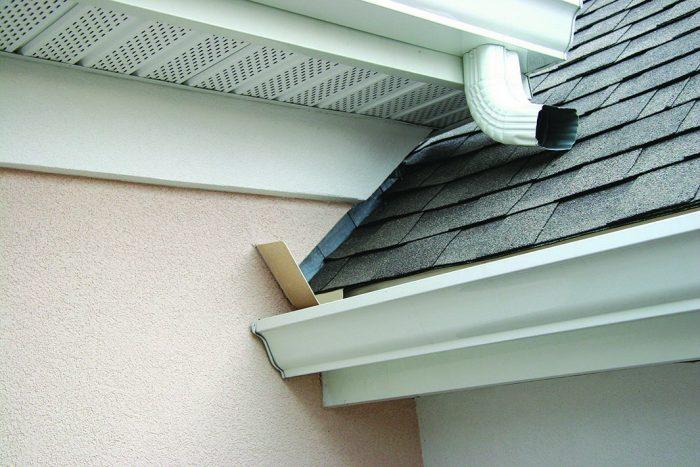
Kick out flashing, also known as diverter flashing, is a vital feature in roofing systems designed to direct water away from areas where it could potentially infiltrate the structure. It is typically installed where a roof meets a vertical wall, such as a sidewall, chimney, or dormer.
2. Why It’s Called “Kick Out”:
The name “kick out” comes from the way this type of flashing is shaped. It has a unique design that allows it to divert water away from the wall and into the gutter system. The shape resembles a kick-out leg, which directs water outward and away from the structure.
The Importance of Kick Out Flashing:
Kick out flashing plays a critical role in preventing water damage and maintaining the integrity of your home. Here are some key reasons why it’s essential:
1. Preventing Water Intrusion:
When water flows down the roof, it can get trapped in the corner where the roof meets a wall. Without kick out flashing, this water can infiltrate the wall, leading to leaks, moisture damage, and potential structural issues.
2. Protecting the Siding:
Kick out flashing helps protect the siding or exterior cladding of your home. By directing water away from the wall, it prevents staining, rot, and deterioration of the siding material.
3. Preserving the Foundation:
Water that enters the wall can eventually seep down to the foundation of your home, causing more extensive damage. Kick out flashing helps preserve the foundation by redirecting water into the gutter system.
Installing Kick Out Flashing:
Proper installation of kick out flashing is essential for it to function effectively. Here’s a general overview of how it’s installed:
1. Roof Preparation:
Before installing kick out flashing, ensure that the roof and shingles are properly prepared. The area where the flashing will be installed should be clean, and any damaged shingles or roofing material should be repaired or replaced.
2. Cutting and Shaping:
Kick out flashing is typically made from metal, such as aluminum or copper, which is durable and resistant to corrosion. The flashing is cut and shaped to fit the specific area where it will be installed.
3. Attaching to the Roof:
The kick out flashing is attached to the roof with roofing nails or screws, ensuring a secure fit. It should be positioned in a way that allows water to flow away from the wall and into the gutter.
4. Caulking and Sealing:
To further prevent water intrusion, a sealant or caulk is applied around the edges of the flashing where it meets the wall. This creates a watertight seal and enhances the flashing’s effectiveness.
Conclusion: Protecting Your Home with Kick Out Flashing
In conclusion, kick out flashing is a crucial component of your roofing system that helps prevent water damage and protect the integrity of your home. Its unique design and proper installation ensure that water is directed away from the wall and into the gutter system, preventing potential leaks and structural issues. When installing or repairing your roof, be sure to include kick out flashing in the design to safeguard your home from water intrusion.
In this article, we’ve explored what kick out flashing is, why it’s important, and how it’s installed as a vital part of your roofing system to prevent water damage and protect your home.


Leave a Reply