When it comes to protecting your home from the elements, a sturdy and well-installed roof is essential. For metal roofs, which offer durability and longevity, incorporating ice and water shield into the installation process is crucial. This specialized membrane adds an extra layer of defense against potential leaks and water damage. In this article, we will delve into the key considerations for placing ice and water shield on a metal roof to ensure optimal protection and peace of mind.
The Role of Ice and Water Shield on a Metal Roof
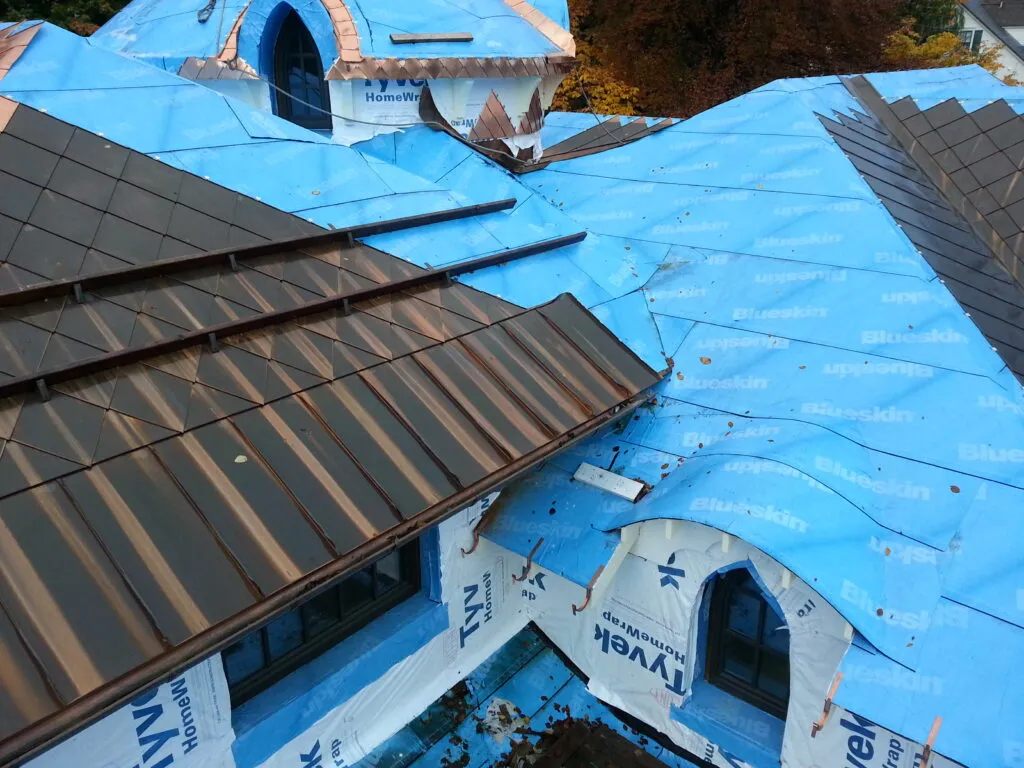
Before discussing the placement of ice and water shield, it’s important to understand its purpose. Ice and water shield, also known as a weather barrier or underlayment, is a self-adhesive membrane designed to prevent water infiltration. It is particularly useful in areas prone to ice dams, heavy rain, and wind-driven rain. When applied correctly, this shield acts as a protective barrier that prevents water from seeping under the metal panels and causing potential damage to the roof’s structure and interior.
Guidelines for Placing Ice and Water Shield on a Metal Roof
Placing ice and water shield on a metal roof requires strategic consideration to ensure its effectiveness. Here are the key guidelines to follow:
1. Eaves and Valleys: Critical Areas for Protection
Eaves: The eaves, or the lower edges of the roof, are especially vulnerable to ice dams and water backup. Begin by applying the ice and water shield along the eaves, extending it at least 2 to 3 feet from the edge. This helps prevent water from infiltrating under the metal panels and causing damage to the roof’s deck and interior.
Valleys: Valleys, where two roof planes intersect, are another critical area that requires protection. Apply the shield along the valleys to create a watertight seal. Ensure that the shield extends far enough up the roof to account for potential water flow during heavy rain.
2. Around Penetrations and Protrusions
Penetrations: Any roof penetrations, such as chimneys, vents, and skylights, present potential points of entry for water. Apply the ice and water shield around these penetrations to create a seamless barrier that prevents water from finding its way into your home.
Protrusions: Protrusions like dormers or wall intersections also require careful attention. Apply the shield around these areas to ensure that water cannot seep in between the metal panels and the underlying structure.
3. Transition Areas
Transition areas, where different roof sections meet, are susceptible to water intrusion. Whether it’s a slope change or a change in roofing material, these areas should be adequately covered with the shield to maintain a consistent barrier against water.
Conclusion: Enhancing Metal Roof Protection
In conclusion, incorporating ice and water shield into the installation of a metal roof is a wise investment in your home’s protection. By strategically placing the shield in critical areas, such as eaves, valleys, penetrations, and transition points, you can effectively guard against leaks and potential water damage. Proper installation is key to reaping the full benefits of this protective barrier. If you’re unsure about the installation process, it’s recommended to consult professional roofing experts who have the expertise to ensure the shield is applied correctly. With the right measures in place, you can enjoy the longevity and performance of your metal roof while safeguarding your home from the challenges posed by water infiltration.

Leave a Reply