Discover the optimal placements for screws in metal roofing to ensure structural integrity and weather resistance. Learn where to put screws in metal roofing for a secure and durable installation.
Understanding the Importance of Proper Screw Placement
The placement of screws in metal roofing plays a crucial role in:
- Preventing Leaks: Correct placement minimizes the risk of water infiltration.
- Enhancing Wind Resistance: Secure screws ensure panels withstand strong winds.
- Maintaining Aesthetic Appeal: Properly aligned screws maintain the roof’s sleek appearance.
Factors Influencing Screw Placement
Several factors determine where to put screws in metal roofing:
- Roof Design: Different types of metal roofing (standing seam, corrugated) require specific screw placements.
- Manufacturer Guidelines: Follow recommended spacing and placement instructions for the chosen roofing material.
- Environmental Conditions: Consider wind uplift, snow loads, and temperature fluctuations.
Step-by-Step Guide to Screw Placement in Metal Roofing
Step 1: Preparation and Safety Measures
Prepare the roof surface by cleaning and ensuring it’s free of debris. Wear appropriate safety gear, including gloves and harnesses.
Step 2: Choosing the Right Screws
Select screws designed for metal roofing, typically self-tapping and corrosion-resistant. Ensure they match the roof material and thickness.
Step 3: Determining Screw Spacing
Follow manufacturer specifications for screw spacing. Typically, screws are placed at panel overlaps and near edges.
Step 4: Marking and Aligning Screw Locations
Mark screw locations using chalk lines or a measuring tape. Ensure screws are aligned correctly to maintain panel integrity.
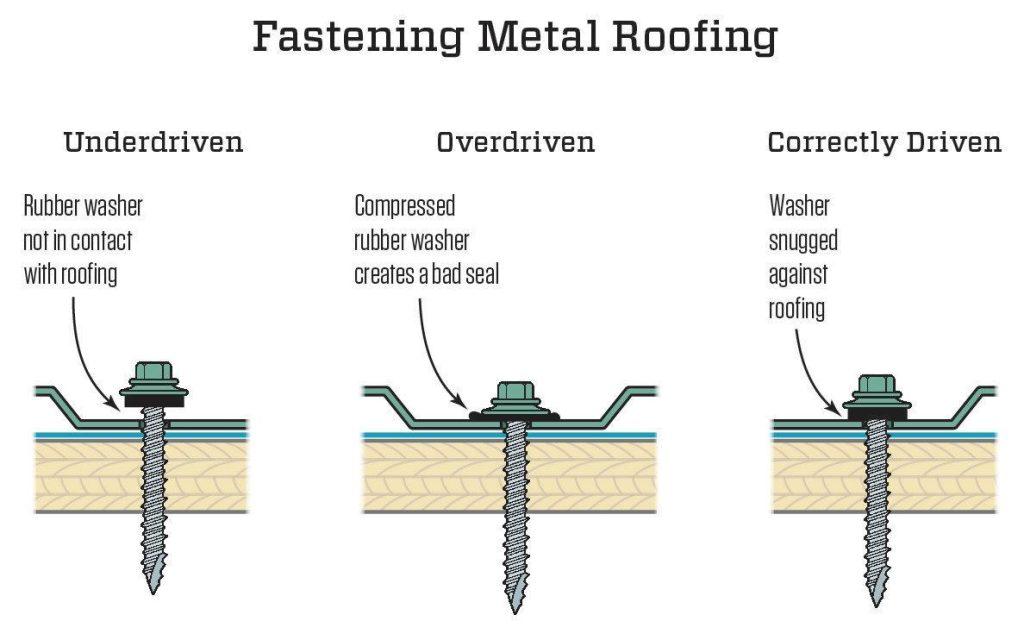
Step 5: Driving Screws Correctly
Use a screw gun or drill with adjustable torque settings to drive screws perpendicular to the roof surface. Avoid over-tightening to prevent damage.
Common Challenges and Solutions
Overcome potential issues in where to put screws in metal roofing:
- Panel Distortion: Improper screw placement can cause panels to warp or buckle.
- Water Infiltration: Insufficient or misplaced screws may lead to leaks over time.
- Aesthetic Concerns: Ensure screws are uniformly spaced and aligned for a professional finish.
Read too: Is It Reasonable to Ask the Seller to Replace the Roof?
Maintenance Tips for Screwed Metal Roofing
To extend the lifespan of your metal roof:
- Regularly inspect screws for tightness and corrosion.
- Replace damaged screws promptly to prevent water penetration.
- Apply sealant around screw heads as an added layer of protection.
Conclusion
Mastering where to put screws in metal roofing ensures your roof remains secure and resilient against the elements. By following proper installation techniques and maintenance practices, you can maximize the lifespan and performance of your metal roof.


Leave a Reply