When it comes to enhancing the durability and appearance of your home’s roof, 5 rib metal roofing is a popular choice. Known for its strength, low maintenance requirements, and aesthetic appeal, it’s crucial to understand the installation process thoroughly. This guide will provide you with a detailed overview of 5 rib metal roofing installation, including its benefits, step-by-step installation procedures, and essential tips to ensure a successful roofing project.
What is 5 Rib Metal Roofing?
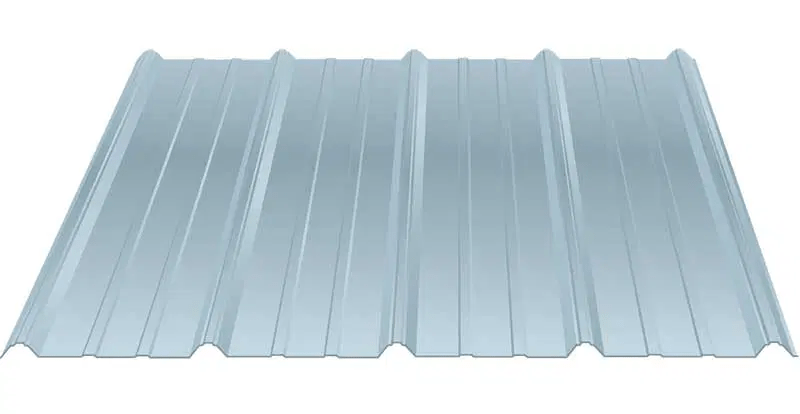
5 rib metal roofing refers to a type of metal roofing characterized by its distinctive five-ribbed pattern. This design provides not only a unique visual appeal but also enhances the structural integrity of the roof. Typically made from steel or aluminum, this roofing type is designed to withstand harsh weather conditions while offering long-term durability.
Benefits of 5 Rib Metal Roofing
Before diving into the installation process, let’s explore why 5 rib metal roofing is a popular choice among homeowners:
- Durability: Metal roofing is known for its longevity. It can last between 40 to 70 years, depending on the material and maintenance.
- Weather Resistance: This roofing type is highly resistant to extreme weather conditions, including heavy rain, snow, and high winds.
- Low Maintenance: Unlike traditional roofing materials, metal roofs require minimal maintenance. They are resistant to issues like rot, mold, and pests.
- Energy Efficiency: Metal roofs reflect solar heat, which can help in reducing cooling costs during the summer months.
- Aesthetic Appeal: The 5-ribbed pattern gives the roof a modern and attractive look that complements various architectural styles.
Read too: How To Replace Roof Shingles That Blew Off: A Comprehensive Guide
5 Rib Metal Roofing Installation: A Step-by-Step Guide
5 rib metal roofing installation involves several critical steps to ensure that the roof is installed correctly and performs effectively. Here’s a detailed guide to help you through the process:
1. Preparation
Assess the Roof Structure
Before installation begins, it’s essential to evaluate the condition of the existing roof structure. Ensure that the decking is solid and that there are no signs of damage or rot.
Gather Tools and Materials
Make sure you have all the necessary tools and materials for the installation. This typically includes:
- 5 rib metal roofing panels
- Underlayment
- Roofing nails or screws
- Flashing
- Sealant
- Measuring tape
- Safety gear (gloves, goggles, etc.)
- Roofing tools (snips, hammer, drill)
Safety Precautions
Safety is paramount during roofing installation. Ensure that you have the right safety equipment and that the work area is secure. If you’re unsure about working at heights, consider hiring a professional.
2. Installing Underlayment
Lay Down Underlayment
The underlayment serves as a protective layer between the roof deck and the metal panels. It helps to provide an extra barrier against water infiltration. Roll out the underlayment across the roof deck and secure it in place.
Overlap Edges
Ensure that the edges of the underlayment overlap by at least 2 inches to prevent water from seeping underneath.
3. Measuring and Cutting Panels
Measure the Roof
Accurate measurements are crucial for a proper fit. Measure the length and width of the roof and determine how many panels you’ll need. Make allowances for overlaps and trims.
Cut Panels to Size
Using a metal cutting tool or snips, cut the roofing panels to the required size. Be precise with your cuts to ensure a good fit and avoid any gaps.
4. Installing Metal Panels
Start from the Bottom
Begin installing the metal panels from the bottom edge of the roof and work your way up. This ensures that each panel overlaps the one below it, which is essential for proper water runoff.
Secure Panels
Align the panels correctly and secure them to the roof deck using roofing nails or screws. Ensure that the fasteners are placed in the designated ribbed areas to avoid leaks.
Install Flashing
Apply flashing around chimneys, vents, and other roof penetrations. Flashing helps to seal these areas and prevent water from leaking through.
5. Finishing Touches
Seal Joints and Edges
Use roofing sealant to seal joints, overlaps, and any areas where water might seep in. This step is crucial for ensuring that your roof is watertight.
Inspect the Installation
Perform a thorough inspection of the roof to ensure that all panels are securely fastened and that there are no gaps or loose areas.
Clean Up
Remove any debris, tools, or excess materials from the roof. Ensure that the work area is clean and safe.
Tips for Successful 5 Rib Metal Roofing Installation
Here are some additional tips to ensure a successful 5 rib metal roofing installation:
1. Choose High-Quality Materials
Invest in high-quality metal panels and underlayment. Quality materials will contribute to the longevity and performance of your roof.
2. Follow Manufacturer’s Instructions
Always follow the manufacturer’s instructions for installation. This ensures that you adhere to their guidelines and warranty requirements.
3. Use Proper Fasteners
Use the correct type and number of fasteners recommended by the manufacturer. This helps to secure the panels properly and prevent leaks.
4. Consider Professional Help
If you’re not confident in your roofing skills, consider hiring a professional roofing contractor. Professionals have the experience and expertise to ensure a flawless installation.
5. Perform Regular Maintenance
Even though metal roofs require minimal maintenance, periodic inspections are essential. Check for any signs of damage or wear and address them promptly.
Conclusion
5 rib metal roofing offers numerous benefits, including durability, weather resistance, and aesthetic appeal. Proper installation is crucial for ensuring that your roof performs effectively and lasts for years to come. By following the steps outlined in this guide and paying attention to essential tips, you can achieve a successful roofing project that enhances the safety and appearance of your home.
Whether you’re a DIY enthusiast or considering professional installation, understanding the intricacies of 5 rib metal roofing installation will help you make informed decisions and ensure a high-quality result. With the right approach, your metal roof will provide reliable protection and add value to your property.


Leave a Reply