Installing a metal roof can feel overwhelming—especially if you’ve never worked at height or handled roofing panels before. If you’re searching for How To Put A Tin Roof On A House, you’re likely looking for a clear, beginner-friendly guide that explains the process safely and correctly.
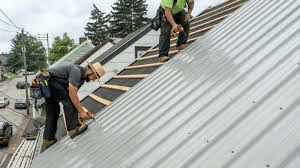
The good news? With the right tools, preparation, and careful measurements, installing a tin roof (commonly steel panels) is absolutely achievable for experienced DIYers. This guide walks you through every step while prioritizing safety, durability, and long-term performance.
Read too: How Long Do Standing Seam Metal Roofs Last? A Comprehensive Guide to Durability and Longevity
How To Put A Tin Roof On A House (Complete Overview)
Before diving into installation, it’s important to understand what “tin roofing” actually means. Most modern “tin roofs” are made from galvanized steel or aluminum panels designed for durability and corrosion resistance.

4
According to industry data from the Metal Roofing Alliance, metal roofs can last 40–70 years, significantly longer than traditional asphalt shingles, which average 20–30 years.
For general roofing structure concepts, see the overview on Wikipedia:
https://en.wikipedia.org/wiki/Roof
Is a Tin Roof Right for Your Home?
Before learning How To Put A Tin Roof On A House, consider these advantages and disadvantages.
Pros vs Cons of Tin Roofing
| Advantages | Disadvantages |
|---|---|
| 40–70 year lifespan | Higher upfront cost |
| Fire-resistant | Noisy without insulation |
| Lightweight (1–1.5 lbs/sq ft) | Requires precision installation |
| Energy-efficient (reflects sunlight) | Can dent from hail |
Metal roofs reflect solar radiant heat, potentially reducing cooling costs by 10–25% in warm climates.
What Tools and Materials Do You Need?
Essential Tools
- Measuring tape (25 ft minimum)
- Chalk line
- Circular saw with metal blade
- Cordless drill (18–20V recommended)
- Metal roofing screws with rubber washers
- Safety harness and roof anchors
- Work gloves and safety glasses
Materials
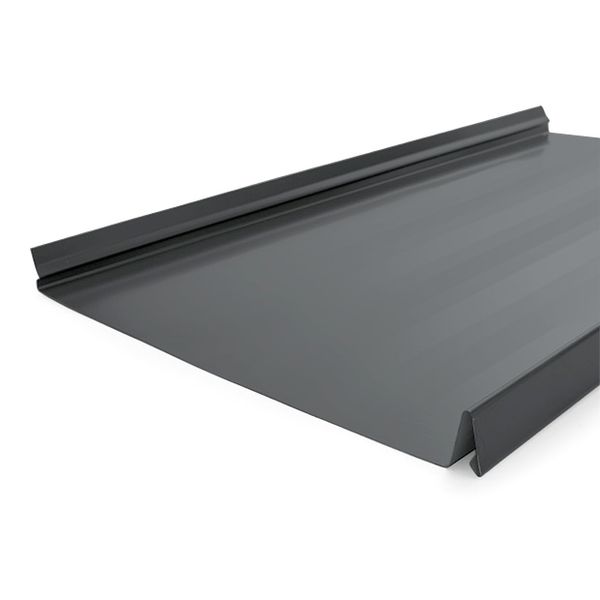
- Metal roofing panels
- Synthetic underlayment
- Drip edge flashing
- Ridge cap
- Closure strips
- Butyl tape sealant
Safety Note: Always use fall protection if working above 6 feet.
Step 1: Measure the Roof Accurately
Proper measurement prevents costly mistakes.
Calculate Roof Area
- Measure roof length (e.g., 40 feet).
- Measure slope length (e.g., 15 feet).
- Multiply: 40 × 15 = 600 sq ft per side.
- Multiply by 2 for gable roof: 1,200 sq ft total.
Add 10% extra material for overlap and waste.
Step 2: Remove Old Roofing (If Necessary)
If installing over existing shingles (check local codes first):
- Remove loose shingles.
- Inspect roof decking.
- Replace damaged plywood (minimum ½-inch thickness).
A solid decking base ensures long-term structural stability.
Step 3: Install Underlayment

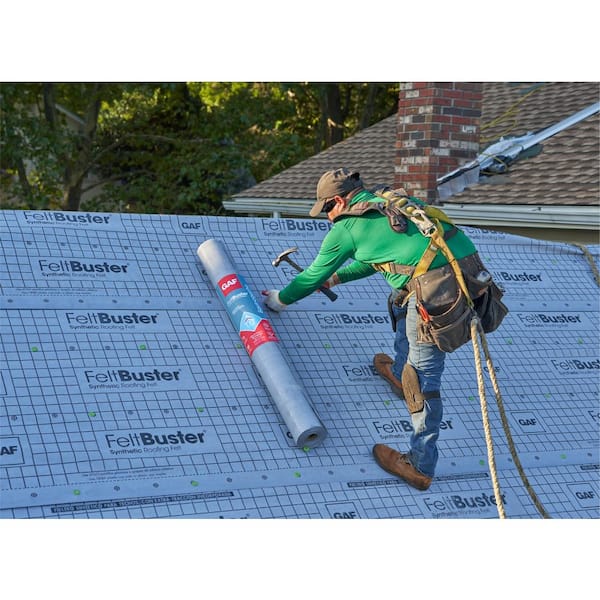
4
Underlayment acts as moisture protection.
Installation Instructions
- Start at bottom edge.
- Roll horizontally.
- Overlap rows by 4 inches.
- Secure with roofing nails every 12–18 inches.
- Install drip edge along eaves before panels.
Work in dry weather between 50–90°F.
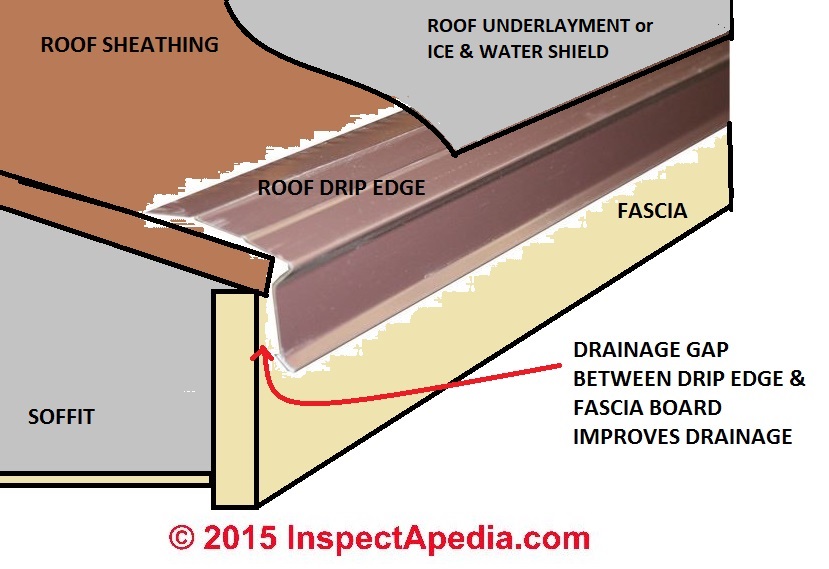
Step 4: Install Drip Edge Flashing
Drip edge directs water away from fascia boards.
- Install along eaves first.
- Nail every 12 inches.
- Overlap sections by 2 inches.
This small detail prevents water damage over time.
Step 5: Lay the First Metal Panel
The first panel determines alignment for the entire roof.
How To Position Correctly
- Start at lower corner.
- Align panel square to roof edge.
- Allow 1-inch overhang past eave.
- Check alignment using chalk line.
Take your time here—mistakes multiply across the roof.
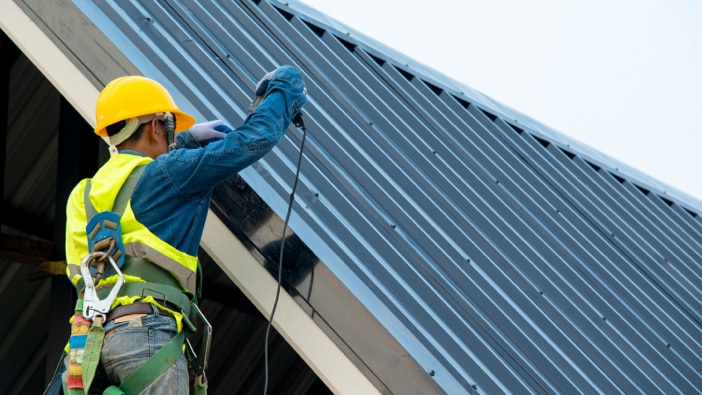
Step 6: Secure Panels Properly
Use manufacturer-recommended screws with neoprene washers.
Screw Placement Guide
- Place screws in flat areas (not ridges).
- Space every 24 inches vertically.
- Use 1 screw per rib at panel overlap.
Do NOT overtighten. Washer should compress slightly, not bulge.
Overtightening can cause leaks.
Step 7: Overlap Panels Correctly
Most panels require:
- 1 rib overlap horizontally.
- 6-inch overlap vertically (if needed).
Apply butyl tape between overlaps for extra waterproofing.
Step 8: Install Ridge Cap


4
The ridge cap seals the top peak.
Steps
- Install closure strips.
- Apply sealant tape.
- Position ridge cap.
- Screw every 12 inches along ridge.
Proper ridge installation ensures ventilation and weather protection.
How Long Does It Take to Install a Tin Roof?
- Small 1,200 sq ft home: 2–4 days (2-person team)
- Larger home: 4–7 days
Time depends on:
- Roof complexity
- Weather
- Experience level
How Much Does It Cost?
Estimated DIY Cost (U.S.)
| Item | Cost Per Sq Ft |
|---|---|
| Metal panels | $3–$6 |
| Underlayment | $0.50–$1 |
| Fasteners & flashing | $1 |
| Total materials | $4.50–$8 per sq ft |
Professional installation averages $8–$14 per sq ft.
Common Mistakes to Avoid
- Skipping underlayment
- Improper screw spacing
- Not checking panel alignment
- Ignoring ventilation
- Working without safety harness
Roofing accidents account for thousands of emergency room visits annually—never compromise on safety.
FAQ – How To Put A Tin Roof On A House
1. Can I install a tin roof over shingles?
Yes, in many areas, but check local building codes. Ensure roof structure can support additional weight.
2. Do metal roofs attract lightning?
No. Metal roofs do not increase lightning risk and are non-combustible.
3. How do you prevent condensation?
Install proper underlayment and attic ventilation. Consider insulation panels if climate is humid.
4. Is a tin roof noisy during rain?
It can be louder than shingles, but insulation and solid decking significantly reduce noise.
5. How often should a metal roof be inspected?
Inspect annually and after major storms. Look for loose screws and damaged flashing.
6. Can I walk on a metal roof?
Yes, but step on flat sections near structural supports. Always wear non-slip footwear.
Conclusion
Now you know exactly How To Put A Tin Roof On A House—from preparation and measurement to panel installation and ridge finishing.
A properly installed metal roof offers:
- Long lifespan (40–70 years)
- Energy efficiency
- Low maintenance
- Strong weather resistance
Take your time, prioritize safety, and follow each step carefully. If this guide helped you plan your roofing project, share it with friends or on social media—someone else might be ready to upgrade their roof too.


Leave a Reply