Discover how to successfully tackle Cedar Shake Roof Installation Do Yourself with our comprehensive guide. Learn the process, tools, and tips for a successful project.
Cedar Shake Roof Installation Do Yourself: A Step-by-Step Guide
Installing a cedar shake roof can be a rewarding DIY project, but it requires careful planning and execution to ensure durability and aesthetic appeal.
Planning Your Cedar Shake Roof Installation
Before you start installing your cedar shake roof, it’s essential to plan carefully and gather all necessary materials and tools. Here’s what you need to consider:
Materials Needed
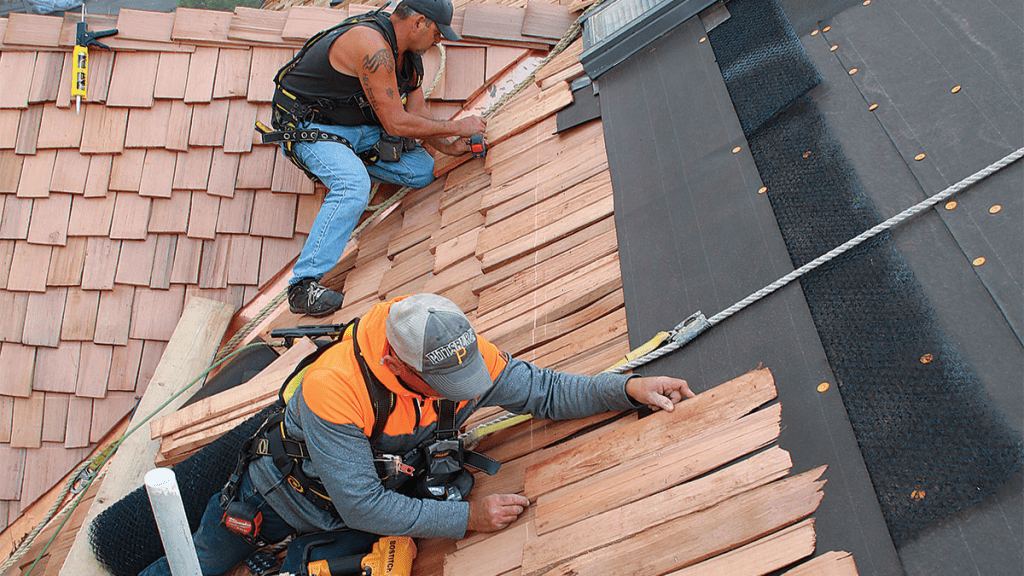
- Cedar Shingles: Choose high-quality cedar shakes that are suitable for your climate and desired aesthetic.
- Underlayment: Use a suitable underlayment material to provide additional weather protection.
- Fasteners: Select corrosion-resistant nails or staples for securing the cedar shakes.
- Flashing: Install flashing around chimneys, vents, and other roof penetrations to prevent water infiltration.
- Sealant: Use appropriate sealants for flashing and to seal any gaps between shakes.
Read too: How To Replace Roof Shingles That Blew Off: A Comprehensive Guide
Tools Required
- Roofing Nailer or Stapler: For fastening cedar shakes to the roof deck.
- Hammer: Use a hammer for hand-nailing shakes in tight spots or near edges.
- Utility Knife: To cut shakes to size and trim around roof edges and penetrations.
- Ladder or Scaffolding: Ensure safe access to the roof during installation.
- Safety Gear: Wear gloves, safety glasses, and sturdy footwear to protect yourself during the project.
Steps for DIY Cedar Shake Roof Installation
Follow these steps to install a cedar shake roof yourself:
1. Preparation
- Roof Inspection: Inspect the roof deck for any damage or decay. Make necessary repairs before proceeding.
- Underlayment Installation: Lay down the underlayment according to manufacturer’s instructions, starting from the eaves and working upward.
2. Cedar Shake Installation
- Starting at the Bottom: Begin installing cedar shakes at the bottom edge of the roof, overlapping each row to shed water effectively.
- Nailing or Stapling: Use a roofing nailer or stapler to fasten shakes securely to the roof deck. Follow manufacturer recommendations for spacing and placement.
- Cutting Shakes: Use a utility knife to trim shakes to fit around edges, vents, chimneys, and other roof features.
- Maintaining Consistency: Maintain a consistent overlap and alignment of shakes to ensure a uniform appearance and proper water drainage.
3. Flashing and Trim Installation
- Installing Flashing: Apply flashing around roof penetrations and along valleys to direct water away from vulnerable areas.
- Trimming and Finishing: Install trim pieces along roof edges and gables to provide a finished look and enhance weather resistance.
4. Final Checks and Sealant Application
- Inspection: Conduct a thorough inspection of the entire roof to check for loose shakes, missed nails, or potential leaks.
- Sealant Application: Apply sealant to all flashing edges and around any penetrations to prevent water infiltration and enhance weather resistance.
Benefits of DIY Cedar Shake Roof Installation
Cost Savings
DIY installation can save on labor costs associated with hiring professional roofers.
Personal Satisfaction
Completing a cedar shake roof installation yourself can be a rewarding experience and enhance your home improvement skills.
Customization
DIY allows you to customize the installation to meet your specific design preferences and roofing needs.
Conclusion
Installing a cedar shake roof yourself can be a challenging yet fulfilling project. By following the steps outlined in this guide and paying attention to detail, you can achieve a beautiful and durable roof that enhances your home’s curb appeal and value.


Leave a Reply