When it comes to enhancing the aesthetic appeal and durability of your home, few options rival the beauty of cedar shake roofing. Known for its natural elegance and superior insulation properties, a cedar shake roof can significantly elevate the look and functionality of your house. In this article, we’ll delve into the Cedar Shake Roof Installation process, its advantages, and key considerations to ensure a successful project.
Understanding Cedar Shake Roofing
Cedar shakes are made from split logs, typically cedar wood, which provides a rustic, textured appearance that is unmatched by other roofing materials. This type of roofing is not only visually appealing but also offers various functional benefits.
Benefits of Cedar Shake Roofing
- Durability: Cedar shakes can last 30 years or more with proper maintenance, outperforming many other roofing materials.
- Natural Insulation: Cedar has natural insulating properties, helping to regulate your home’s temperature and improve energy efficiency.
- Aesthetic Appeal: The natural variations in color and texture of cedar shakes create a unique look that enhances your home’s curb appeal.
- Environmental Benefits: Cedar is a renewable resource, and when sourced responsibly, it’s an environmentally friendly option.
- Resistant to Weather: Cedar shakes are naturally resistant to decay and can withstand harsh weather conditions when properly treated.
Read too: How To Replace Roof Shingles That Blew Off: A Comprehensive Guide
Preparing for Cedar Shake Roof Installation
Choosing the Right Materials
Before you begin your installation, it’s essential to choose high-quality cedar shakes. Look for shakes that are:
- Grade: Select shakes graded as “hand-split” or “taper-sawn” for optimal durability and appearance.
- Treatment: Ensure the wood is treated for fire resistance and protection against pests.
Tools and Materials Needed
Gather the necessary tools and materials for a smooth installation process:
- Tools: Hammer, nails, roofing knife, measuring tape, chalk line, level, and safety gear (gloves, goggles).
- Materials: Cedar shakes, roofing felt (or underlayment), drip edge, and flashing.
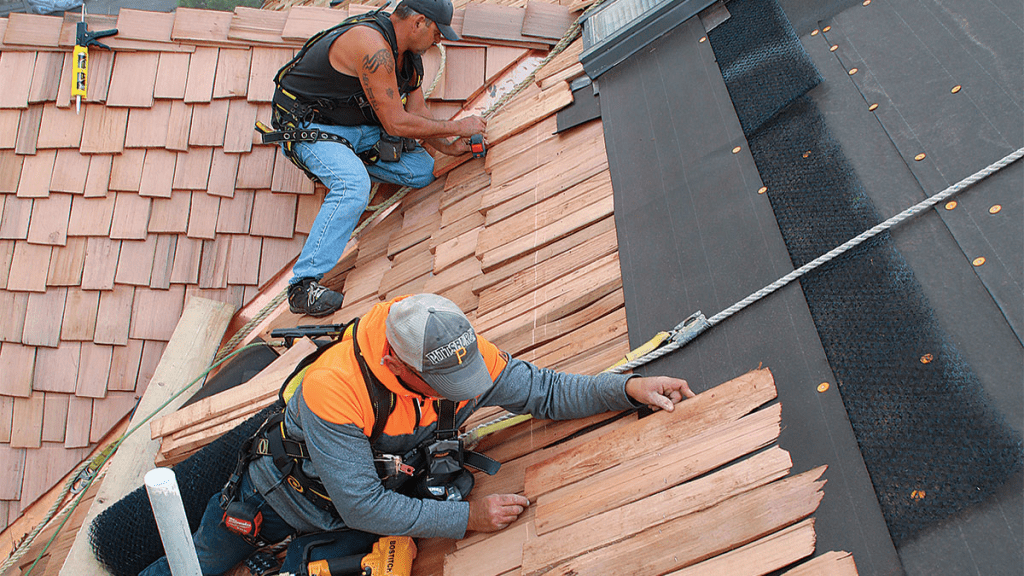
Steps for Cedar Shake Roof Installation
Step 1: Preparing the Roof Deck
Ensure that your roof deck is clean, dry, and structurally sound. Remove any old roofing materials and repair any damage to the underlying structure. This step is crucial for ensuring a secure installation.
Step 2: Installing the Underlayment
Once the deck is ready, lay down a waterproof underlayment. This will provide an additional layer of protection against moisture. Use roofing felt or synthetic underlayment, ensuring that it overlaps by at least six inches.
Step 3: Adding Drip Edge and Flashing
Install a metal drip edge along the eaves of the roof. This will help direct water away from the fascia and prevent rot. Additionally, install flashing around any chimneys, vents, or other roof penetrations to further prevent leaks.
Step 4: Measuring and Cutting Cedar Shakes
Measure the length of the roof and cut your cedar shakes accordingly. Standard shakes typically measure 24 inches in length. It’s essential to create staggered rows to prevent water from seeping through seams.
Step 5: Starting the Installation
Begin the installation at the bottom edge of the roof, working your way up. Place the first shake against the drip edge, ensuring it hangs over by about an inch. Secure it with nails, placing them 1.5 inches from the bottom edge of the shake.
Step 6: Staggering the Shakes
For the next row, use a shake that is half the length of the one below it. This staggering helps create a more water-resistant roof and enhances the overall appearance.
Step 7: Securing the Shakes
Continue installing shakes row by row, securing each one with two nails to prevent movement during high winds. Check that each shake is level and aligned before securing it.
Step 8: Finishing Touches
Once you reach the ridge of the roof, you may choose to use a ridge cap made of shakes or install metal flashing to complete the look. Ensure all exposed cuts are properly treated to prevent moisture absorption.
Maintenance Tips for Cedar Shake Roofs
To extend the life of your cedar shake roof, regular maintenance is essential. Here are some tips:
- Regular Inspections: Check for damaged or loose shakes after storms and make necessary repairs promptly.
- Cleaning: Remove debris, such as leaves and branches, to prevent moisture buildup. Regularly clean the roof to prevent mold and algae growth.
- Re-treatment: Every few years, consider re-treating your cedar shakes with a sealant to maintain their protective properties.
- Gutter Maintenance: Keep gutters clear to ensure proper drainage and prevent water from pooling on the roof.
Conclusion
Cedar Shake Roof Installation is a rewarding project that can enhance your home’s beauty and longevity. By understanding the benefits of cedar shakes, preparing adequately, and following the installation steps outlined in this guide, you can achieve a stunning and durable roof that will stand the test of time. With regular maintenance, your cedar shake roof can provide years of service and add character to your home.
If you’re unsure about handling the installation yourself, it’s always wise to consult with or hire a professional roofing contractor to ensure quality results.


Leave a Reply