Tesla vehicles are known for their sleek design, high performance, and innovation in electric vehicle technology. However, as more Tesla owners seek to expand their vehicle’s utility, one accessory that stands out is the roof rack. Whether you’re an outdoor enthusiast who needs extra space for bikes, kayaks, or snowboards, or just someone looking to increase storage capacity, a roof rack is a great solution. In this article, we’ll explore everything you need to know about Tesla Roof Rack Installation—from understanding compatibility with different Tesla models to a step-by-step guide on installation.
Why Install a Tesla Roof Rack?
Adding a roof rack to your Tesla can drastically enhance the versatility of your vehicle without compromising its aerodynamic performance. Here are some reasons why many Tesla owners opt for roof racks:
- Increased Storage: Tesla vehicles, while offering ample space, may not be enough for large families or outdoor adventurers. A roof rack provides additional cargo space for items that are difficult to store inside the vehicle.
- Sports Equipment: Whether you’re carrying surfboards, bicycles, or kayaks, a roof rack is an ideal solution for transporting bulky sports gear.
- Travel Convenience: For long road trips, roof racks allow you to carry rooftop cargo boxes, which provide additional space for luggage and travel essentials.
Read too: Hail Damage Roof Repair: Essential Guide to Restoring Your Home’s Protection
Understanding Tesla Roof Rack Compatibility
Before jumping into the Tesla Roof Rack Installation process, it’s essential to check the compatibility of your roof rack with your specific Tesla model. Tesla offers roof racks for various models, including the Model 3, Model S, Model Y, and Model X. Each of these vehicles has unique dimensions, roof designs, and mounting systems, so it’s crucial to purchase a roof rack specifically designed for your model.
- Tesla Model 3 Roof Rack: The Model 3 comes with fixed mounting points located under the weather strips on the roof. The Tesla-branded roof rack for this model is designed to attach to these mounting points seamlessly.
- Tesla Model S Roof Rack: Like the Model 3, the Model S also has mounting points integrated into the roof, and the roof rack must align with these.
- Tesla Model Y Roof Rack: The Model Y has a glass roof, but the factory-installed roof rack is designed to securely attach without damaging the roof or affecting the vehicle’s aesthetics.
- Tesla Model X Roof Rack: The Model X’s unique design, with falcon-wing doors, requires special roof racks that don’t interfere with door operation. Tesla’s Model X-specific roof rack is designed for easy installation without impeding the functionality of the doors.
Tesla Roof Rack Installation: Step-by-Step Guide
1. Prepare the Tools and Materials
Before starting your Tesla Roof Rack Installation, ensure you have the necessary tools and materials. The roof rack kit usually comes with all required parts, but here’s what you may need:
- Tesla roof rack kit for your specific model
- Torque wrench
- Hex keys (often included with the roof rack kit)
- Measuring tape
- Clean microfiber cloth
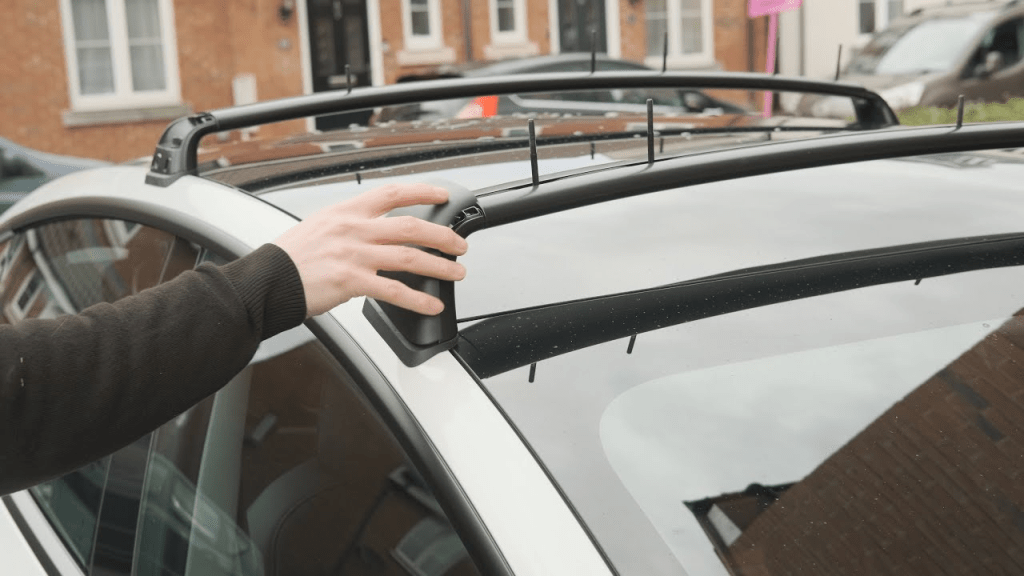
2. Locate the Mounting Points
For most Tesla models, the mounting points are located under the roof’s weather strips. For instance:
- Tesla Model 3 and Model S: You’ll need to gently lift the weather strip to reveal the fixed mounting points.
- Tesla Model Y: Similar mounting points are available under the trim.
- Tesla Model X: The roof has predefined points designed specifically for the roof rack.
3. Clean the Roof Surface
Before attaching the roof rack, clean the area around the mounting points with a microfiber cloth. This ensures no dirt or debris will interfere with the installation or cause scratches during the process.
4. Assemble the Roof Rack
Once the roof is clean, begin assembling the roof rack. Follow the instructions provided by Tesla, as different models may require slightly different steps. Common components include crossbars, foot packs, and clamps.
5. Attach the Roof Rack
Position the roof rack over the mounting points and attach it according to the instructions:
- For most models, you’ll align the foot packs with the mounting points and use a hex key to tighten the screws.
- Make sure the roof rack is centered and level on the vehicle.
- Use a torque wrench to ensure the screws are tightened to the recommended specifications, which is crucial for safety and stability.
6. Check for Stability
Once the roof rack is installed, double-check that everything is secure. Gently shake the roof rack to make sure it is properly fastened and won’t shift during travel. It’s important to confirm the tightness of all screws and clamps.
7. Reinstall the Weather Strip (if applicable)
For models like the Model 3 and Model S, where you had to lift the weather strip, reinstall it carefully after attaching the roof rack. Ensure that it sits flush to maintain the car’s aerodynamics and avoid any wind noise.
8. Test the Roof Rack
After installation, it’s a good idea to take the vehicle for a short drive to ensure the roof rack is securely in place and doesn’t produce excessive noise.
Maintenance Tips for Tesla Roof Racks
Once your Tesla Roof Rack Installation is complete, regular maintenance is essential to ensure longevity and performance.
- Inspect Regularly: Periodically check that the roof rack is securely attached and that no parts are loose or worn. Tighten any screws as necessary.
- Clean the Rack: Dirt and debris can accumulate on the roof rack, potentially causing scratches or damage over time. Wipe it down regularly with a damp cloth to keep it in good condition.
- Avoid Overloading: Each roof rack has a weight limit that should not be exceeded. Overloading the roof rack can cause damage to your vehicle and reduce fuel efficiency.
- Remove When Not in Use: If you aren’t using the roof rack frequently, consider removing it to improve aerodynamics and reduce wind noise.
Tesla Roof Rack Accessories
Once you have installed your Tesla roof rack, you can enhance its utility with various accessories designed to carry specific items. Some popular accessories include:
- Bicycle Racks: Tesla offers bike rack attachments for their roof racks, making it easy to transport bicycles securely.
- Ski and Snowboard Attachments: For winter sports enthusiasts, Tesla’s roof rack system has attachments specifically designed for carrying skis and snowboards.
- Cargo Boxes: For long road trips or extra storage space, a cargo box that attaches to the roof rack can be an excellent addition.
Why Choose Tesla-Branded Roof Racks?
While there are third-party options available, Tesla-branded roof racks are engineered specifically for each Tesla model, ensuring optimal fit, performance, and safety. Here are some reasons to choose a Tesla roof rack over third-party alternatives:
- Perfect Fit: Tesla roof racks are designed to align precisely with your vehicle’s mounting points, reducing the risk of improper installation.
- Aerodynamic Design: Tesla’s roof racks are designed with aerodynamics in mind, minimizing wind resistance and noise.
- Quality and Durability: Tesla roof racks are built to last, using high-quality materials that can withstand various weather conditions.
Conclusion: The Benefits of Tesla Roof Rack Installation
Installing a roof rack on your Tesla is an easy upgrade that boosts your vehicle’s utility. Whether you have a Model 3, S, X, or Y, it’s perfect for extra storage or transporting sports gear. With proper installation and maintenance, it stays a reliable and safe addition.
Investing in a Tesla-branded roof rack ensures a perfect fit, optimal aerodynamics, and a design that complements the sleek lines of your vehicle. Plus, with the ability to attach a variety of accessories, a Tesla roof rack makes your vehicle more functional for road trips, outdoor activities, and daily errands.


Leave a Reply