Adding a porch roof to your home not only boosts curb appeal but also provides practical benefits like shade and protection from the elements. However, when your home is finished with stucco, attaching a porch roof requires special consideration. This guide will walk you through how to attach a porch roof to a stucco house, highlighting materials, techniques, and expert tips to help you do it right.
Whether you’re upgrading your home’s exterior or building a new addition, this step-by-step article will provide all the information you need to make confident decisions during your project.
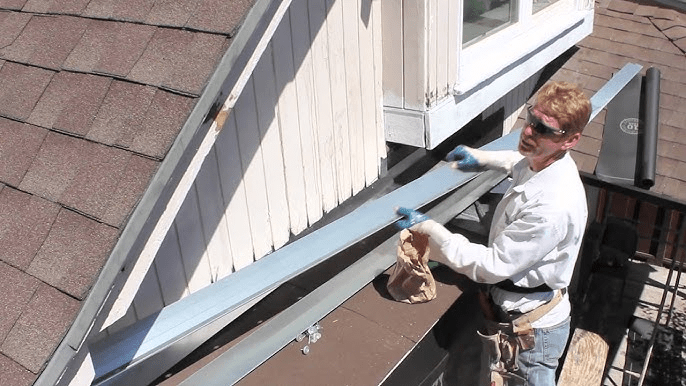
Read too: How To Replace Roof Shingles That Blew Off: A Comprehensive Guide
Why It’s Different With Stucco
Stucco is a durable and attractive siding choice, but it’s brittle and prone to cracking if not handled correctly. Unlike wood or vinyl, stucco doesn’t allow for easy anchor points without risking damage. When attaching anything structural like a porch roof, you need to approach the task with precision to ensure safety, stability, and aesthetic integrity.
Before diving into how to attach a porch roof to a stucco house, let’s cover what makes this type of construction unique:
- Stucco is typically applied over wood framing, wire mesh, and a moisture barrier.
- Improper anchoring can lead to cracks, water intrusion, and structural damage.
- The attachment must go through the stucco and into the structural framing behind it.
Benefits of Adding a Porch Roof
Understanding the advantages of installing a porch roof can motivate you to approach the job with care:
- Increased outdoor living space
- Shade from the sun and protection from rain
- Enhanced architectural style
- Improved energy efficiency (by reducing solar gain on windows)
- Higher home resale value
Tools and Materials You’ll Need
Before you start the project, gather the following tools and materials:
Tools:
- Drill with masonry bit and wood bit
- Circular saw
- Chalk line
- Stud finder
- Ladder or scaffolding
- Level
- Hammer
- Safety goggles and gloves
Materials:
- Ledger board (typically pressure-treated 2×6 or 2×8)
- Lag bolts or ledger screws
- Porch roof rafters/trusses
- Joist hangers
- Flashing tape and metal flashing
- Sealant/caulking
- Waterproof membrane
- Stucco patching compound
How To Attach A Porch Roof To A Stucco House: Step-by-Step Instructions
Let’s break down the process to make it as straightforward as possible. These steps will guide you through everything from prep to final assembly.
Step 1: Plan and Design Your Porch Roof
First, determine what style of porch roof you want—gable, shed, or flat. Make sure the design complements your existing roofline and doesn’t interfere with doors, windows, or eaves.
You’ll also need to check:
- Local building codes – Ensure you have the proper permits.
- Roof pitch – Commonly 3:12 to 6:12 for porches.
- Load requirements – Consider snow load and wind ratings.
- Drainage and water control – Flashing and gutter placement are key.
Step 2: Locate the Wall Studs
The most critical part of how to attach a porch roof to a stucco house is ensuring your roof is anchored to the framing—not just the stucco.
Use a deep-scanning stud finder to locate the studs behind the stucco. You’ll typically find them 16 or 24 inches apart. Mark these locations clearly with chalk or a pencil.
Step 3: Prepare the Stucco Surface
Before attaching anything, remove a small section of stucco where the ledger board will go. This allows you to anchor directly into the wall studs without crushing or cracking the stucco.
Here’s how:
- Mark the area with chalk where the ledger board will be placed.
- Use a circular saw with a masonry blade to cut along the outline.
- Carefully remove the stucco using a hammer and chisel.
Tip: Don’t remove too much—just enough to mount the ledger securely and install flashing.
Step 4: Install the Ledger Board
The ledger board acts as the main support for the front of your porch roof. It must be level and securely fastened into the wall framing.
- Use a level to ensure the ledger is straight.
- Pre-drill holes in the ledger and corresponding spots in the wall studs.
- Attach using lag bolts or ledger board screws (minimum 3” length).
- Use washers for added support and stability.
Step 5: Waterproof the Ledger
Waterproofing is essential when working with stucco because water infiltration can lead to mold and damage.
- Apply flashing tape along the top and sides of the ledger board.
- Install metal flashing over the top edge, tucking it under the house wrap or stucco edge.
- Seal all edges with waterproof caulking.
This flashing setup ensures that water runs off the wall instead of pooling behind the ledger.
Step 6: Install Support Posts and Beams
Depending on the size and design of your porch, you’ll need vertical posts to support the outer edge of the roof. These are typically placed at the corners and every 6 to 8 feet along the front.
- Set posts in concrete footings or use post anchors.
- Attach a horizontal beam to the top of the posts.
- Use joist hangers to connect rafters or trusses to the ledger board and beam.
Ensure all posts are plumb and square to support the roof load effectively.
Step 7: Frame the Porch Roof
With your ledger board and beam in place, it’s time to build the roof:
- Cut rafters or install pre-made trusses according to your design.
- Attach rafters using framing hardware for added strength.
- Sheath the roof with plywood or OSB.
- Install a waterproof membrane or roofing felt.
Step 8: Shingle and Flash the Roof
Once the structure is framed and sheathed:
- Apply shingles or metal roofing to match your home’s roof.
- Add side and valley flashing to prevent leaks where the new porch roof meets the house.
- Install gutters and downspouts if needed for drainage control.
Step 9: Patch Stucco and Finish
Finally, clean up and finish the area where you removed stucco:
- Apply stucco patch or repair mix.
- Texture the surface to match the original.
- Paint if necessary to blend in.
This will leave your home looking polished and professionally finished.
Common Mistakes to Avoid
- Not finding the studs: Anchoring into just the stucco can cause structural failure.
- Skipping flashing: This can lead to serious water damage.
- Ignoring permits: Always check local codes before building.
- Mismatched roof pitch or materials: A poorly integrated porch can harm resale value.
Maintenance Tips After Installation
- Inspect flashing annually for signs of separation or leaks.
- Check for cracks in patched stucco areas.
- Keep gutters clear of debris to prevent water backup.
- Repaint or reseal as needed to maintain curb appeal.
Pros and Cons of DIY vs Hiring a Contractor
| DIY | Hiring a Contractor |
|---|---|
| Lower cost | Higher cost |
| Full control of design | Professional expertise |
| Longer timeline | Faster completion |
| Learning curve | Licensed and insured |
If you’re comfortable with tools and have construction experience, a DIY approach is feasible. However, when in doubt—especially with stucco and roof connections—consult a professional.
Final Thoughts
Learning how to attach a porch roof to a stucco house is a rewarding yet technical process. By following the steps outlined above, you can ensure your addition is structurally sound, weather-resistant, and visually appealing.
Whether you’re building a small covered entryway or a full wraparound porch, attention to detail—especially with anchoring and flashing—will make all the difference in longevity and performance.


Leave a Reply